LNMP 环境安装
简介
LNMP的安装,使用 root 用户运行,服务器 CentOS 7.2 64 位
Nginx
添加 Nginx 的源
sudo rpm -Uvh http://nginx.org/packages/centos/7/noarch/RPMS/nginx-release-centos-7-0.el7.ngx.noarch.rpm安装Nginx
通过 yum search nginx 看看是否已经添加源成功。如果成功则执行下列命令安装 Nginx。sudo yum install -y nginx
启动Nginx并设置开机自动运行
#启动nginx
sudo systemctl start nginx.service
#设置开机自动运行
sudo systemctl enable nginx.service
#重启
sudo systemctl restart nginx
#停止
sudo systemctl stop nginx
浏览器查看效果
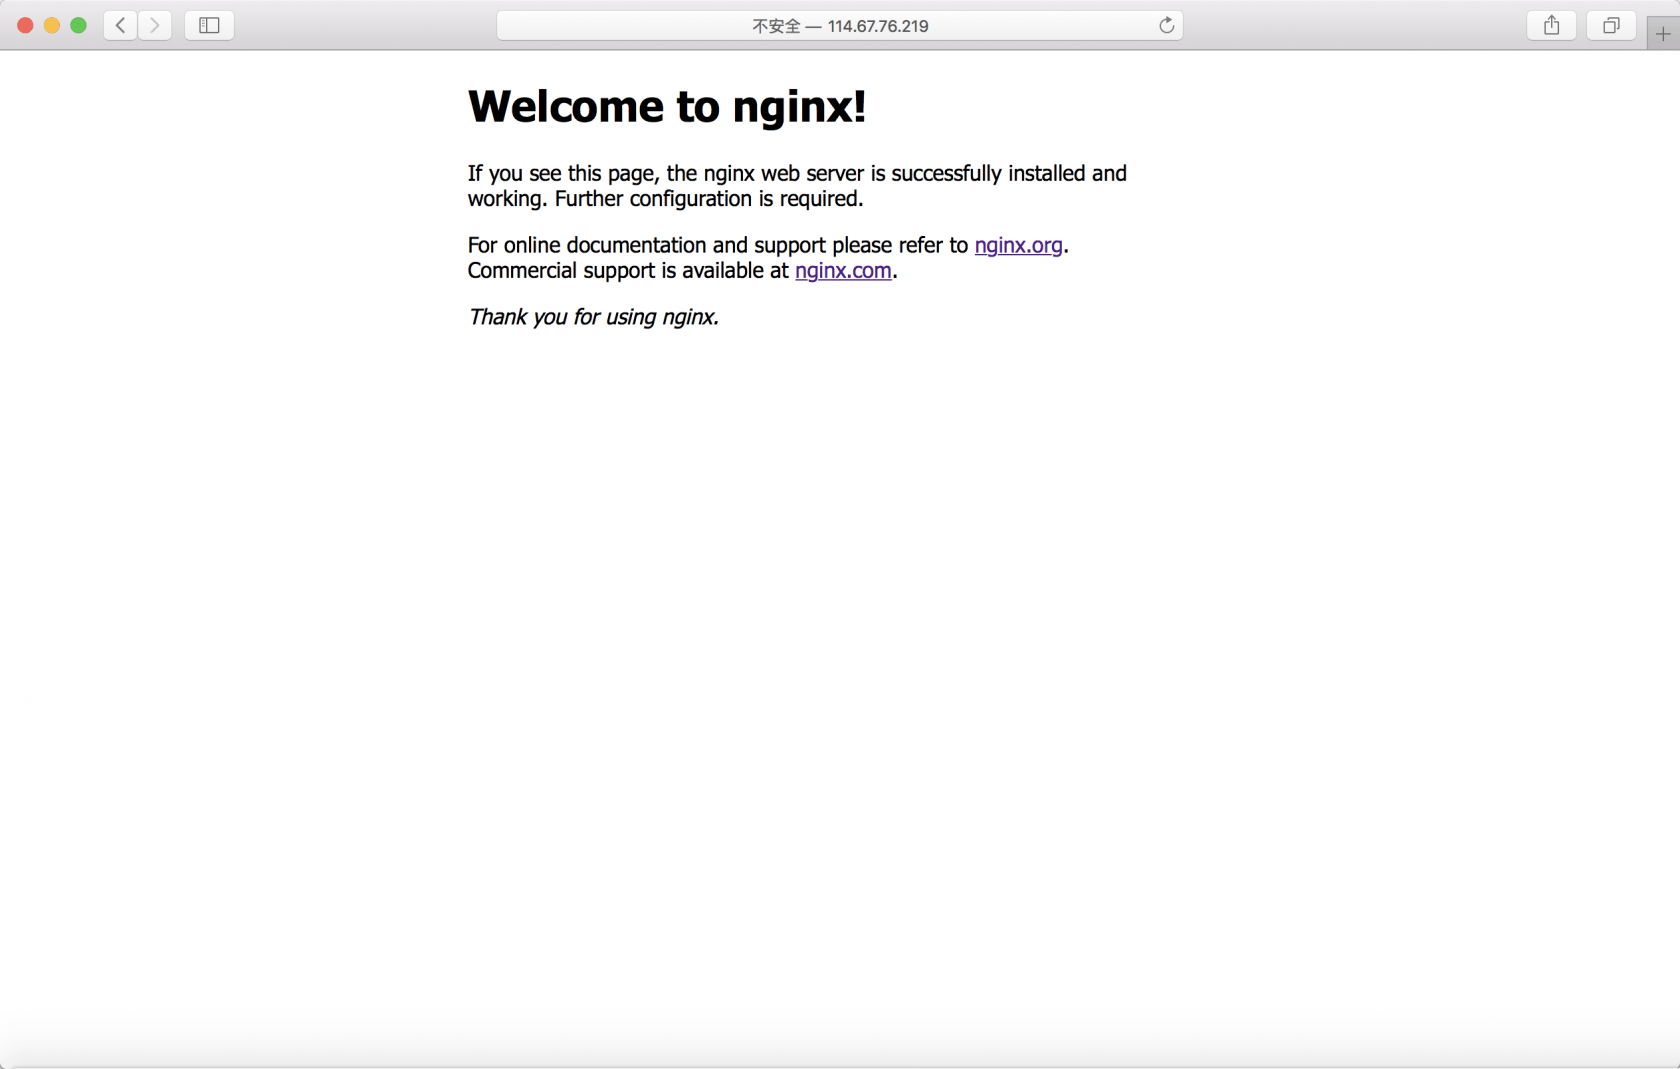
end
PHP7.2
使用 yum 安装
更换rpm源
直接使用 `yum -y install php` 安装的是 5.4 版本的,所以更新一下源
```
rpm -Uvh https://dl.fedoraproject.org/pub/epel/epel-release-latest-7.noarch.rpm
rpm -Uvh https://mirror.webtatic.com/yum/el7/webtatic-release.rpm
```
安装需要的扩展
7.2版本名为72w,安装 php72w 和各种拓展,选自己需要的即可
yum -y install php72w php72w-cli php72w-common php72w-devel php72w-embedded php72w-fpm php72w-gd php72w-mbstring php72w-mysqlnd php72w-opcache php72w-pdo php72w-xmlphp -v 查看信息

php-fpm 开机自启动
#开机自启动
systemctl enable php-fpm
#启动php-fpm
systemctl start php-fpm
#重启
systemctl restart php-fpm
#停止
systemctl stop php-fpm
PHP 配置信息
    php.ini =>  /etc/php.ini
    php-fpm.conf  =>  /etc/php-fpm.conf
    www.conf  =>  /etc/php-fpm.d/www.conf
end
Nginx 关联 PHP
查看 Nginx 的配置文件

更改 nginx.conf 使其支持 PHP 文件请求
我的 nginx.conf 实际加载的是在
include /etc/nginx/conf.d/*.conf。
server {
    listen       80;
    server_name  localhost;
    index index.html index.php;
    #web访问的路径
    root /usr/share/nginx/html;

    #charset koi8-r;
    #access_log  /var/log/nginx/host.access.log  main;
    location / {
        index  index.html index.htm index.php;
        try_files $uri $uri/ /index.php?$query_string;
    }

    #error_page  404              /404.html;

    # redirect server error pages to the static page /50x.html
    #
    error_page   500 502 503 504  /50x.html;
    location = /50x.html {
        root   /usr/share/nginx/html;
    }

    # proxy the PHP scripts to Apache listening on 127.0.0.1:80
    #
    #location ~ \.php$ {
    #    proxy_pass   http://127.0.0.1;
    #}

    # pass the PHP scripts to FastCGI server listening on 127.0.0.1:9000
    #配置FastCGI信息
    location ~ \.php$ {
        fastcgi_pass   127.0.0.1:9000;
        fastcgi_index  index.php;
        fastcgi_param  SCRIPT_FILENAME $document_root$fastcgi_script_name;
        include        fastcgi_params;
    }

    # deny access to .htaccess files, if Apache's document root
    # concurs with nginx's one
    #
    location ~ /\.ht {
        deny  all;
    }
}
可根据具体的情况进行修改,最主要的就是配置 location ~ \.php$ 的参数信息
配置 Nginx 和 PHP 运行用户
这里使用 www-data 这个用户运行
-
创建用户组和用户
#创建用户组 groupadd www-data #创建用户 useradd -g www-data -s /sbin/nologin www-data -
配置 Nginx
修改
nginx.conf的运行用户,之后重启 Nginxsystemctl restart nginx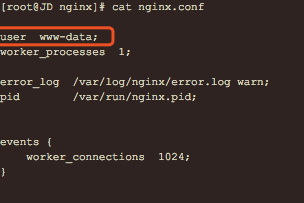
-
配置 PHP
php-fpm的运行用户是在www.conf文件里面修改,我使用 yum 安装的 PHP ,所以www.conf是在/etc/php-fpm.d这个目录下,如果使用源码编译安装,可能在/usr/local/php下的某个文件的php-fpm.d这个目录下。更改
www.conf文件的user和group这两个属性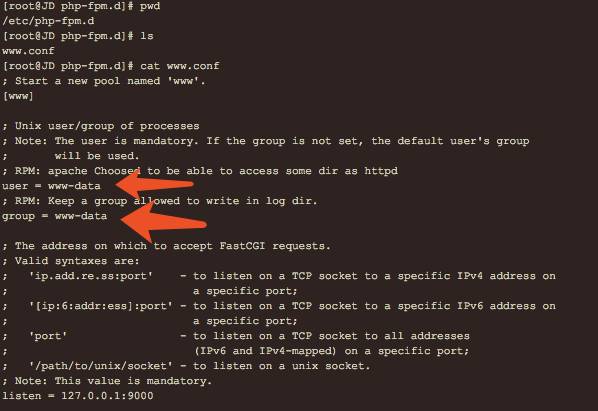
-
重启 php-fpm
systemctl restart php-fpm
编写 PHP 文件,查看结果
-
创建 PHP 文件
在 nginx.conf 文件中,web 访问的目录是
/usr/share/nginx/html,在此目录下创建 index.php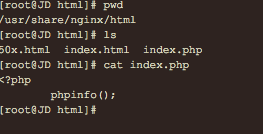
-
访问 index.php 文件
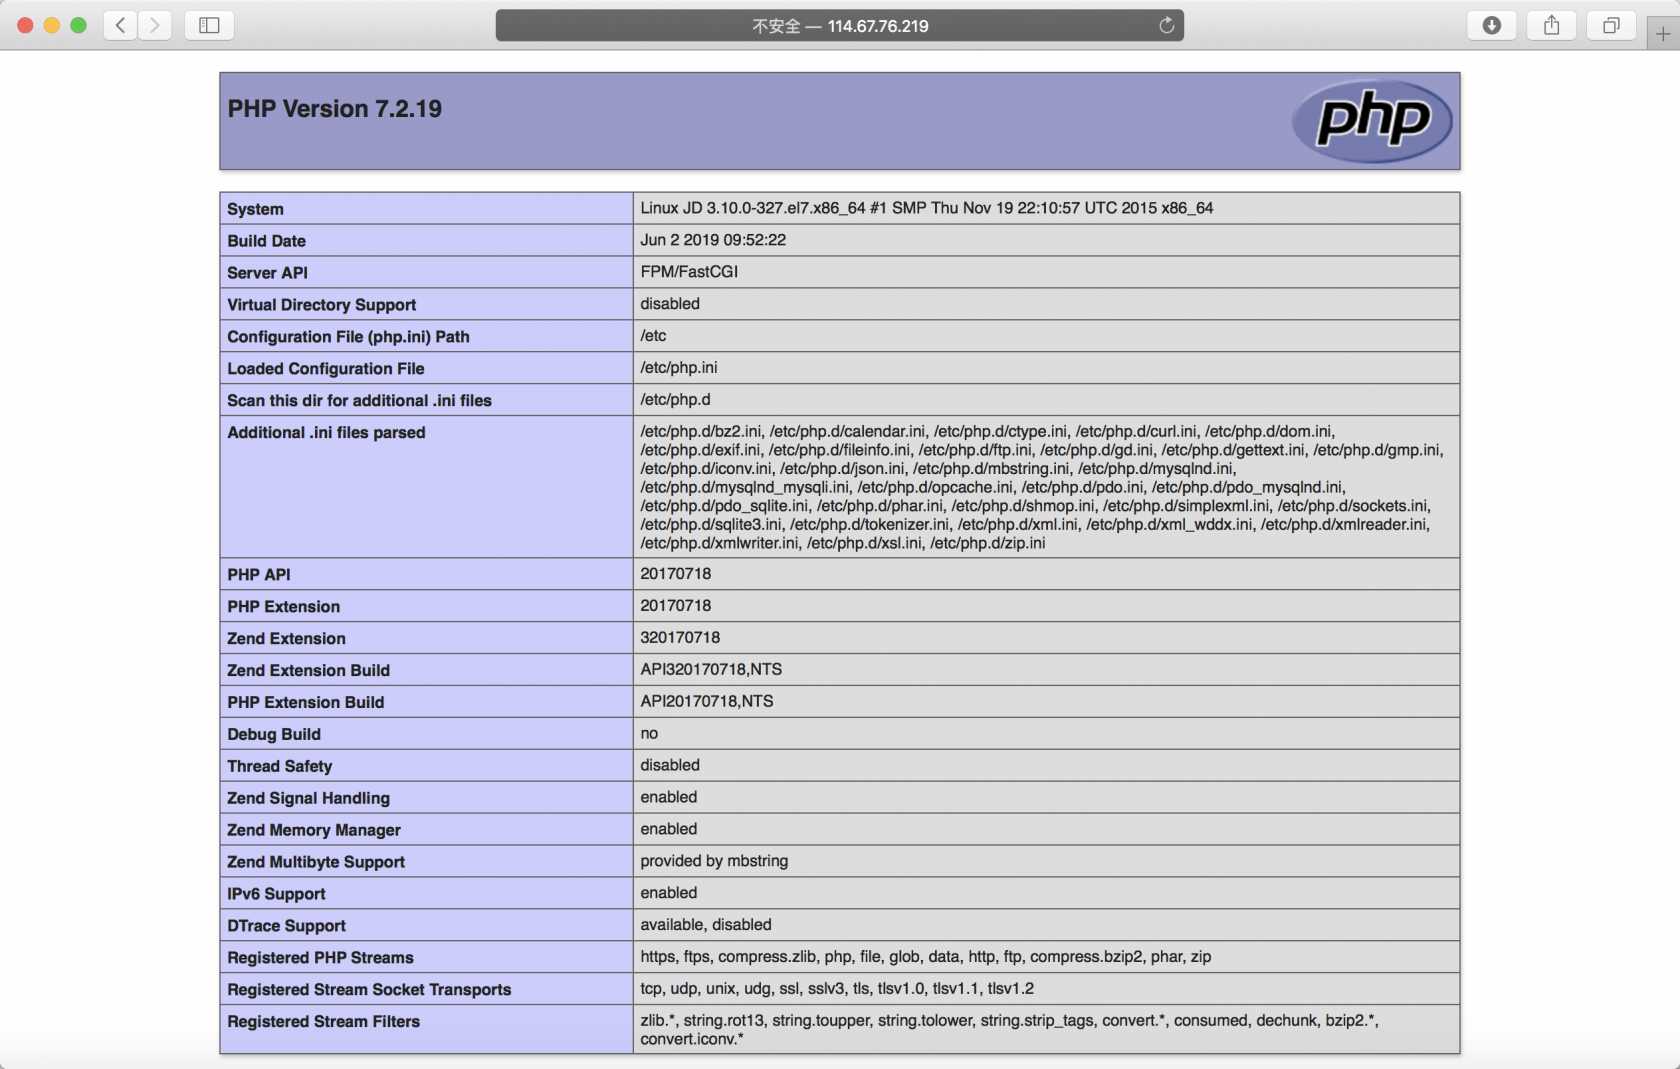
-
如果出现
nginx File not found可参考 nginx File not found 错误
end
MySql5.7
创建运行 MySql 的用户和所属组
groupadd mysql
useradd -r -g mysql mysql
安装 MySql5.7 可查看 此教程
创建只读用户并开启远程连接
-
创建测试用户,并允许远程连接
create user test@'%' identified by '123456'此命令创建一个用户名为 test,密码为 123456 的用户,
%表示此用户可以远程连接。 -
授权此用户对所有库和表仅有读权限
可根据实际情况替换 SELECT ,『select , insert, update, create, drop 』or 『all privileges』GRANT SELECT ON *.* TO 'test'@'%'; -
查看此用户权限
SHOW GRANTS for test@'%'; -
撤销此用户的读权限
revoke SELECT ON *.* TO 'test'@'%'; -
删除用户
drop user test@'%'; -
使用 MySql 工具连接

Redis
安装 Redis 服务
- yum install redis
- systemctl start redis
- systemctl status redis 查看状态
- systemctl stop redis 停止服务
- systemctl restart redis 重启服务
- systemctl enable redis 开机启动
安装 PHP 的 redis 扩展
wget https://github.com/phpredis/phpredis/archive/5.1.1.tar.gz- tar -zxvf redis.tar.gz
- cd phpredis
- phpize
- which php-config
- ./configure --with-php-config=/usr/bin/php-config
- yum install gcc
- php --ini 查看引入方式
- redis.ini or php.ini => redis.so
Composer 安装
安装 Composer 并配置国内镜像
-
安装 composer
php -r "copy('https://install.phpcomposer.com/installer', 'composer-setup.php');" php composer-setup.php -
移动 composer.phar,这样 composer 就可以进行全局调用。
mv composer.phar /usr/local/bin/composer -
配置国内镜像,使用的是 阿里云Composer全量镜像
composer config -g repo.packagist composer https://mirrors.aliyun.com/composer/
本作品采用《CC 协议》,转载必须注明作者和本文链接


 关于 LearnKu


