
CentOS7 轻松部署 Laravel 应用
5791 / 23 / 创建于 4年前 /
 GuanJie 的个人博客
说明:本文基于轻松部署 Laravel 应用构建,用于 Centos7 系统的部署。不当之处,还请指出。
本文同步发布于 个人博客
留言你所需要的 Linux 程序,我将继续添加至本文。持续更新中...
不要尝试暴力破解教程中所演示的服务器,演示服务器为腾讯云提供的免费试用1月版本,本人除了演示之外不会放任何其他有意义文件!
一、Linux 常用命令
# 查找文件位置
$ find / -name php.ini

# 查看某个程序运行情况
$ ps aux | grep php

# 查看端口情况
$ netstat -ntlp
1.1 systemctl 常用指令
$ systemctl start mysqld.service # 启动 MySql
$ systemctl stop mysqld.service # 停止 MySql
$ systemctl restart mysqld.service # 重启 MySql
$ systemctl status mysqld.service  # 查看 MySql 运行状态
$ systemctl enable mysqld.service # 启用 MySql 开机启动
$ systemctl disable mysqld.service # 禁用 MySql 开机启动
更新软件源
$ yum update
$ yum clean packages
安装 nginx
yum install nginx

# 管理 Nginx 服务
$ systemctl start nginx  # 启动 Nginx
$ systemctl stop nginx  # 停止 Nginx
$ systemctl restart nginx  # 重启 Nginx

# 使用 `systemctl` 命令开关服务的开机自启:
$ systemctl enable nginx # 启用 Nginx 开机启动
$ systemctl disable nginx # 禁用 Nginx 开机启动
安装 PHP-FPM
# 配置 yum 源【来源:https://webtatic.com/】
$ yum install epel-release
$ rpm -Uvh https://mirror.webtatic.com/yum/el7/webtatic-release.rpm

# yum 搜索源
$ yum search php72

# 安装 php
$ yum install -y php72w php72w-cli php72w-fpm

# 安装 php 扩展【https://webtatic.com/packages/php72/】
$ yum install -y php72w-mbstring php72w-xml php72w-bcmath
$ yum install -y php72w-gd php72w-mysql php72w-opcache php72w-process php72w-devel

# 查看 php 扩展
$ php -m

# 管理 PHP-FPM 服务
$ systemctl restart php-fpm  # 重启 PHP-FPM
$ systemctl start php-fpm  # 启动 PHP-FPM
$ systemctl stop php-fpm  # 停止 PHP-FPM

# 开关机自启
$ systemctl enable php-fpm # 启用 PHP-FPM 开机启动
$ systemctl disable php-fpm # 禁用 PHP-FPM 开机启动

# 确认 PHP-FPM 正常运行
$ ps aux |  grep php
安装 Git
$ yum install -y git

$ git --version # 查看 git 版本

# 生成 SSH 秘钥
$ ls -al ~/.ssh # 查看是否 存在 `id_rsa` 与文件 `id_rsa.pub`
$ ssh-keygen -t rsa -C "your_email@example.com" # 一路回车【密码为空】
$ ls -al ~/.ssh # 再次查看是否生成成功
$ cat ~/.ssh/id_rsa.pub # 查看公钥内容
安装 Composer
【来源:https://getcomposer.org/download/】
$ php -r "copy('https://getcomposer.org/installer', 'composer-setup.php');" # 或者使用 `$ wget -O composer-setup.php https://getcomposer.org/installer`
$ php -r "if (hash_file('sha384', 'composer-setup.php') === 'a5c698ffe4b8e849a443b120cd5ba38043260d5c4023dbf93e1558871f1f07f58274fc6f4c93bcfd858c6bd0775cd8d1') { echo 'Installer verified'; } else { echo 'Installer corrupt'; unlink('composer-setup.php'); } echo PHP_EOL;"
$ php composer-setup.php --filename=composer --install-dir=/usr/local/bin --version=1.9.0
$ php -r "unlink('composer-setup.php');"

# 检查安装情况
$ composer --version

# 淘宝全量镜像【https://learnku.com/composer/wikis/30594】
$ composer config -g repo.packagist composer https://mirrors.aliyun.com/composer/

# composer 故障排除
https://getcomposer.org/doc/articles/troubleshooting.md#degraded-mode
安装 NodeJs
参考:
- https://nodejs.org/zh-cn/download/
- https://github.com/nodesource/distribution...
- https://www.learnku.net/blog/articles/112
# 卸载并添加 yum 源
$ yum remove nodejs
$ yum clean all && yum makecache fast
$ yum install -y gcc-c++ make
$ curl -sL https://rpm.nodesource.com/setup_10.x | sudo -E bash -

# 安装 nodejs
$ yum install -y nodejs

# 查看安装情况
$ node -v
$ npm -v

# 添加淘宝镜像
$ npm config set registry https://registry.npm.taobao.org
安装 yarn
【参考:https://tecadmin.net/install-yarn-centos/】
$ npm install yarn -g
$ yarn -v

# 添加淘宝镜像
$ yarn config set registry https://registry.npm.taobao.org
部署 laravel 应用
$ mkdir /data/website && cd /data/website # 创建项目目录
# 使用 composer 创建 laravel 项目
# 注意:此过程中如果 composer 遇到问题: [请根据此连接进行排查...](https://getcomposer.org/doc/articles/troubleshooting.md#degraded-mode)
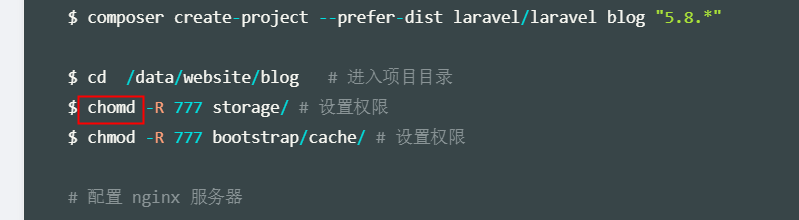
$ composer create-project --prefer-dist laravel/laravel blog "5.8.*"
$ cd /data/website/blog # 进入项目目录
$ chmod -R 777 storage/ # 设置权限
$ chmod -R 777 bootstrap/cache/ # 设置权限
# 配置 nginx 服务器
$ vim /etc/nginx/conf.d/blog.conf
# 输入以下内容 ##########################################
server {
listen 80;
server_name test.learnku.net; # 此为必修改项,请替换为服务器公网 IP 或域名
root /data/website/blog/public; # 此为必修改项,请注意指向站点根目录的 public 子目录
add_header X-Frame-Options "SAMEORIGIN";
add_header X-XSS-Protection "1; mode=block";
add_header X-Content-Type-Options "nosniff";
index index.html index.htm index.php;
charset utf-8;
location / {
try_files $uri $uri/ /index.php?$query_string;
}
location = /favicon.ico { access_log off; log_not_found off; }
location = /robots.txt { access_log off; log_not_found off; }
error_page 404 /index.php;
location ~ \.php$ {
fastcgi_pass 127.0.0.1:9000;
fastcgi_index index.php;
fastcgi_param SCRIPT_FILENAME $realpath_root$fastcgi_script_name;
include fastcgi_params;
try_files $uri = 400;
}
location ~ /\.(?!well-known).* {
deny all;
}
}
#######################################################
# 重启 nginx 服务器
$ systemctl restart nginx
# 此时域名配置好解析后访问就可以啦。安装 MySql
# 安装 mysql 官方 yum 源
$ rpm -ivh https://dev.mysql.com/get/mysql80-community-release-el7-3.noarch.rpm

# 查看 MySQL yum 源
$ yum list |  grep mysql # 发现只有 mysql80 的包,这是因为没有开启 mysql57 的包

# 关闭 80 包,开启 57 包
$ yum-config-manager --disable mysql80-community
$ yum-config-manager --enable mysql57-community

# 再次查看 MySQL yum 源
$ yum list |  grep mysql # 发现有了 mysql57 的包

# 安装 mysql
$ yum install -y mysql-community-server
$ yum install -y mysql-community-client # 根据需要安装(可不装)

# 管理 mysql
$ systemctl start mysqld # 启动 mysql
$ systemctl stop mysqld # 停止 mysql

# 查看超级账户 root 临时密码
$ grep 'temporary password' /var/log/mysqld.log

# 修改超级账户 root 密码
$ mysql  -uroot  -p
mysql> ALTER USER "root"@"localhost" IDENTIFIED BY '你的新密码';
mysql> flush privileges;
mysql> exit;
$ systemctl restart mysqld.service
安装 Redis
# [下载 fedora 的 epel 仓库](https://fedoraproject.org/wiki/EPEL/zh-cn)
$ yum install https://dl.fedoraproject.org/pub/epel/epel-release-latest-7.noarch.rpm

$ yum install -y redis
$ cat /etc/redis.conf # 查看 redis 配置文件【根据需要自行修改】

# 管理程序
$ systemctl start redis # 启动 redis
$ systemctl stop redis # 停止 redis

# 测试 redis
$ ps aux | grep redis # 查看 redis 启动情况
$ redis-cli # 进入 redis 交互命令
redis>  keys *
redis> exit # 退出 redis 交互命令

# 客户端程序 PhpRedisAdmin 如有需要自行安装
安装 Memcached
$ yum search memcached # 查看 yum 源中是否存在 memcached
$ yum info memcached # 查看 yum 源中 memcached 版本

$ yum install memcached

# 管理程序
$ systemctl start memcached.service # 启动 memcached 服务
$ systemctl stop memcached.service # 停止 memcached 服务

# 测试 memcached
$ yum install -y telnet
$ telnet 127.0.0.1 11211 # 连接 memcached
memcached> add username 0 0 7
memcached> get username
memcached> quit # 退出 memcached
安装 MongoDB
【官方安装手册】
# 添加 yum 源
$ vim /etc/yum.repos.d/mongodb-org-4.2.repo
# 输入以下内容 ##########################################
[mongodb-org-4.2]
name=MongoDB Repository
baseurl=https://repo.mongodb.org/yum/redhat/$releasever/mongodb-org/4.2/x86_64/
gpgcheck=1
enabled=1
gpgkey=https://www.mongodb.org/static/pgp/server-4.2.asc
#######################################################

$ yum install -y mongodb-org

# 管理 mongodb 【参考:https://docs.mongodb.com/manual/tutorial/install-mongodb-on-red-hat/#id4】
$ systemctl start mongod.service # 启动
$ systemctl stop mongod.service # 停止
安装 OpenCC
# 安装依赖
$ # 注意需要 gcc 版本 >= 4.6
$ yum install -y cmake
$ yum install -y doxygen

# 安装 OpenCC【https://github.com/BYVoid/OpenCC】
$ cd /usr/local/src
$ git clone https://github.com/BYVoid/OpenCC.git --depth 1
$ cd OpenCC/
$ make
$ make install
$ opencc --version # 查看 opencc 版本(如果报错)

# 我安装的过程中遇到第1个报错 #####################################################
# 报错信息:
`opencc: error while loading shared libraries: libopencc.so.2: cannot open shared object file: No such file or directory`

# 查找问题
$ find / -name libopencc.so*  # 先在系统上查找一下对应文件

# 报错原因:我们要找的 libopencc.so.2 ,在/usb/lib/下面,在 /usr/lib64 下没有(所以我们需要做一下软链)
$ ln -s /usr/lib/libopencc.so.2 /usr/lib64/libopencc.so.2
###############################################################################

# 再次验证
$ opencc --version # 查看 opencc 版本(发现此时 ok 了)

# 测试
$ echo '嚴格區分「一簡對多繁」和「一簡對多異」' | opencc -c t2s
安装 opencc4php
$ cd /usr/local/src
$ git clone https://github.com/nauxliu/opencc4php.git --depth 1
$ cd opencc4php/
$ phpize
$ ./configure
$ make && sudo make install
# 查看最后一句提示:Installing shared extensions:     /usr/lib64/php/modules/

# 添加 php 扩展
$ find / -name php.ini # 找到 php.ini 位置
$ vim /etc/php.ini # 上一步找到的文件
# 要添加的内容 ##################################################################
# 通过关键字 `extension` 找到对应的位置添加以下内容即可:
; OpenCC 扩展
extension=opencc.so
###############################################################################

# 重启 php-fpm
$ systemctl restart php-fpm.service
$ php -m # 查看 php 扩展中是否有了 `opencc`

# 测试
$ cd /data/website/
$ vim index.php
# 要添加的内容 ##################################################################
<?php

$od = opencc_open("s2twp.json"); //传入配置文件名
$text = opencc_convert("严格区分", $od);
echo $text . PHP_EOL;
opencc_close($od);
###############################################################################

# 测试【具体使用见:https://github.com/NauxLiu/opencc4php】
$  php index.php # 输出 "嚴格區分";
安装 Elasticsearch
# Download and install the public signing key:
$ rpm --import https://artifacts.elastic.co/GPG-KEY-elasticsearch

# 添加 yum 源
$ vim /etc/yum.repos.d/elasticsearch-7.x.repo
# 要添加的内容 ##################################################################
[elasticsearch-7.x]
name=Elasticsearch repository for  7.x packages
baseurl=https://artifacts.elastic.co/packages/7.x/yum
gpgcheck=1
gpgkey=https://artifacts.elastic.co/GPG-KEY-elasticsearch
enabled=1
autorefresh=1
type=rpm-md
###############################################################################

# 安装 es
$ yum install -y elasticsearch

# 管理 es
$ systemctl start elasticsearch.service
$ systemctl stop elasticsearch.service

# 测试 elasticsearch
# 参考 https://www.elastic.co/guide/cn/elasticsearch/guide/current/running-elasticsearch.html
$ curl http://127.0.0.1:9200?pretty
安装 Supervisor
$ yum install -y epel-release # 选择 yum 源
$ yum install -y supervisor # 安装
$ supervisord -v # 查看 版本

# 管理 Supervisor
$ systemctl start supervisord # 启动
$ systemctl stop supervisord # 停止
$ ps -ef|grep supervisord  # 查看是否存在supervisord进程

# 常用命令
$ supervisorctl status # 查看服务状态
$ supervisorctl update # 重新加载配置文件
$ supervisorctl restart # 重新启动服务
$ supervisorctl stop # 停止服务
$ supervisorctl pid # 查看某服务的 pid
$ supervisorctl tail # 输出最新的 log 信息
$ supervisorctl shutdown # 关闭 supervisord 服务

# 配置文件 `/etc/supervisord.conf`
# 查看文件我们不难发现以下两句:
######################################################################
[include]
files = supervisord.d/*.ini
######################################################################
# 顺在这里推荐一篇文章:[使用Supervisor管理进程](https://www.fanhaobai.com/2017/09/supervisor.html)
安装 SamBa
注意:阿里、腾讯云服务器强制禁用了 445 端口,所以不要去尝试了。
$ yum info samba
$ yum install -y samba # 安装 samba 共享文件夹
$ rpm -qa | grep samba # 查看已经安装好的Samba的信息

# 创建共享账号
$ useradd test1 -s /bin/false -g daemon # 创建SMB帐号 test1就是用户帐号
$ smbpasswd -a test1 # 设置密码

# 配置共享文件夹
$ cp /etc/samba/smb.conf /etc/samba/smb.conf.example # 备份配置文件
$ vim /etc/samba/smb.conf # 编辑配置文件
########################################################################
# 加入如下配置:
[test]
    comment = test01
    path=/home/test
    browseable = yes
    guest ok = no
    writable = yes
    printable = no
    #允许访问的用户
    valid users = test1
    create mask = 0775
    directory mask = 0775
########################################################################

$ systemctl restart smb.service # 重启 samba

# 可能需要关闭 selinux
安装 NFS
使用Samba或NFS实现文件共享
如何确保NFS服务安全
搭建一个基于 Kerberos 认证的 NFS 服务器
$ yum install -y nfs-utils # 安装

# 检测安装情况
$ rpm -qa | grep nfs
$ rpm -qa | grep rpcbind

# 为 nfs 创建用户
$ useradd website # 创建用户
$ passwd website # 设置密码
$ id website # 查看用户的【 uid 和 gid】

# 创建共享文件夹
$ mkdir /data
$ chown website:website /data/

# 配置共享文件夹
$ vim /etc/exports
#########################################################################
# `secure`:限制客户端只能从小于1024的tcp/ip端口连接nfs服务器(默认设置)
# `insecure`:允许客户端从大于1024的tcp/ip端口连接服务器(请开启:否则 win 挂载不上)
#【anonuid 与 anongid】 是上一步所查到的用户 【uid 和 gid】
# 访问 http://www.ip138.com/ 获取你自己的 ip 地址(替换 * 号)
/data  *(insecure,rw,sync,root_squash,anonuid=1000,anongid=1000)
# /data  218.17.175.10(insecure,rw,sync,root_squash,anonuid=1000,anongid=1000)
#########################################################################

# 启动 nfs
$ systemctl start rpcbind # 启动
$ systemctl start nfs.service # 启动
$ systemctl status nfs.service # 查看状态
$ exportfs  -av # 使配置生效  exportfs  -rv

# 查询NFS的共享状态
$ showmount -e # 默认查看自己共享的服务,前提是要DNS能解析自己,不然容易报错
$ showmount -a # 显示已经与客户端连接上的目录信息

# 查看 nfs 端口使用情况
$ rpcinfo -p
$ vim /etc/sysconfig/nfs
# 设置固定端口:############################################################
# 固定端口
MOUNTD_PORT=20048 # mountd
LOCKD_TCPPORT=30001 # nlockmgr
LOCKD_UDPPORT=30001 # nlockmgr
RQUOTAD_PORT=30002
STATD_PORT=30003
##########################################################################

# 重启服务
$ systemctl restart rpcbind
$ systemctl restart nfs

# 再次查看 nfs 端口使用情况
$ rpcinfo -p

# 注意:
1. 本地虚拟机:直接禁用防火墙
2. 云主机:【云主机控制台】->【安全组】中放开以下端口->【TCP/UDP: 111/2049/20048/30001-30003】

# 添加防火墙设置 【TCP/UDP: 111/2049/20048/30001-30003】
$ firewall-cmd --permanent --add-port=111/tcp
$ firewall-cmd --permanent --add-port=111/udp
$ firewall-cmd --permanent --add-port=2049/tcp
$ firewall-cmd --permanent --add-port=2049/udp
$ firewall-cmd --permanent --add-port=20048/tcp
$ firewall-cmd --permanent --add-port=20048/udp
$ firewall-cmd --permanent --add-port=30001/tcp
$ firewall-cmd --permanent --add-port=30001/udp
$ firewall-cmd --permanent --add-port=30002/tcp
$ firewall-cmd --permanent --add-port=30002/udp
$ firewall-cmd --permanent --add-port=30003/tcp
$ firewall-cmd --permanent --add-port=30003/udp
$ firewall-cmd --reload # 重新加载配置
# 或者添加服务也可以
$ firewall-cmd --permanent --add-service=nfs
$ firewall-cmd --permanent --add-service=rpc-bind
$ firewall-cmd --permanent --add-service=mountd
$ firewall-cmd --reload  # 重新加载配置

# 使用 window 【映射网络驱动器】 挂载 【nfs 共享文件】
[教你怎么在windows上挂载nfs](https://jingyan.baidu.com/article/0a52e3f4dc3f4abf63ed7259.html)
[ win10 挂载NFS(网络文件夹)](https://blog.csdn.net/qq_34158598/article/details/81976063)
## 步骤1:添加 注册表
cmd> regedit
- 找到:HKEY_LOCAL_MACHINE \ SOFTWARE \ Microsoft \ ClientForNFS \ CurrentVersion \ Default
- 添加:选择 `新建` -> `QWORD值`:【AnonymousUid,AnonymousGid 两个值,值为 0】
- 重启 window 电脑使注册表生效
## 步骤2:在 windos 上打开 nfs 服务
## 步骤3:打开 cmd 命令区
cmd> showmount -e 49.235.86.245 # 换成你的云服务器公网 ip(客户端测试挂载情况)
## 步骤4:挂载 nfs
cmd> mount \\49.235.86.245\data T:
## 步骤5:打开【我的电脑】 会发现多了一个 `T 盘`

# 挂载不上?查看错误日志:
$ cat /var/log/messages | grep mount

# 安全问题不做说明(因为我们推荐在开发环境搭建 nfs 而不是生产环境)
安装 Firewalld 防火墙
$ yum install firewalld            # 安装
$ systemctl start firewalld # 启动
$ systemctl status firewalld  # 检查状态
$ systemctl stop firewalld # 关闭防火墙
$ systemctl disable firewalld # 禁用防火墙

$ um list | grep firewall         # 查看是否安装防火墙
$ ps -ef | grep firewall           # 查看防火墙运行状态

# 端口设置
$ firewall-cmd --permanent --add-port=22/tcp       # 永久 添加22端口
$ firewall-cmd --permanent --remove-port=22/tcp    # 永久 删除22端口
$ ...
$ firewall-cmd --query-port=22/tcp     # 查看22端口
$ firewall-cmd --list-ports            # 查看端口列表
$ firewall-cmd --reload                # 重新加载配置

# 服务设置
$ firewall-cmd --query-service=ssh     # 查看服务状态
$ firewall-cmd --permanent --add-service=ssh       # 永久 添加服务 *
$ firewall-cmd --permanent --remove-service=ssh    # 永久 删除服务 *
$ ...
$ firewall-cmd --list-all-zones        # 查看所有zone信息
$ firewall-cmd --get-default-zone      # 查看默认zone是哪一个
$ firewall-cmd --list-services         # 列出所有服务 *
$ firewall-cmd --reload                # 重新加载配置

$ reboot # 防火墙配置后需要重启主机
安装 Docker
Docker 官方讲的很清楚了,此处暂时先不做讲解先....本作品采用《CC 协议》,转载必须注明作者和本文链接
本帖由系统于 4年前 自动加精


 ;这里字母 写反了


 关于 LearnKu


推荐文章: