
[教程一] 写一个搜索:使用 Laravel Scout,Elasticsearch,ik 分词
18 / 59 / 创建于 9年前
 lijinma 的个人博客
文字太长,你可以直接看代码:
https://github.com/lijinma/laravel-scout-e...
过年的时候,我在家写了一个小网站,名字叫“笑来搜”,整个过程是这样的:
- 开始使用
tntsearch,非常小巧,依赖也少,很喜欢。 - 不过用了一下发现
tntsearch没有配套的中文分词,有一个小伙子写了一个,但是很不完善。 - 最终还是选择了
ElasticSearch,虽然相对tntsearch更重一点。 ElasticSearch中的ik分词插件简单好用,而且非常容易扩展词库。
笑来搜 上线后,好几个朋友询问如何可以简单的实现一个类似的搜索网站,所以我就抽时间做了一个类似的 Demo,代码在 https://github.com/lijinma/laravel-scout-e... ,对你有帮助的请 Star,这个 Demo 至少有这两个优点:
- 尽可能写清楚安装中的每一个步骤,我假设你是一名新手。
- 这个 Demo 直接跑在了我的服务器上,你可以直观的玩起来。http://scout.lijinma.com/search
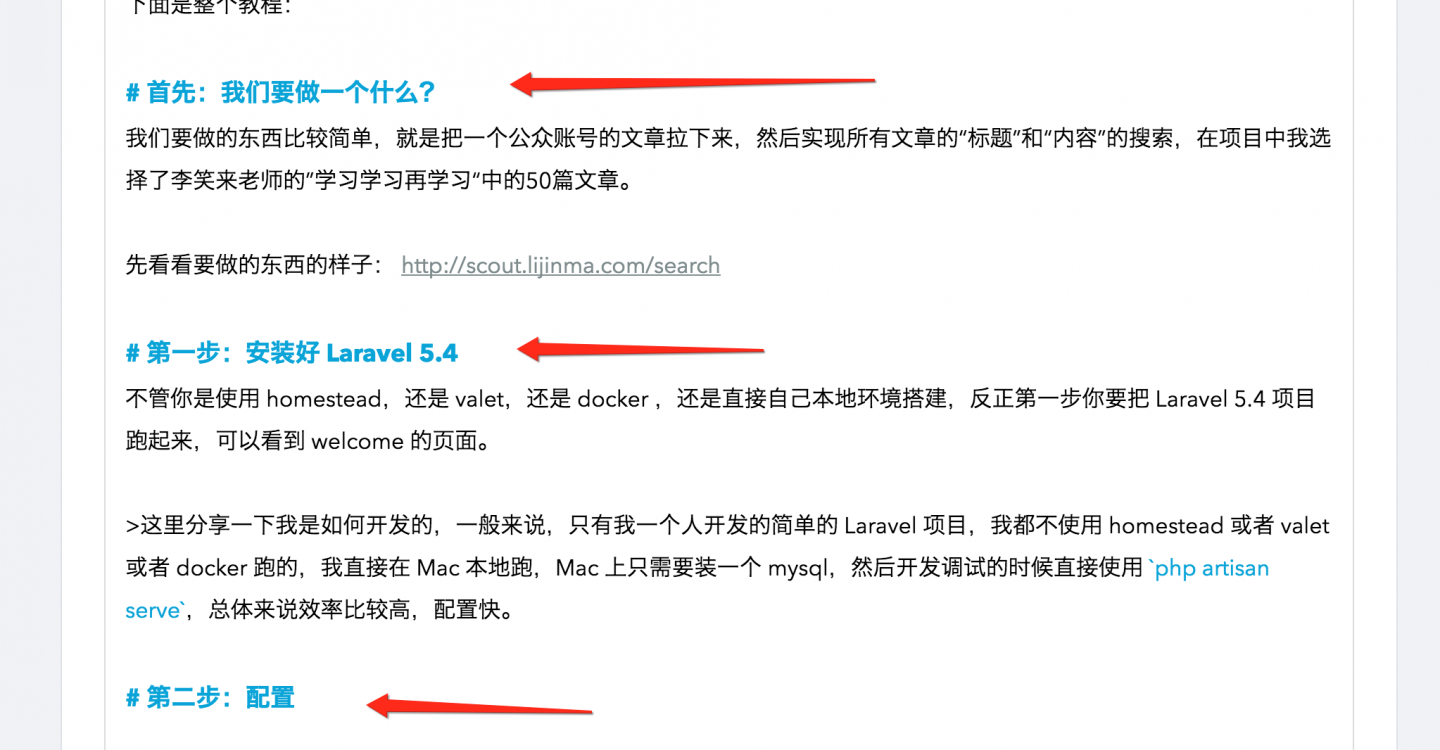
下面是整个教程:
首先:我们要做一个什么?
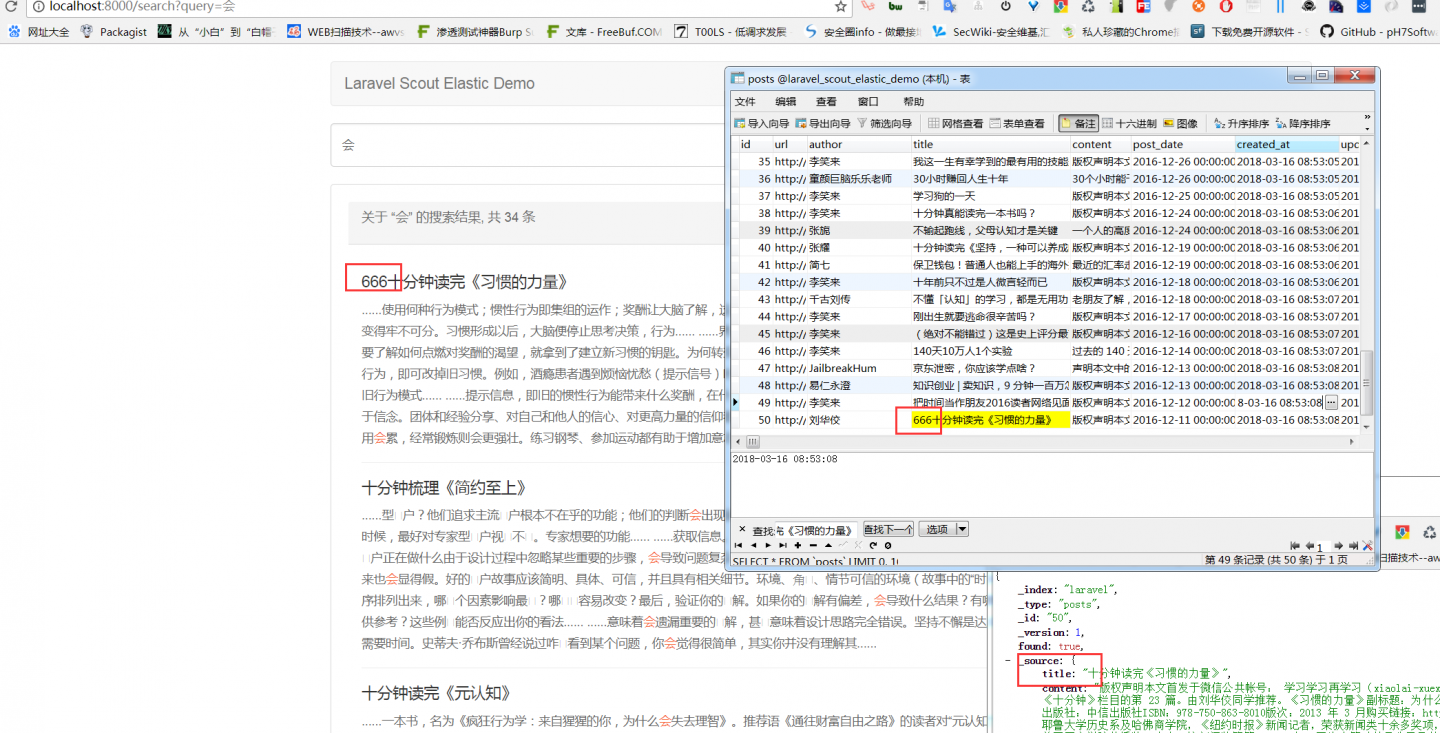
我们要做的东西比较简单,就是把一个公众账号的文章拉下来,然后实现所有文章的“标题”和“内容”的搜索,在项目中我选择了李笑来老师的”学习学习再学习“中的50篇文章。
先看看要做的东西的样子: http://scout.lijinma.com/search
第一步:安装好 Laravel 5.4
不管你是使用 homestead,还是 valet,还是 docker ,还是直接自己本地环境搭建,反正第一步你要把 Laravel 5.4 项目跑起来,可以看到 welcome 的页面。
这里分享一下我是如何开发的,一般来说,只有我一个人开发的简单的 Laravel 项目,我都不使用 homestead 或者 valet 或者 docker 跑的,我直接在 Mac 本地跑,Mac 上只需要装一个 mysql,然后开发调试的时候直接使用
php artisan serve,总体来说效率比较高,配置快。
第二步:配置
配置数据库
create database laravel_scout_elastic_demo;安装 ElasticSearch Scout Engine 包
$ composer require tamayo/laravel-scout-elastic安装这个包的时候,顺便就会装好 Laravel Scout,我们 publish 一下 config
$ php artisan vendor:publish --provider="Laravel\Scout\ScoutServiceProvider"添加对应的 ServiceProvider:
//app.php
                ...
        Laravel\Scout\ScoutServiceProvider::class,
        ScoutEngines\Elasticsearch\ElasticsearchProvider::class,
                ...
安装 Goutte Client
我们需要通过公众号文章的 url 爬到文章的标题和内容,所以需要安装这个 库:
composer require fabpot/goutte第三步:安装 ElasticSearch
因为我们要使用 ik 插件,在安装这个插件的时候,如果自己想办法安装这个插件会浪费你很多精力。
所以我们直接使用项目: https://github.com/medcl/elasticsearch-rtf
当前的版本是 Elasticsearch 5.1.1,ik 插件也是直接自带了。
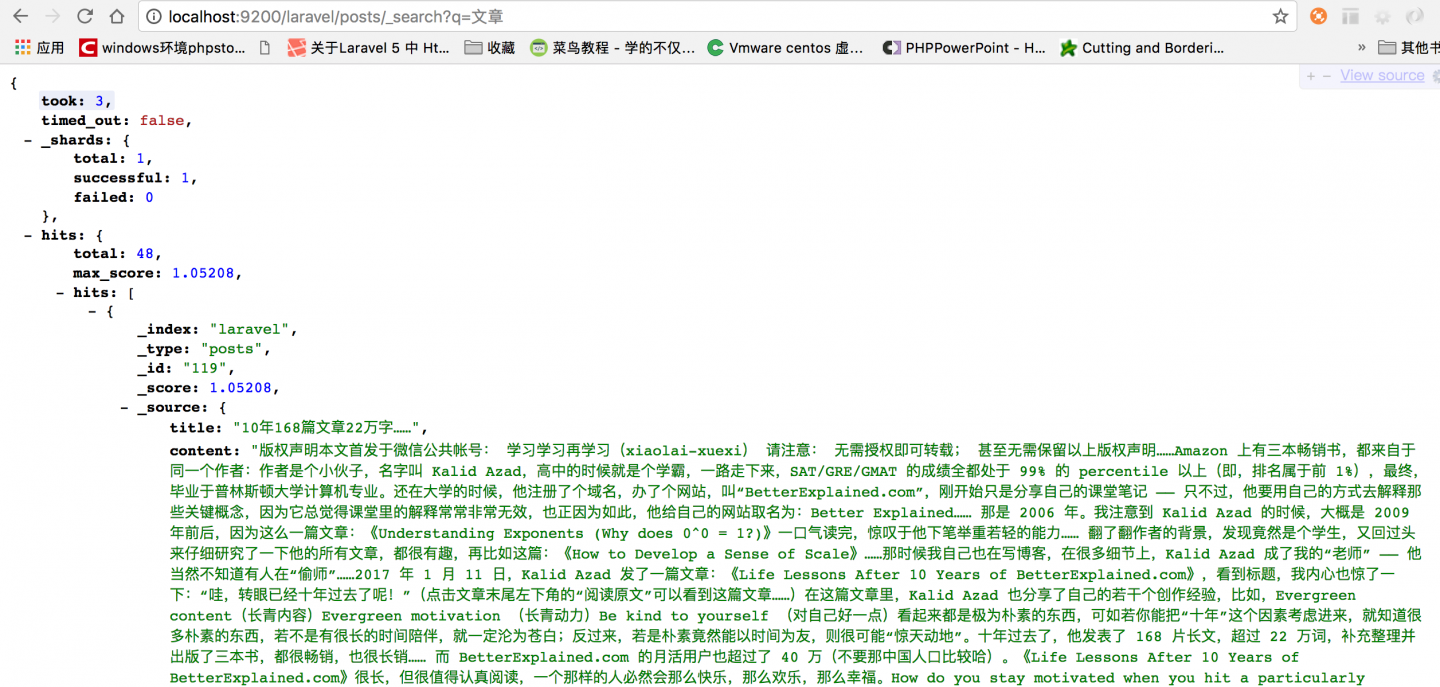
安装好 ElasticSearch,跑起来服务,测试服务安装是否正确:
$ curl http://localhost:9200

{
  "name" : "Rkx3vzo",
  "cluster_name" : "elasticsearch",
  "cluster_uuid" : "Ww9KIfqSRA-9qnmj1TcnHQ",
  "version" : {
    "number" : "5.1.1",
    "build_hash" : "5395e21",
    "build_date" : "2016-12-06T12:36:15.409Z",
    "build_snapshot" : false,
    "lucene_version" : "6.3.0"
  },
  "tagline" : "You Know, for Search"
}
如果正确的打印以上信息,证明 ElasticSearch 已经安装好了。
接着你需要查看一下 ik 插件是否安装(请在你的 ElasticSearch 文件夹中执行):
$ ./bin/elasticsearch-plugin list
analysis-ik
如果出现 analysis-ik,证明 ik 已经安装。
第四步,开始写代码:
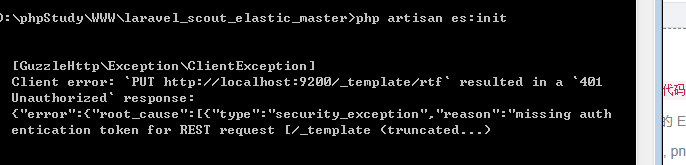
添加 InitEs 命令,初始化 ES 的一些数据
$ php artisan make:command InitEsInitEs.php 代码如下,主要做了两件事情:
- 创建对应的 index
- 创建一个 template,你可以通过下面的链接了解一下什么是 Index template
https://www.elastic.co/guide/en/elasticsea...
<?php

namespace App\Console\Commands;

use GuzzleHttp\Client;
use Illuminate\Console\Command;

class InitEs extends Command
{
    /**
     * The name and signature of the console command.
     *
     * @var string
     */
    protected $signature = 'es:init';

    /**
     * The console command description.
     *
     * @var string
     */
    protected $description = 'Init es to create index';

    /**
     * Create a new command instance.
     *
     */
    public function __construct()
    {
        parent::__construct();
    }

    /**
     * Execute the console command.
     *
     * @return mixed
     */
    public function handle()
    {
        $client = new Client();
        $this->createTemplate($client);
        $this->createIndex($client);
    }

    protected function createIndex(Client $client)
    {
        $url = config('scout.elasticsearch.hosts')[0] . ':9200/' . config('scout.elasticsearch.index');
        $client->put($url, [
            'json' => [
                'settings' => [
                    'refresh_interval' => '5s',
                    'number_of_shards' => 1,
                    'number_of_replicas' => 0,
                ],
                'mappings' => [
                    '_default_' => [
                        '_all' => [
                            'enabled' => false
                        ]
                    ]
                ]
            ]
        ]);
    }

    protected function createTemplate(Client $client)
    {
        $url = config('scout.elasticsearch.hosts')[0] . ':9200/' . '_template/rtf';
        $client->put($url, [
            'json' => [
                'template' => '*',
                'settings' => [
                    'number_of_shards' => 1
                ],
                'mappings' => [
                    '_default_' => [
                        '_all' => [
                            'enabled' => true
                        ],
                        'dynamic_templates' => [
                            [
                                'strings' => [
                                    'match_mapping_type' => 'string',
                                    'mapping' => [
                                        'type' => 'text',
                                        'analyzer' => 'ik_smart',
                                        'ignore_above' => 256,
                                        'fields' => [
                                            'keyword' => [
                                                'type' => 'keyword'
                                            ]
                                        ]
                                    ]
                                ]
                            ]
                        ]
                    ]
                ]
            ]
        ]);

    }
}
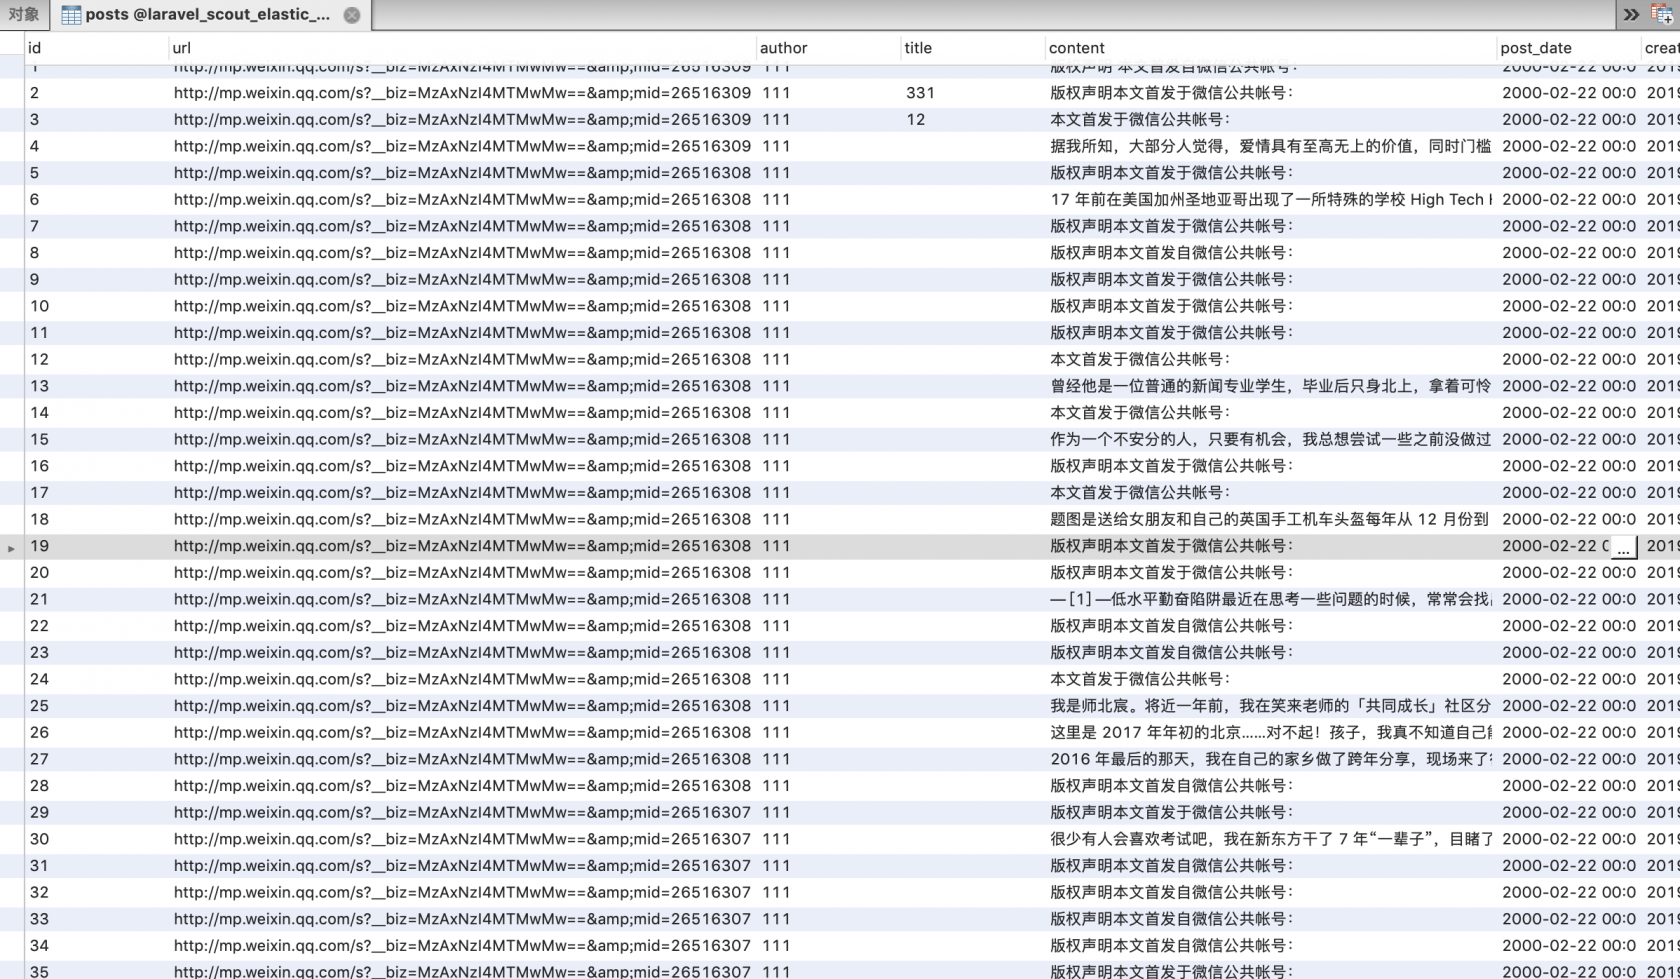
创建 Post 表,存放公众号的文章
php artisan make:migration create_posts_table代码:
<?php

use Illuminate\Support\Facades\Schema;
use Illuminate\Database\Schema\Blueprint;
use Illuminate\Database\Migrations\Migration;

class CreatePostsTable extends Migration
{
    /**
     * Run the migrations.
     *
     * @return void
     */
    public function up()
    {
        Schema::create('posts', function (Blueprint $table) {
            $table->increments('id');
            $table->text('url');
            $table->string('author', 64)->nullable()->default(null);
            $table->text('title');
            $table->longText('content');
            $table->dateTime('post_date')->nullable()->default(null);
            $table->timestamps();
        });
    }

    /**
     * Reverse the migrations.
     *
     * @return void
     */
    public function down()
    {
        Schema::dropIfExists('posts');
    }
}
在数据库中创建表:
$ php artisan migrate添加 Post Model:
$ php artisan make:model Post代码:
<?php

namespace App;

use Illuminate\Database\Eloquent\Model;
use Laravel\Scout\Searchable;

/**
 * Class Post
 * @package App
 * @property string $url
 * @property string $author
 * @property string $content
 * @property string $title
 * @property string $post_date
 * @property string $created_at
 * @property string $updated_at
 */
class Post extends Model
{
    use Searchable;
    protected $table = 'posts';

    protected $fillable = [
        'url',
        'author',
        'title',
        'content',
        'post_date'
    ];

    public function toSearchableArray()
    {
        return [
            'title' => $this->title,
            'content' => $this->content
        ];
    }
}
添加一个命令 ImportPosts,通过此命令去爬去数据,并导入到 Post 表中。
$ php artisan make:command ImportPosts代码:
<?php

namespace App\Console\Commands;

use App\Libraries\WechatPostSpider;
use App\Post;
use Goutte\Client;
use Illuminate\Console\Command;

class ImportPosts extends Command
{
    /**
     * The name and signature of the console command.
     *
     * @var string
     */
    protected $signature = 'posts:import';

    /**
     * The console command description.
     *
     * @var string
     */
    protected $description = 'Import posts!';

    /**
     * Create a new command instance.
     *
     */
    public function __construct()
    {
        parent::__construct();
    }

    /**
     * Execute the console command.
     *
     * @return mixed
     */
    public function handle()
    {
        $client = new Client();
        foreach (config('post-urls') as $url) {
            /**
             * 这里 url 可能需要索引,但是用 url 做唯一标示不太好,索引太大
             */
            if (Post::where('url', $url)->exists()) {
                continue;
            }
            $wechatPostSpider = new WechatPostSpider($client, $url);
            $this->savePost($wechatPostSpider);
            $this->info('create one post!');
        }
    }

    protected function savePost(WechatPostSpider $wechatPostSpider)
    {
        Post::create([
            'url' => $wechatPostSpider->getUrl(),
            'author' => $wechatPostSpider->getAuthor(),
            'title' => $wechatPostSpider->getTitle(),
            'content' => $wechatPostSpider->getContent(),
            'post_date' => $wechatPostSpider->getPostDate(),
        ]);
    }
}
此时,需要依赖两个文件,一个是 app/Libraries/WechatPostSpider.php,一个是 config/post-urls.php 配置文件。
WechatPostSpider.php 负责爬去数据
<?php namespace App\Libraries;

use Goutte\Client;
use Symfony\Component\DomCrawler\Crawler;

/**
 * Created by PhpStorm.
 * User: lijinma
 * Date: 04/03/2017
 * Time: 9:05 PM
 */
class WechatPostSpider
{

    /**
     * @var Crawler|null
     */
    protected $crawler;

    /**
     * @var string
     */
    protected $url;

    /**
     * WechatPostSpider constructor.
     * @param Client $client
     * @param $url
     */
    public function __construct(Client $client, $url)
    {
        $this->url = $url;
        $this->crawler = $client->request('GET', $url);
    }

    /**
     * @return string
     */
    public function getTitle()
    {
        return trim($this->crawler->filter('title')->text());
    }

    /**
     * @return string
     */
    public function getContent()
    {
        return trim($this->crawler->filter('.rich_media_content')->text());
    }

    /**
     * @return string
     */
    public function getAuthor()
    {
        return trim($this->crawler->filter('#post-date')->nextAll()->text());
    }

    /**
     * @return string
     */
    public function getPostDate()
    {
        return $this->crawler->filter('#post-date')->text();
    }

    /**
     * @return string
     */
    public function getUrl()
    {
        return $this->url;
    }
}
post-urls.php 存储需要爬取的公众号文章 urls,这里只列了一条
<?php

return [
    "http://mp.weixin.qq.com/s?__biz=MzAxNzI4MTMwMw==&mid=2651630953&idx=1&sn=9c4d8f2b4df2605fdaa1338303acc908&chksm=801ff511b7687c07303220a0c105d979f1a4a5db45689c95111a6c6ec2f5a6c0c6cecea88ba0&scene=4#wechat_redirect",
];
添加 PostController
$ php artisan make:controller PostControllerPostController.php 代码:
<?php

namespace App\Http\Controllers;

use App\Post;
use Illuminate\Http\Request;

class PostController extends Controller
{
    public function search(Request $request)
    {
        $q = $request->get('q');
        $paginator = [];
        if ($q) {
            $paginator = Post::search($q)->paginate();
        }

        return view('search', compact('paginator', 'q'));
    }
}
PostController.php 需要依赖 view 文件,我们创建一个 resources/views/layouts/main.blade.php,一个 resources/views/search.blade.php
resources/views/layouts/main.blade.php 代码:
<!DOCTYPE html>
<html lang="en">
<head>
<meta charset="utf-8">
<meta http-equiv="X-UA-Compatible" content="IE=edge">
<meta name="viewport" id="viewport"
content="width=device-width, initial-scale=1, minimum-scale=1, maximum-scale=1"/>
<!-- CSRF Token -->
<meta name="csrf-token" content="{{ csrf_token() }}">
<title>{{ config('app.name', 'Laravel') }}</title>
<!-- Styles -->
<link href="https://cdn.bootcss.com/bootstrap/3.3.7/css/bootstrap.min.css" rel="stylesheet">
<link href="/css/main.css" rel="stylesheet">
<!-- Scripts -->
<script>
window.Laravel = {!! json_encode([
'csrfToken' => csrf_token(),
]) !!};
</script>
</head>
<body>
<div id="app">
<div class="container">
<div class="row">
<div class="col-md-12">
<nav class="navbar navbar-default">
<div class="container-fluid">
<!-- Brand and toggle get grouped for better mobile display -->
<div class="navbar-header">
<button type="button" class="navbar-toggle collapsed" data-toggle="collapse" data-target="#bs-example-navbar-collapse-1" aria-expanded="false">
<span class="sr-only">Toggle navigation</span>
<span class="icon-bar"></span>
<span class="icon-bar"></span>
<span class="icon-bar"></span>
</button>
<a class="navbar-brand" href="/">Laravel Scout Elastic Demo</a>
</div>
</div><!-- /.container-fluid -->
</nav>
</div>
</div>
@yield('content')
</div>
</div>
<!-- Scripts -->
<script src="http://cdn.bootcss.com/jquery/1.12.4/jquery.min.js"></script>
<script src="http://cdn.bootcss.com/bootstrap/3.3.7/js/bootstrap.min.js"></script>
</body>
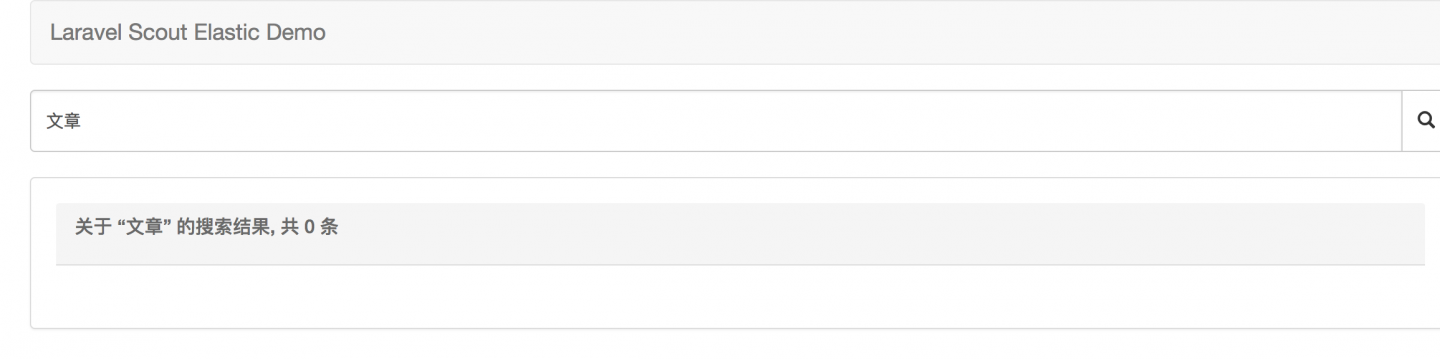
</html>resources/views/search.blade.php 代码:
@extends('layouts.main')
@section('content')
<div class="row">
<div class="col-md-12">
<form action="/search">
<div class="input-group">
<input type="text" class="form-control h50" name="q" placeholder="关键字..." value="{{ $q }}">
<span class="input-group-btn"><button class="btn btn-default h50" type="submit" type="button"><span class="glyphicon glyphicon-search"></span></button></span>
</div>
</form>
</div>
</div>
@if($q)
<div class="row">
<div class="col-md-12">
<div class="panel panel-default list-panel search-results">
<div class="panel-heading">
<h3 class="panel-title ">
<i class="fa fa-search"></i> 关于 “<span class="highlight">{{ $q }}</span>” 的搜索结果, 共 {{ $paginator->total() }} 条
</h3>
</div>
<div class="panel-body ">
@foreach($paginator as $post)
<div class="result">
<h2 class="title">
<a href="{{ $post->url }}" target="_blank">
{{ $post->title }}
</a>
</h2>
<div class="info">
</div>
<div class="desc">
{{ mb_substr($post->content, 0, 150) }}......
</div>
<hr>
</div>
@endforeach
</div>
{{ $paginator->links() }}
</div>
</div>
</div>
@else
<div class="row text-center">
<div class="col-md-12">
<br>
<h2>你会搜索到什么?</h2>
<br>
<p>学习学习再学习公众号所有文章</p>
</div>
</div>
@endif
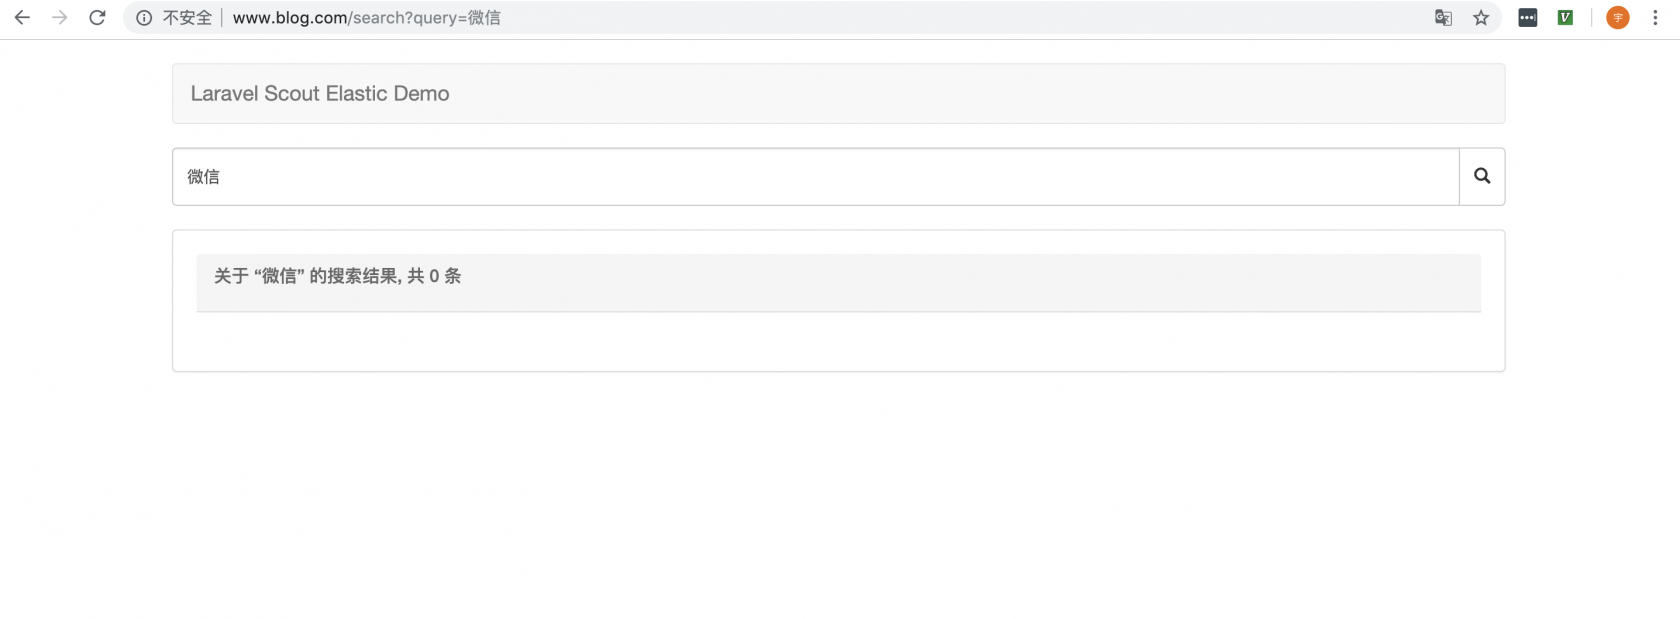
@endsection现在我们的代码已经写完了,但是缺少一个功能,搜索结果如何高亮(highlight) 呢?
本作品采用《CC 协议》,转载必须注明作者和本文链接


 关于 LearnKu


推荐文章: