
iTerm2 配置
2 / 0 / 创建于 6年前 /
 HuDu 的个人博客
大致介绍
相比于 Mac OS 自带的终端,iTerm2 是一款相对比较好用的终端工具。iTerm2 常用操作包括主题选择、声明高亮、自动填充建议、隐藏用户名和主机名、分屏效果等。
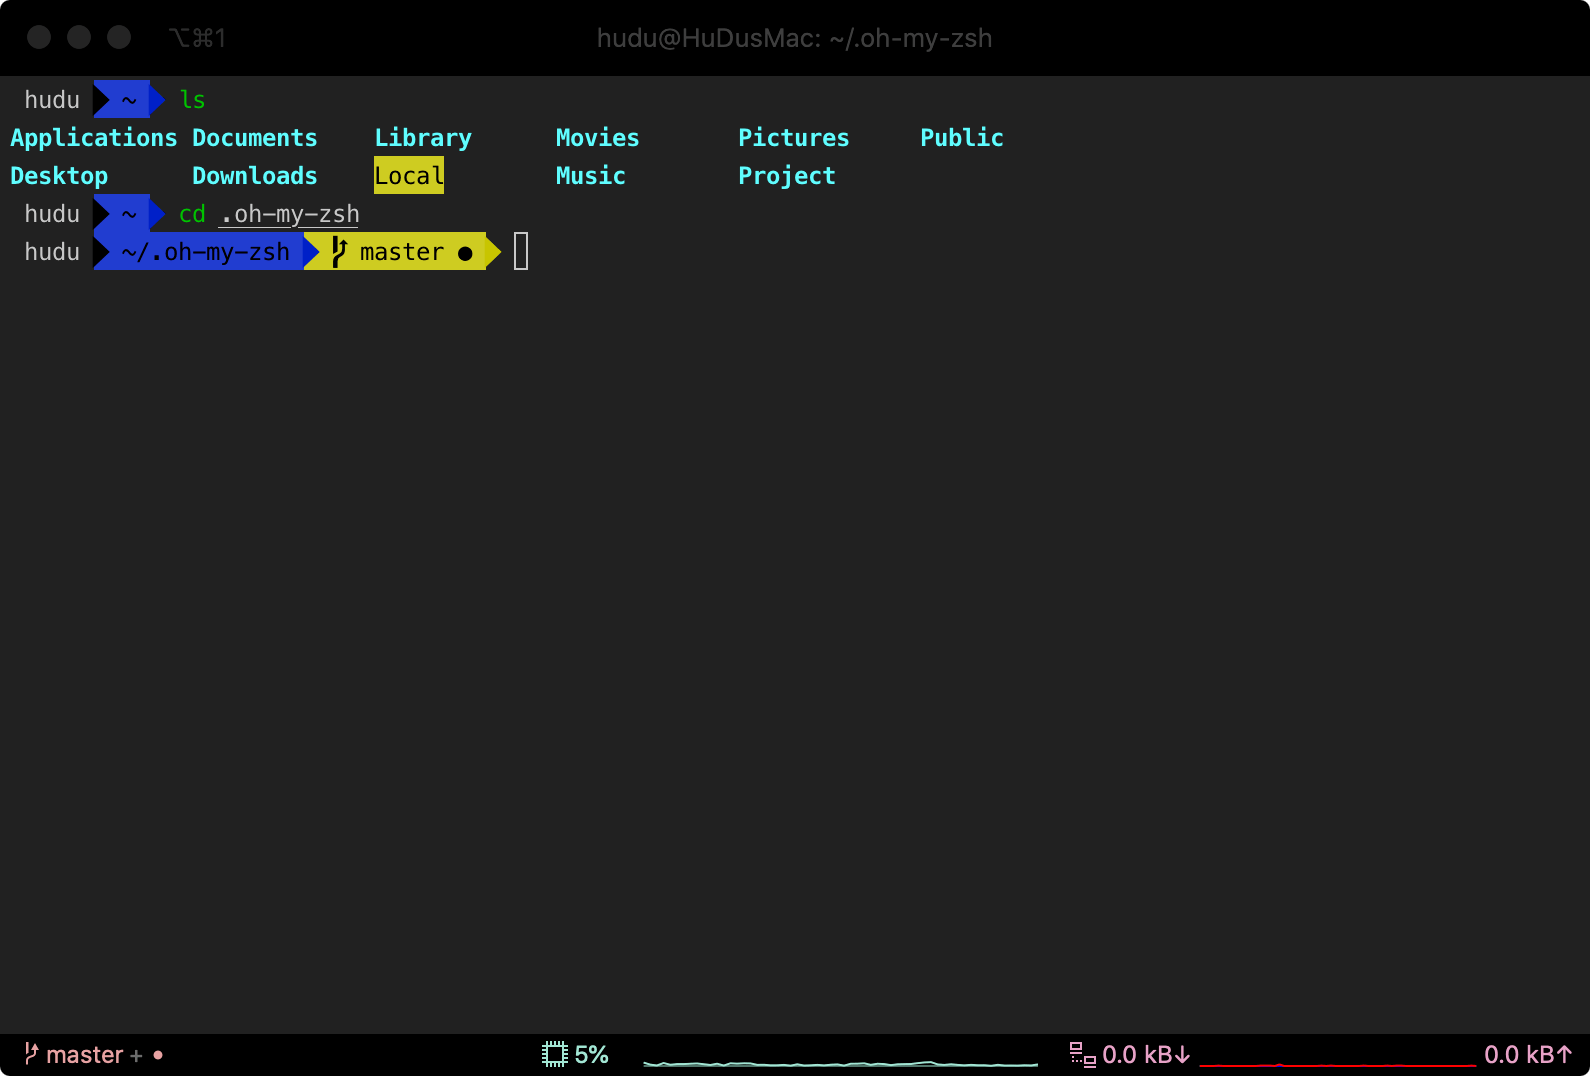
效果图大致如下,很多都可以自定义
什么是Shell
相对于内核来说,Shell是Linux/Unix的一个外壳,它负责外界与Linux内核的交互,接收用户或其他应用程序的命令,然后把这些命令转化成内核能理解的语言,传给内核,内核是真正干活的,干完之后再把结果返回用户或应用程序。
简单的说,shell就是命令行。
Shell的分类
Linux/Unix提供了很多种Shell,不同的shell具备不同的功能,shell还决定了脚本中函数的语法,Linux中默认的shell是/bin/bash;
查看当前shell:
echo $SHELL想知道你的系统有几种shell,可以通过以下命令查看:
$ cat /etc/shells显示如下:
/bin/bash
/bin/csh
/bin/ksh
/bin/sh
/bin/tcsh
/bin/zsh
切换shell
$ chsh -s /bin/zsh
$ chsh -s /bin/bash
下载及安装
iTerm2 下载地址:iTerm2
1、下载的是压缩文件,解压后直接双击执行程序文件,或者直接将它拖到 Applications 目录下。
2、也可以直接使用Homebrew进行安装:
$ brew cask install iterm2安装oh my zsh
官网推荐安装方式:
Via curl:
$ sh -c "$(curl -fsSL https://raw.github.com/robbyrussell/oh-my-zsh/master/tools/install.sh)"Via wget:
$ sh -c "$(wget https://raw.github.com/robbyrussell/oh-my-zsh/master/tools/install.sh -O -)"切换系统shell:
$ chsh -s /bin/zsh主题配置
在安装的目录下会有 .zshrc 隐藏配置文件
$ vi ~/.zshrc主题配置
# Path to your oh-my-zsh installation.
export ZSH="~/.oh-my-zsh"

# Set name of the theme to load --- if set to "random", it will
# load a random theme each time oh-my-zsh is loaded, in which case,
# to know which specific one was loaded, run: echo $RANDOM_THEME
# See https://github.com/ohmyzsh/ohmyzsh/wiki/Themes
ZSH_THEME="agnoster"

source $ZSH/oh-my-zsh.sh主题文件都在~/.oh-my-zsh/themes目录下,可以在~/.zshrc中通过 ZSH_THEME 指定自己喜欢的主题。
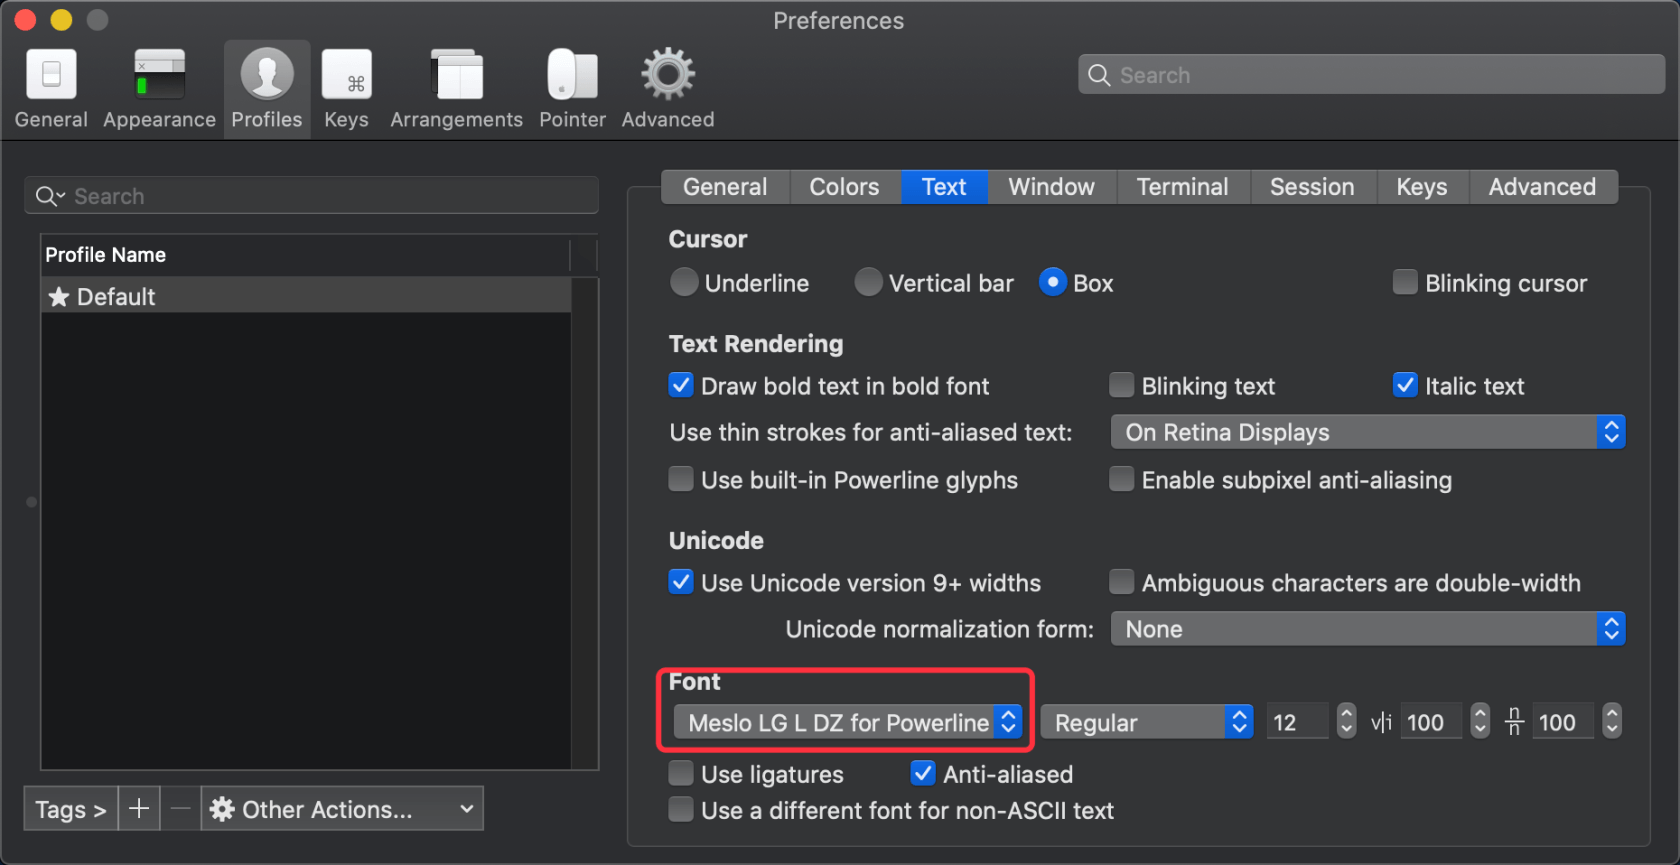
安装字体 PowerFonts
对于有些主题,会设置图标,我们电脑上的字体一般都不支持这些图标,会出现乱码。
打开 Font 下载,或者使用命令行下载,推荐使用命令行。
# clone
$ git clone https://github.com/powerline/fonts.git --depth=1

# install
$ cd fonts
$ ./install.sh

# clean-up a bit
$ cd ..
$ rm -rf fonts
字体安装就大功告成了!
安装完字体一定要应用!
开启插件
我们打开.zshrc配置文件,定位到plugins
plugins=(
git )
可以看到默认只开启了git插件,我们可以将要使用的插件的名字以空格相隔接在后面就可以了
推荐插件
zsh-autosuggestions
它是 Oh-my-szh 的一个插件,作用基本上是根据历史输入指令的记录即时的提示,能够很大的提高效率。
1.克隆到插件目录:/Users/hudu/.oh-my-zsh/plugins
$ git clone git://github.com/zsh-users/zsh-autosuggestions2.修改配置文件 .zshrc :
plugins=(git zsh-autosuggestions)zsh-syntax-highlighting
这是一个命令高亮插件,输入为绿色时表示可用命令,路径带有下划线时表示可用路径
1.克隆到插件目录:
$ git clone https://github.com/zsh-users/zsh-syntax-highlighting.git2.修改配置文件 .zshrc :
plugins=(git zsh-syntax-highlighting)最后别忘了让配置生效
$ source .zshrc安装 Homebrew
Homebrew下载
安装 Homebrew:
$ /bin/bash -c "$(curl -fsSL https://raw.githubusercontent.com/Homebrew/install/master/install.sh)"顺便使用 brew 安装 wget:
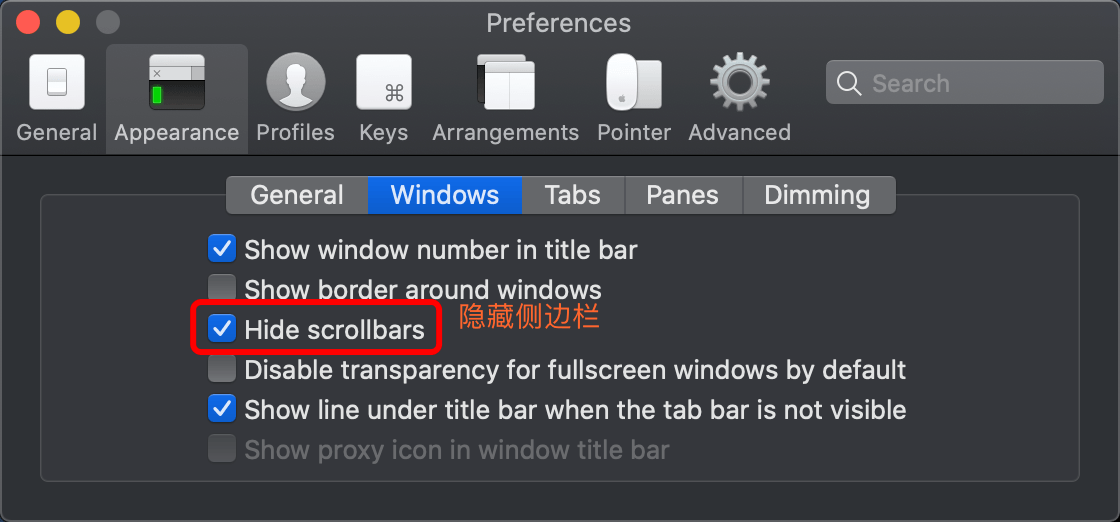
$ brew install wget界面优化
- 自定义状态栏
打开 iTerm 的Preferences,选择Profile中的Session

将自己需要的状态标签拖到下面。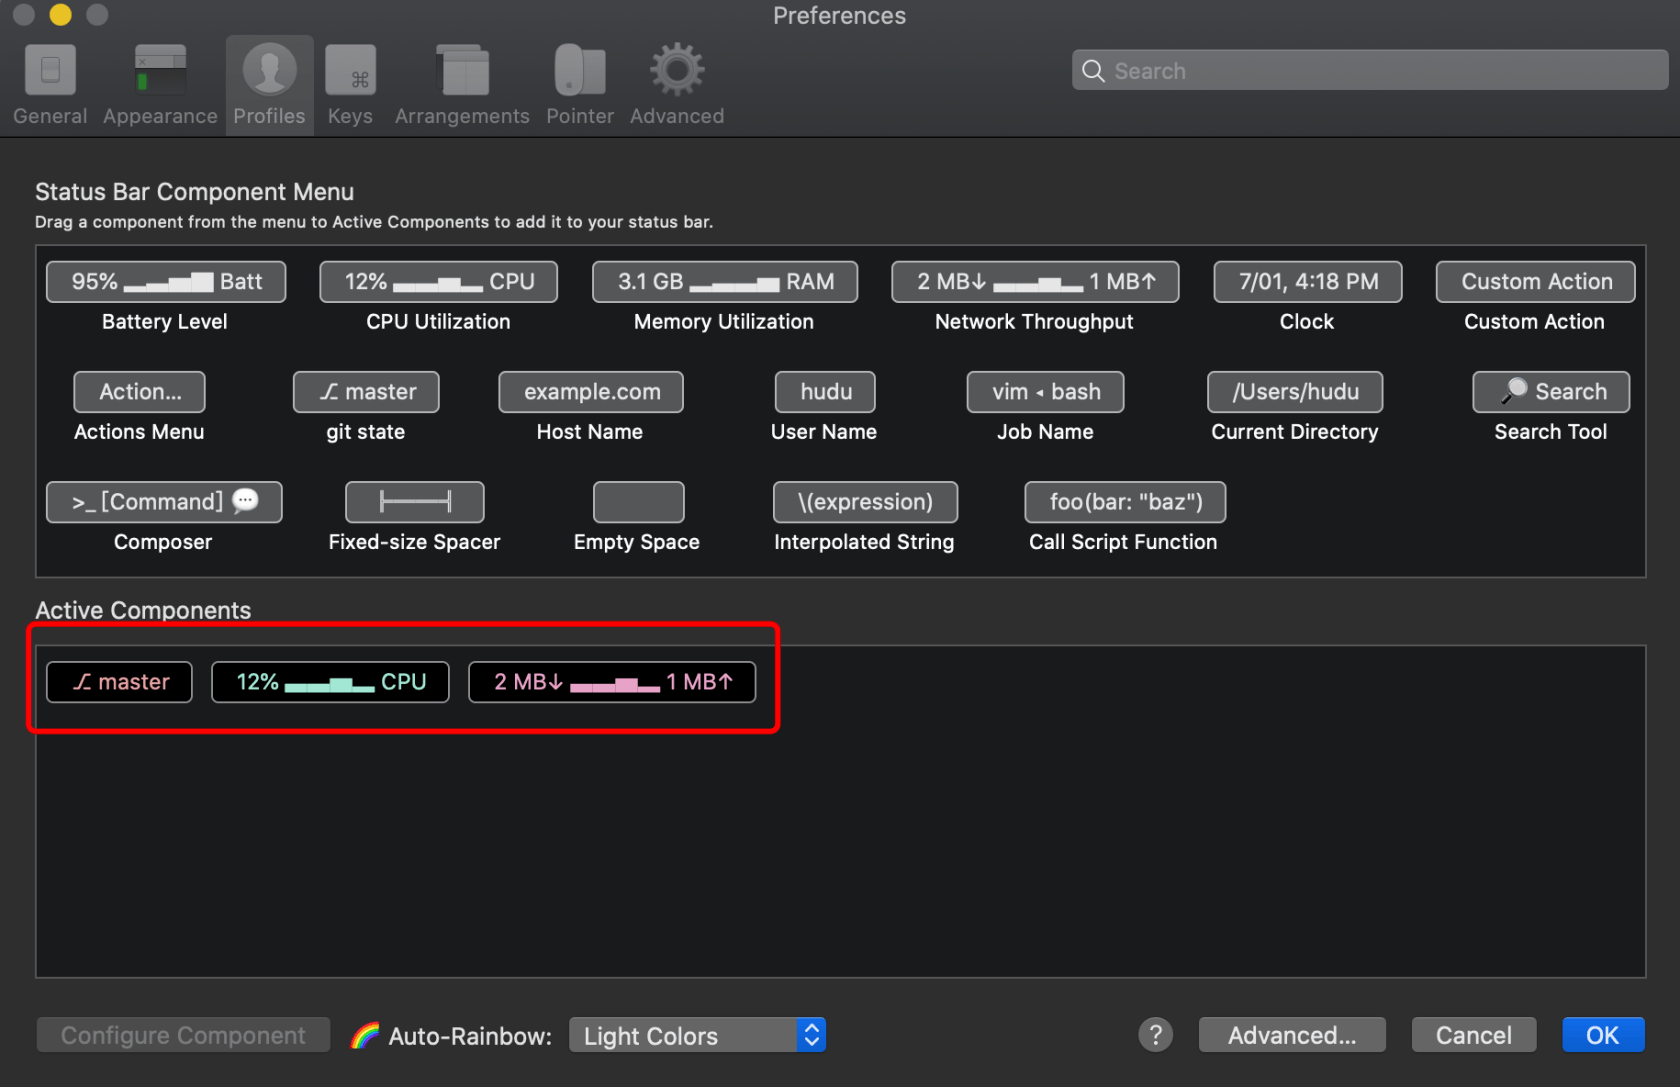
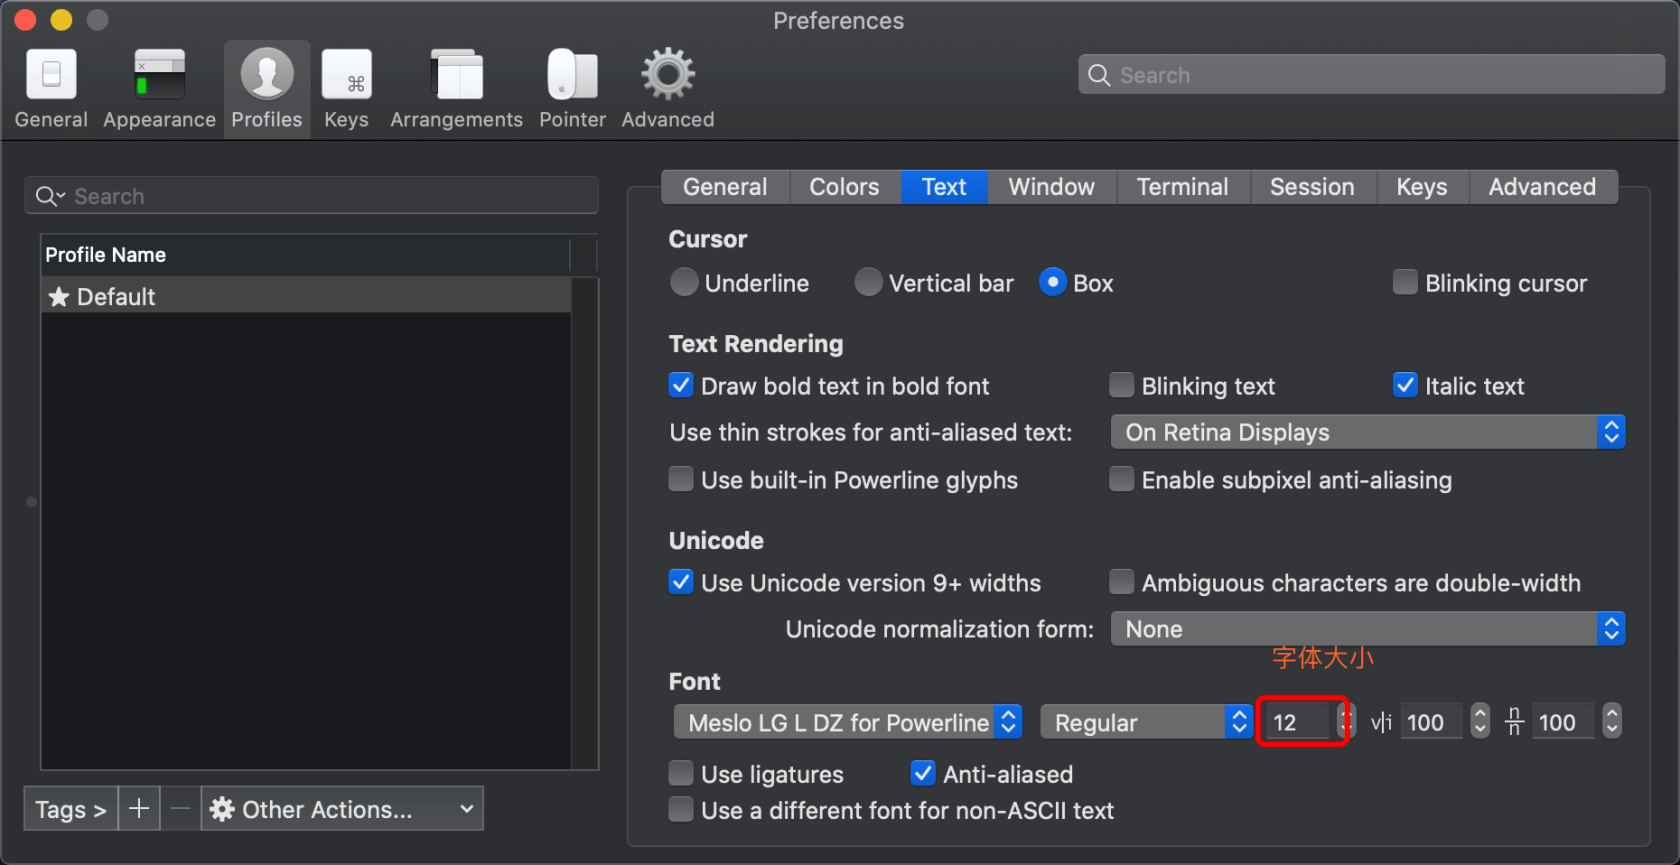

- 标题栏图标
效果图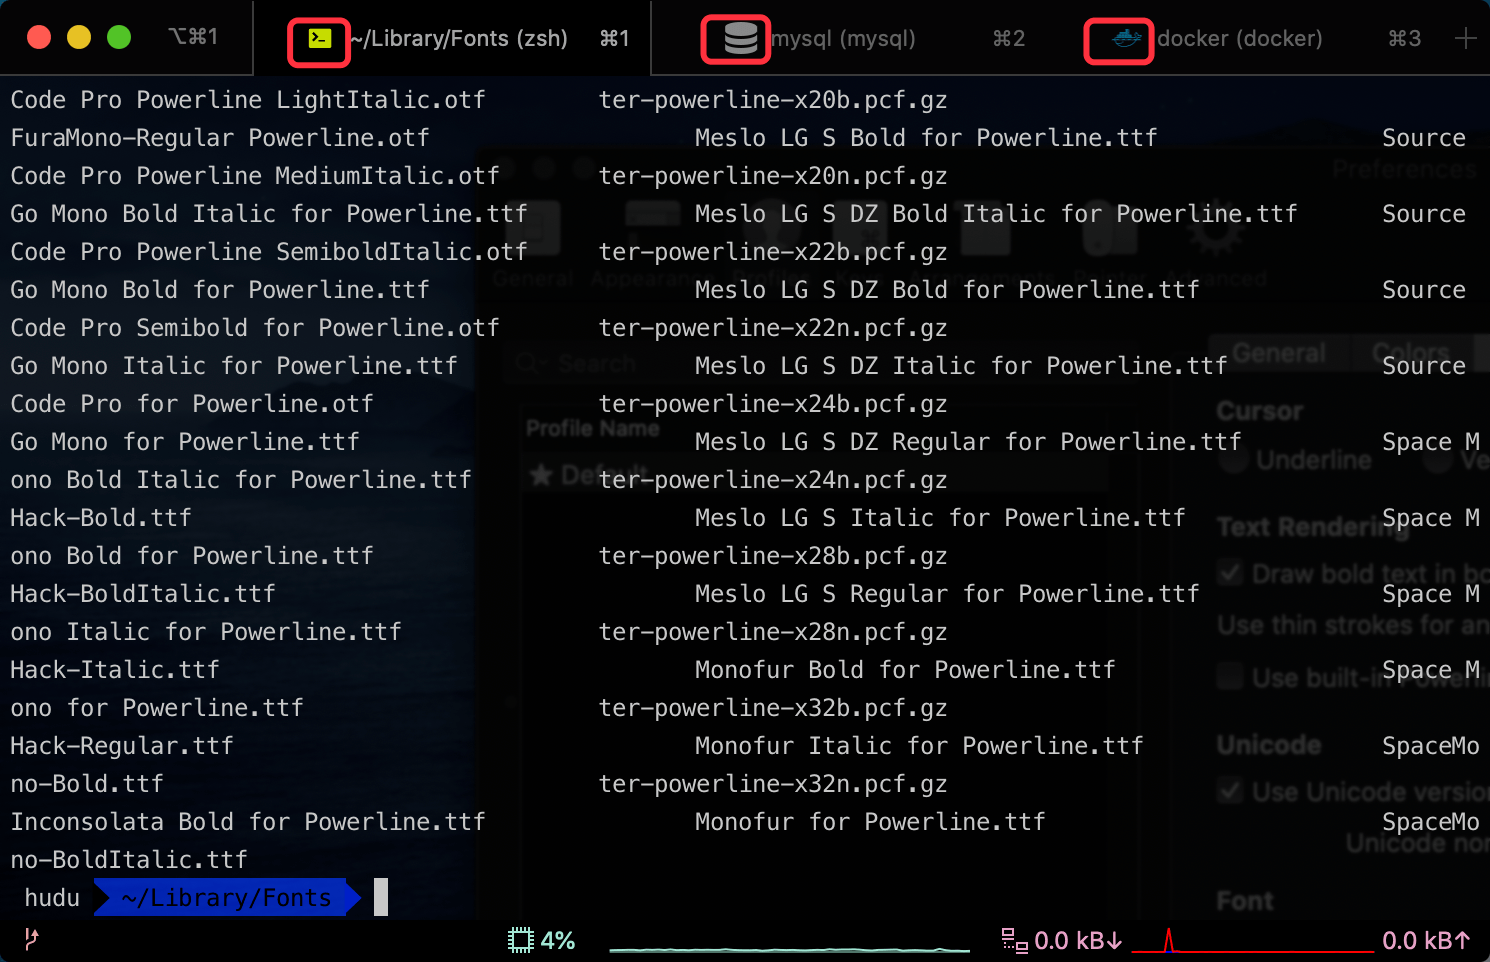
配置修改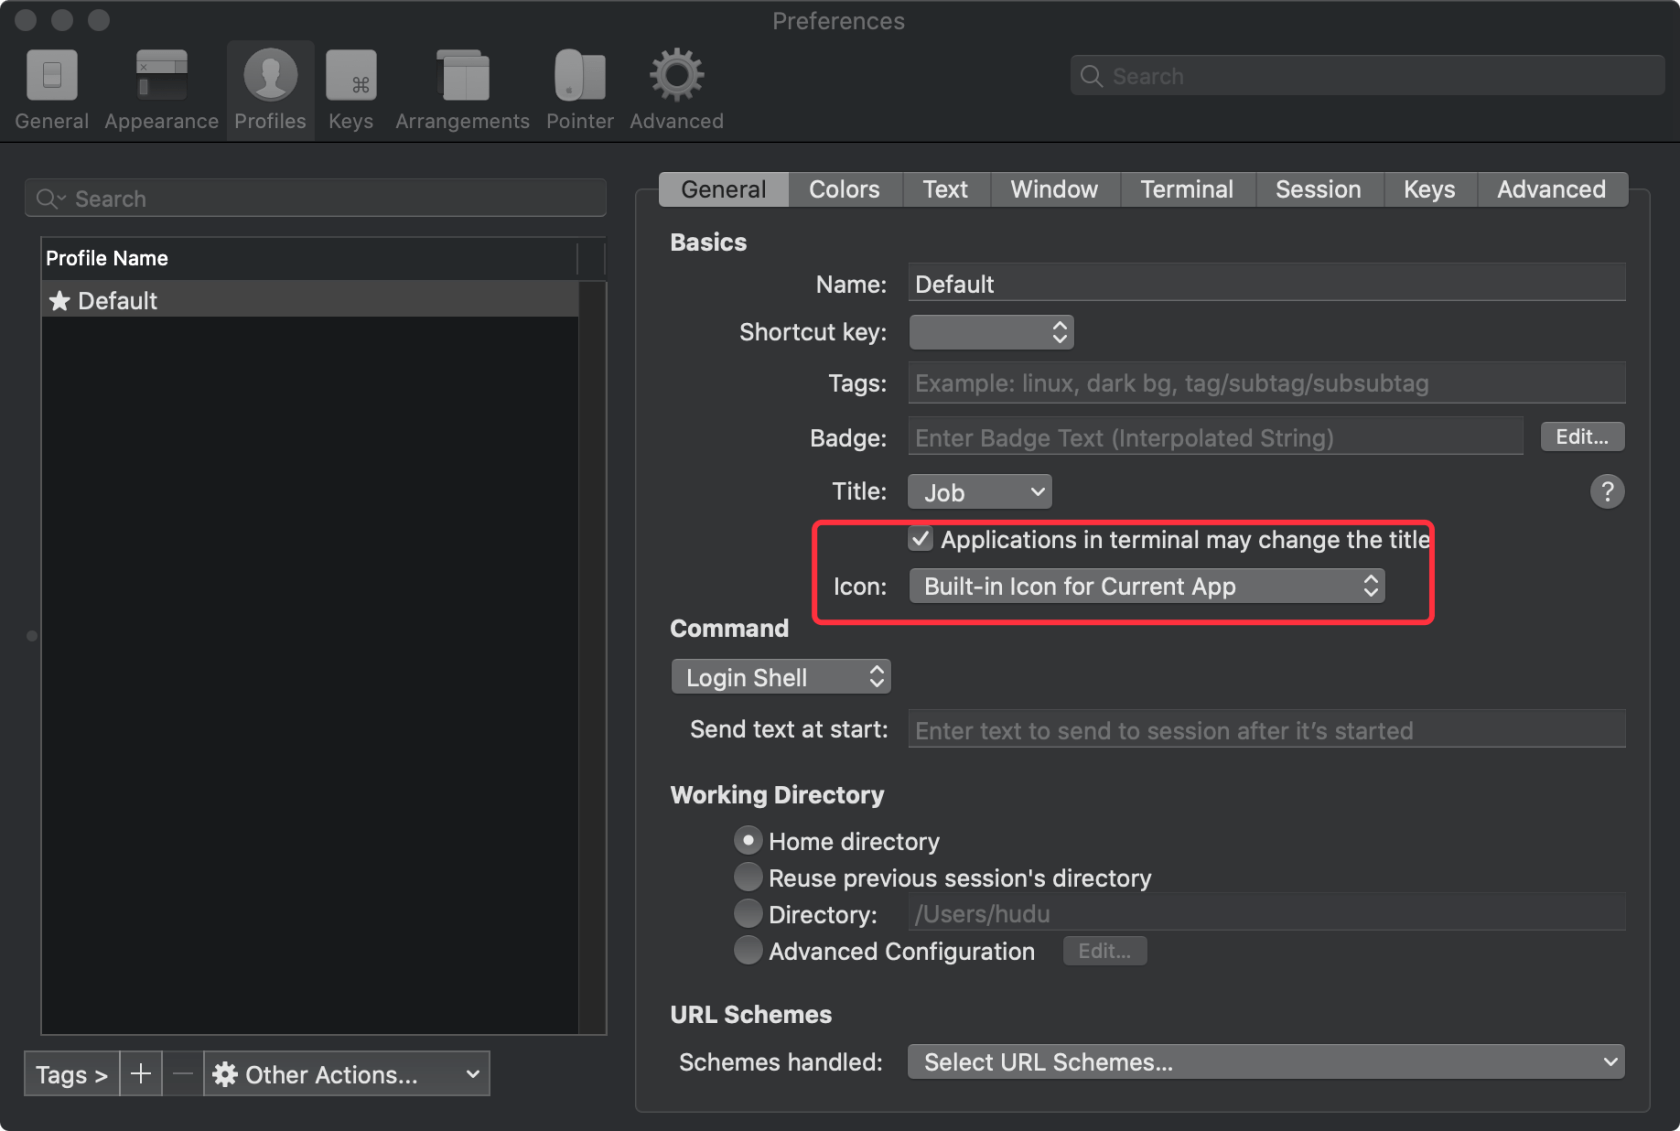
另外推荐:Mac 中配置 Sublime Text3 暗黑风格
本作品采用《CC 协议》,转载必须注明作者和本文链接


 关于 LearnKu


