
Centos7 安装ffmpeg
4 / 1 / 创建于 4年前 /
 YJ明 的个人博客
第一步 下载源码包
官网ffmpeg官网下载ffmpeg源码包
说明:我的安装目录为/root ffmpeg完整目录为 /root/ffmpeg-4.2.4/
wget http://ffmpeg.org/releases/ffmpeg-4.2.4.tar.bz2第二步 解压源码包
tar -jxvf ffmpeg-4.2.4.tar.bz2我在此步骤报错,报错信息如下:
———————— 错误信息 ————————
tar (child): bzip2:无法 exec: 没有那个文件或目录
tar (child): Error is not recoverable: exiting now
tar: Child returned status 2
tar: Error is not recoverable: exiting now
———————— end ————————
查阅资料之后发现原来是bzip2未安装,yum一键安装即可解决,然后继续执行解压命令,完成此步骤
yum install -y bzip2第三步 安装依赖yasm
进入到解压完成的ffmpeg-4.2.4目录下安装yasm(如已安装跳过此步骤)
cd ffmpeg-4.2.4
yum install -y yasm
第四步 配置
./configure --enable-shared --prefix=/root/ffmpeg-4.2.4此步骤可能会报错
———————— 错误信息 ————————
gcc is unable to create an executable file.
If gcc is a cross-compiler, use the –enable-cross-compile option.
Only do this if you know what cross compiling means.
C compiler test failed.
If you think configure made a mistake, make sure you are using the latest
version from Git. If the latest version fails, report the problem to the
user@ffmpeg.org"">ffmpeg-user@ffmpeg.org mailing list or IRC #ffmpeg on irc.freenode.net.
Include the log file “ffbuild/config.log” produced by configure as this will help
solve the problem.
———————— end ————————
这是因为未安装gcc或者gcc版本过低导致,更新/安装gcc即可解决此问题
yum install -y gcc继续执行配置命令,完成配置
第五步 编译
执行make命令(这一步时间比较长,请耐心等待)
make第六步 安装
执行make install(安装)命令
make install第七步 动态库相关配置修改
ld.so.conf修改说明
修改文件/etc/ld.so.conf
vim /etc/ld.so.conf文件最后添加 /root/ffmpeg-4.2.4/lib/
我的ffmpeg安装目录为/root/ffmpeg-4.2.4/
然后执行ldconfig命令使其生效
ldconfig第八步 配置环境变量
vim /etc/profile使用 vim /etc/profile命令打开profile文件,在文件末添加环境变量:
#set ffmpeg environment
PATH=$PATH:/root/ffmpeg-4.2.4/bin
export PATH
随后执行 source /etc/profile使配置生效
source /etc/profile最后一步 查看是否配置成功
用命令ffmpeg -version查看,出现下图信息即安装成功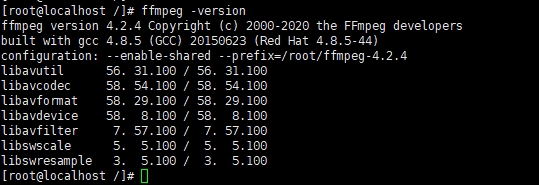
参考文档
CentOS7安装ffmpeg
/etc/ld.so.conf详解
本作品采用《CC 协议》,转载必须注明作者和本文链接


 关于 LearnKu


很久之前安装过,当时碰到了一堆问题 :)