
基于 Laravel Passport API 的多用户多字段认证系统(三):多字段登录
5947 / 2 / 创建于 6年前
 黄冬瓜 的个人博客
3. 多字段登录
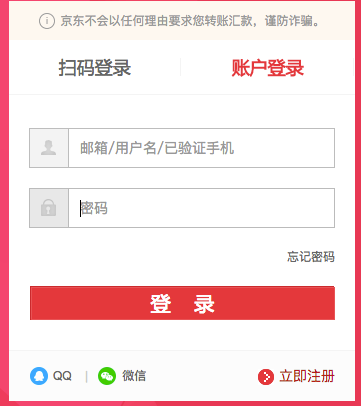
传统意义的多字段登录,是通过 userid 或 username 或 email 这类任意一个 unique 字段+密码验证。例如京东:
通过 Laravel Passport 自带的 findForPassport ,做一点小小的修改即可完全满足:
public function findForPassport($username) {
  return $this->orWhere('email', $username)->orWhere('phone', $username)->first();
 }
对于一些特殊的固定字段,例如用户是否激活,也可以采用以下方式做验证,参见 Issue:
public function findForPassport($username)
    {
        $user = $this->where('email', $username)->first();

        if($user !== null && $user->status == 0) {
            throw new OAuthServerException('User account is not activated', 6, 'account_inactive', 401);
        }
        return $user;
}但是,如果想同时满足多个字段的验证,例如上一章的 Student ,必须同时满足 school_id 和 student_no 的条件
Student::create([
   'school_id'  => '10001',
   'student_no' => '17000003001',
   'name'       => 'Abbey',
   'password'   => bcrypt('st001')
        ]);
因为 findForPassport 默认只传递了一个 username 的字段,因此还是需要自己扩展。并且我也想可以自定义字段名,不一定必须使用username。
以下部分代码参考了@Ryan 的 Laravel Passport API 认证使用小结,特别表示感谢。
上一章已经定位到了源码的 vendor/league/oauth2-server/src/Grant/PasswordGrant.php,有一个validateUserd的函数调用了getUserEntityByUserCredentials。
protected function validateUser(ServerRequestInterface $request, ClientEntityInterface $client)
    {
        $username = $this->getRequestParameter('username', $request);
        if (is_null($username)) {
            throw OAuthServerException::invalidRequest('username');
        }

$password = $this->getRequestParameter('password', $request);
        if (is_null($password)) {
            throw OAuthServerException::invalidRequest('password');
        }

$user = $this->userRepository->getUserEntityByUserCredentials(
            $username,
            $password,
            $this->getIdentifier(),
            $client
        );
        if ($user instanceof UserEntityInterface === false) {
            $this->getEmitter()->emit(new RequestEvent(RequestEvent::USER_AUTHENTICATION_FAILED, $request));

throw OAuthServerException::invalidCredentials();
        }

return $user;
}因此,需要先把PasswordGrant扩展出来。
3.1 在App\Auth新建PasswordGrant.php,代码如下:
<?php

namespace App\Auth;

use League\OAuth2\Server\Grant\PasswordGrant as BasePasswordGrant;

use League\OAuth2\Server\Entities\ClientEntityInterface;
use League\OAuth2\Server\Exception\OAuthServerException;
use League\OAuth2\Server\RequestEvent;
use Psr\Http\Message\ServerRequestInterface;
use League\OAuth2\Server\Entities\UserEntityInterface;

class PasswordGrant extends BasePasswordGrant
{

    /**
     * @param ServerRequestInterface $request
     * @param ClientEntityInterface  $client
     *
     * @throws OAuthServerException
     *
     * @return UserEntityInterface
     */
    protected function validateUser(ServerRequestInterface $request, ClientEntityInterface $client)
    {
        $username = $this->getRequestParameter('username', $request);
        $provider = $this->getRequestParameter('provider', $request);
        if(is_null($provider) && is_null($username)){
            throw OAuthServerException::invalidRequest('username');
        }
        $password = $this->getRequestParameter('password', $request);
        if (is_null($password)) {
            throw OAuthServerException::invalidRequest('password');
        }
        $user = $this->userRepository->getUserEntityByUserCredentials(
            $username,
            $password,
            $this->getIdentifier(),
            $client
        );

        if ($user instanceof UserEntityInterface === false) {
            $this->getEmitter()->emit(new RequestEvent(RequestEvent::USER_AUTHENTICATION_FAILED, $request));

            throw OAuthServerException::invalidCredentials();
        }

        return $user;
    }

}
主要改动逻辑为:
如果传递的参数有provider,则为多用户登录,不用强制验证username了。
当然这里也可以加更多逻辑,按照实际需求来。
$provider = $this->getRequestParameter('provider', $request);
if(is_null($provider) && is_null($username)){
    throw OAuthServerException::invalidRequest('username');
}
3.2 还需要扩展 vendor/laravel/passport/src/Bridge/UserRepository.php 里面的 getUserEntityByUserCredentials,在App\Auth新建MuitiAuthPassportRepository.php,代码如下:
<?php

namespace App\Auth;

use App;
use Illuminate\Http\Request;
use League\OAuth2\Server\Entities\ClientEntityInterface;
use Laravel\Passport\Bridge\UserRepository;
use Laravel\Passport\Bridge\User;
use RuntimeException;

class MuitiAuthPassportRepository extends UserRepository
{

    public function getUserEntityByUserCredentials($username, $password, $grantType, ClientEntityInterface $clientEntity)
    {
        $provider = config('auth.guards.api.provider');

        if (is_null($model = config('auth.providers.'.$provider.'.model'))) {
            throw new RuntimeException('Unable to determine authentication model from configuration.');
        }

        if (method_exists($model, 'findForPassport')) {
            $user = (new $model)->findForPassport($username);
        } else {
            if (method_exists($model, 'findForPassportMulti')) {
                $user = (new $model)->findForPassportMulti(App::make(Request::class)->all());
            }else{
                $user = (new $model)->where('email', $username)->first();
            }
        }

        if (! $user) {
            return;
        } elseif (method_exists($user, 'validateForPassportPasswordGrant')) {
            if (! $user->validateForPassportPasswordGrant($password)) {
                return;
            }
        } elseif (! $this->hasher->check($password, $user->getAuthPassword())) {
            return;
        }

        return new User($user->getAuthIdentifier());
    }

}
验证传递参数的时候,如果模型里面存在自定义的 findForPassportMulti 函数,则把所有的 Request 都传递进去,再多字段也不怕!!!
if (method_exists($model, 'findForPassport')) {
            $user = (new $model)->findForPassport($username);
        } else {
            if (method_exists($model, 'findForPassportMulti')) {
                $user = (new $model)->findForPassportMulti(App::make(Request::class)->all());
            }else{
                $user = (new $model)->where('email', $username)->first();
            }
        }
3.3 修改Student Model:
<?php

namespace App\Models;

use Laravel\Passport\HasApiTokens;
use Illuminate\Notifications\Notifiable;
use Illuminate\Foundation\Auth\User as Authenticatable;

class Student extends Authenticatable
{
    use HasApiTokens, Notifiable;

    protected $fillable = [
        'school_id', 'student_no', 'password',
    ];

    protected $hidden = [
        'password'
    ];

    public function findForPassportMulti($request)
    {
        return $this->where('school_id', $request['school_id'])->where('student_no', $request['student_no'])->first();
    }

}
把所有的 Request 都传递进去以外,应该还有一种更优雅的实现逻辑,参考 Laravel 用户多字段认证优雅解决方案。
3.4 在 App\Providers 新建 PassportServiceProvider.php,引入上面的扩展
<?php

namespace App\Providers;

use App\Auth\MuitiAuthPassportRepository;
use App\Auth\PasswordGrant;
// use League\OAuth2\Server\Grant\PasswordGrant;
use Laravel\Passport\PassportServiceProvider as BasePassportServiceProvider;
use Laravel\Passport\Passport;

class PassportServiceProvider extends BasePassportServiceProvider
{
    /**
     * Create and configure a Password grant instance.
     *
     * @return PasswordGrant
     */
    protected function makePasswordGrant()
    {
        $grant = new PasswordGrant(
            $this->app->make(MuitiAuthPassportRepository::class),
            // $this->app->make(\Laravel\Passport\Bridge\UserRepository::class),
            $this->app->make(\Laravel\Passport\Bridge\RefreshTokenRepository::class)
        );

        $grant->setRefreshTokenTTL(Passport::refreshTokensExpireIn());

        return $grant;
    }

}
这个 PassportServiceProvider 继承了 Passport 原有的 PassportServiceProvider,需要手动加入 config/app.php的providers配置段中:
'providers' => [
        ...
         * Application Service Providers...
         */
        App\Providers\AppServiceProvider::class,
        App\Providers\AuthServiceProvider::class,
        // App\Providers\BroadcastServiceProvider::class,
        App\Providers\EventServiceProvider::class,
        App\Providers\RouteServiceProvider::class,
        App\Providers\PassportServiceProvider::class,
    ],
测试一下多字段的登录,正常返回Token.:
curl --request POST \
  --url http://multiauth.test/oauth/token \
  --header 'accept: application/json' \
  --header 'content-type: application/x-www-form-urlencoded' \
  --data 'school_id=10001&student_no=17000003001&password=st001&client_id=2&client_secret=secret&grant_type=password&scope=&provider=students'
如果少传一个字段student_no:
curl --request POST \
  --url http://multiauth.test/oauth/token \
  --header 'accept: application/json' \
  --header 'content-type: application/x-www-form-urlencoded' \
  --data 'school_id=10001&password=st001&client_id=2&client_secret=secret&grant_type=password&scope=&provider=students'
则妥妥的报错:Undefined index: student_no
Laravel的异常抛出有更优雅的实现方式,不在本文讨论范围内。
至此,多字段登录的功能也实现了。
下一章讲解退出登录以及通过Middleware限制访问。
本作品采用《CC 协议》,转载必须注明作者和本文链接


 关于 LearnKu


推荐文章: