
golang 打桩,mock 数据怎么玩?
4 / 0 / 创建于 3年前
 阿兵云原生 的个人博客
工作中,很多公司都要求效能,要求自动化测试
实际落地的过程中发现,要做单元测试,自动化测试,可能当前这个服务会依赖其他服务的数据,接口等等
那么单测或者自动化的过程中,就可能会由于其他服务的原因或者环境因素导致测试失败,或者阻塞测试
这是一个问题,必须得解决,我们可以采用 golang 自带的 mock 工具来完成,可以在一些必要的地方进行数据打桩,mock 数据
gomock 是什么?
是官方提供的 一个 mock 数据的 框架
官方还提供了 mockgen 工具用来帮助 我们 生成测试代码
github 上项目地址是:github.com/golang/mock
官方是这样介绍 gomock 的:
gomock 是一个用于Go 编程语言的 mocking 框架。它与 Go 的内置测试包集成得很好,但也可以在其他环境中使用。
如何使用 gomock?
使用 gomock 也是非常简单的,先 go get 对应的 工具 gomock 和 mockgen
go get -u github.com/golang/mock/gomock
go get -u github.com/golang/mock/mockgen
可以写一个 demo 来进行实践
目录结构是这样的
gomock_test
├── go.mod
├── go.sum
├── main.go
└── myfunc
    ├── mock_myfunc.go
    ├── myfunc.go
    ├── myuser.go
    └── myuser_test.go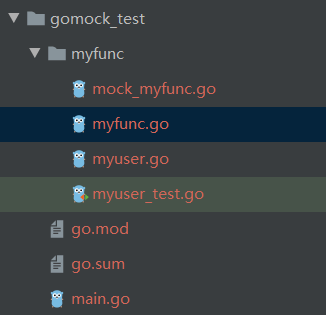
- mock_myfunc.go 是使用 mockgen 工具生成的
- myfunc.go 主要是用于模拟调用的底层实现
- myuser.go 主要是去调用 myfunc.go 里面的接口
- myuser_test.go 是 对应的单测文件
myfunc.go
- 编写一个 接口,里面有一个
GetInfo() string方法,模拟获取信息
package myfunc

type MyFunc interface {
    GetInfo() string
}
myuser.go
- 调用 myfunc.go 中的方法,调用接口获取信息
package myfunc

func getUser(m MyFunc) string {
    user := m.GetInfo()
    return user
}
mock 文件的生成
mock_myfunc.go
这个文件不是我们自己写的,是通过 mockgen 工具生成的 ,生成方式如下:
在 myfunc.go 的同级目录下执行如下语句,填入 source 源文件 和 目标文件即可生成新的 mock 文件
mockgen -source=myfunc.go -destination=mock_myfunc.go我们可以看一下 mockgen 的帮助文档,还有其他的参数供我们使用
# mockgen
mockgen has two modes of operation: source and reflect.

Source mode generates mock interfaces from a source file.
It is enabled by using the -source flag. Other flags that
may be useful in this mode are -imports and -aux_files.
Example:
        mockgen -source=foo.go [other options]

Reflect mode generates mock interfaces by building a program
that uses reflection to understand interfaces. It is enabled
by passing two non-flag arguments: an import path, and a
comma-separated list of symbols.
Example:
        mockgen database/sql/driver Conn,Driver

  -aux_files string
        (source mode) Comma-separated pkg=path pairs of auxiliary Go source files.
  -build_flags string
        (reflect mode) Additional flags for go build.
  -copyright_file string
        Copyright file used to add copyright header
  -debug_parser
        Print out parser results only.
  -destination string
        Output file; defaults to stdout.
  -exec_only string
        (reflect mode) If set, execute this reflection program.
  -imports string
        (source mode) Comma-separated name=path pairs of explicit imports to use.
  -mock_names string
        Comma-separated interfaceName=mockName pairs of explicit mock names to use. Mock names default to 'Mock'+ interfaceName suffix.
  -package string
        Package of the generated code; defaults to the package of the input with a 'mock_' prefix.
  -prog_only
        (reflect mode) Only generate the reflection program; write it to stdout and exit.
  -self_package string
        The full package import path for the generated code. The purpose of this flag is to prevent import cycles in the generated code by trying to include its own package. This can happen if the mock's package is set to one of its inputs (usually the main one) and the output is stdio so mockgen cannot detect the final output package. Setting this flag will then tell mockgen which import to exclude.
  -source string
        (source mode) Input Go source file; enables source mode.
  -version
        Print version.
  -write_package_comment
        Writes package documentation comment (godoc) if true. (default true)
2021/10/30 16:43:25 Expected exactly two arguments
一般用的比较多的就是
-source源文件-destination目标文件-imports依赖的需要 import 的包-build_flags传递给build工具的参数-aux_files接口文件不止一个文件时附加文件-package设置 mock 文件的包名,不设置的话,mock 文件的包名默认是mock_输入文件的包名
通过上述指令生成的 mock 文件如下:

- NewMockMyFunc
创建一个新的 mock 实例
- EXPECT
允许调用者指示预期用途的对象
- GetInfo
mock 的基础方法,也就是我们需要 mock 的方法
具体的如何使用
myuser_test.go
- myuser.go 对应的单测文件 , 使用了 mock 的方式
package myfunc

import (
    "fmt"
    "testing"
    gomock "github.com/golang/mock/gomock"
)

func Test_getUser(t *testing.T) {
    mockCtl := gomock.NewController(t)
    mockMyFunc := NewMockMyFunc(mockCtl)
    mockMyFunc.EXPECT().GetInfo().Return("xiaomotong")
    v := getUser(mockMyFunc)
    if v == "xiaomotong" {
        fmt.Println("get user right!")
    } else {
        t.Error("get error user")
    }
}
看到上述单测文件,可以还不是特别明白区别,我们来看看不用 mock 的时候,我们会是如何去写单测呢
package myfunc

import (
    "fmt"
    "testing"
    gomock "github.com/golang/mock/gomock"
)

func Test_getUser(t *testing.T) {
    m := myfunc.CreateMyFunc() // 也就是说需要自己创建一个对象
    v := getUser(m)
    if v == "xiaomotong" {
        fmt.Println("get user right!")
    } else {
        t.Error("get error user")
    }
}
m := myfunc.CreateMyFunc() 看到上述这一句话,是创建对应的对象,再将该对象作为参数传入到 getUser 函数中,正常情况下这样做单测没有问题
但是如果这个时候创建 MyFunc 对象由于对外部还有依赖导致还没有编码好,可是也不能阻塞我们的单元测试
这个时候使用最上面的 mock 方案就显得尤为重要,可以使用 mock 的方式,mock 一个 MyFunc 对象,并设置好返回值即可完成,如:
mockCtl := gomock.NewController(t)
mockMyFunc := NewMockMyFunc(mockCtl)
mockMyFunc.EXPECT().GetInfo().Return("xiaomotong")
执行上述代码结果如下:
> go test
get user right!
PASS
ok      mygomock/myfunc 0.427s
感兴趣的朋友可以使用起来,用的多了就会更加熟悉
使用 gomock 的好处?
- gomock 实现了较为完整的基于 interface 的 Mock 功能,能够与 Golang 内置的 testing包良好集成,也能用于其它的测试环境中
- 学习成本低,很快就能上手
工具需要用起来,才能发挥他的价值,需要的可以用起来吧
欢迎点赞,关注,收藏
朋友们,你的支持和鼓励,是我坚持分享,提高质量的动力

好了,本次就到这里
常见技术是开放的,我们的心态,更应是开放的。拥抱变化,向阳而生,努力向前行。
我是阿兵云原生,欢迎点赞关注收藏,下次见~
本作品采用《CC 协议》,转载必须注明作者和本文链接


 关于 LearnKu


推荐文章: