
一步步像 cms 一样安装 Laravel 项目
3 / 17 / 创建于 6年前 /
 左手指月 的个人博客
最近公司有个新需求,在前端安装项目的时候,可以像安装CMS一样,一步步的进行安装,有这需求的产品不多,百度了挺长时间。。。。功夫不负有心人,终于找到一个工具Laravel Web Installer,竟然还是Laravel的扩展包且支持Laravel5.1+版本,简直是完美定制啊,查看了下文档,发现配置简单,功能齐全,下面简单的介绍下使用方法:
安装扩展包
composer require rachidlaasri/laravel-installer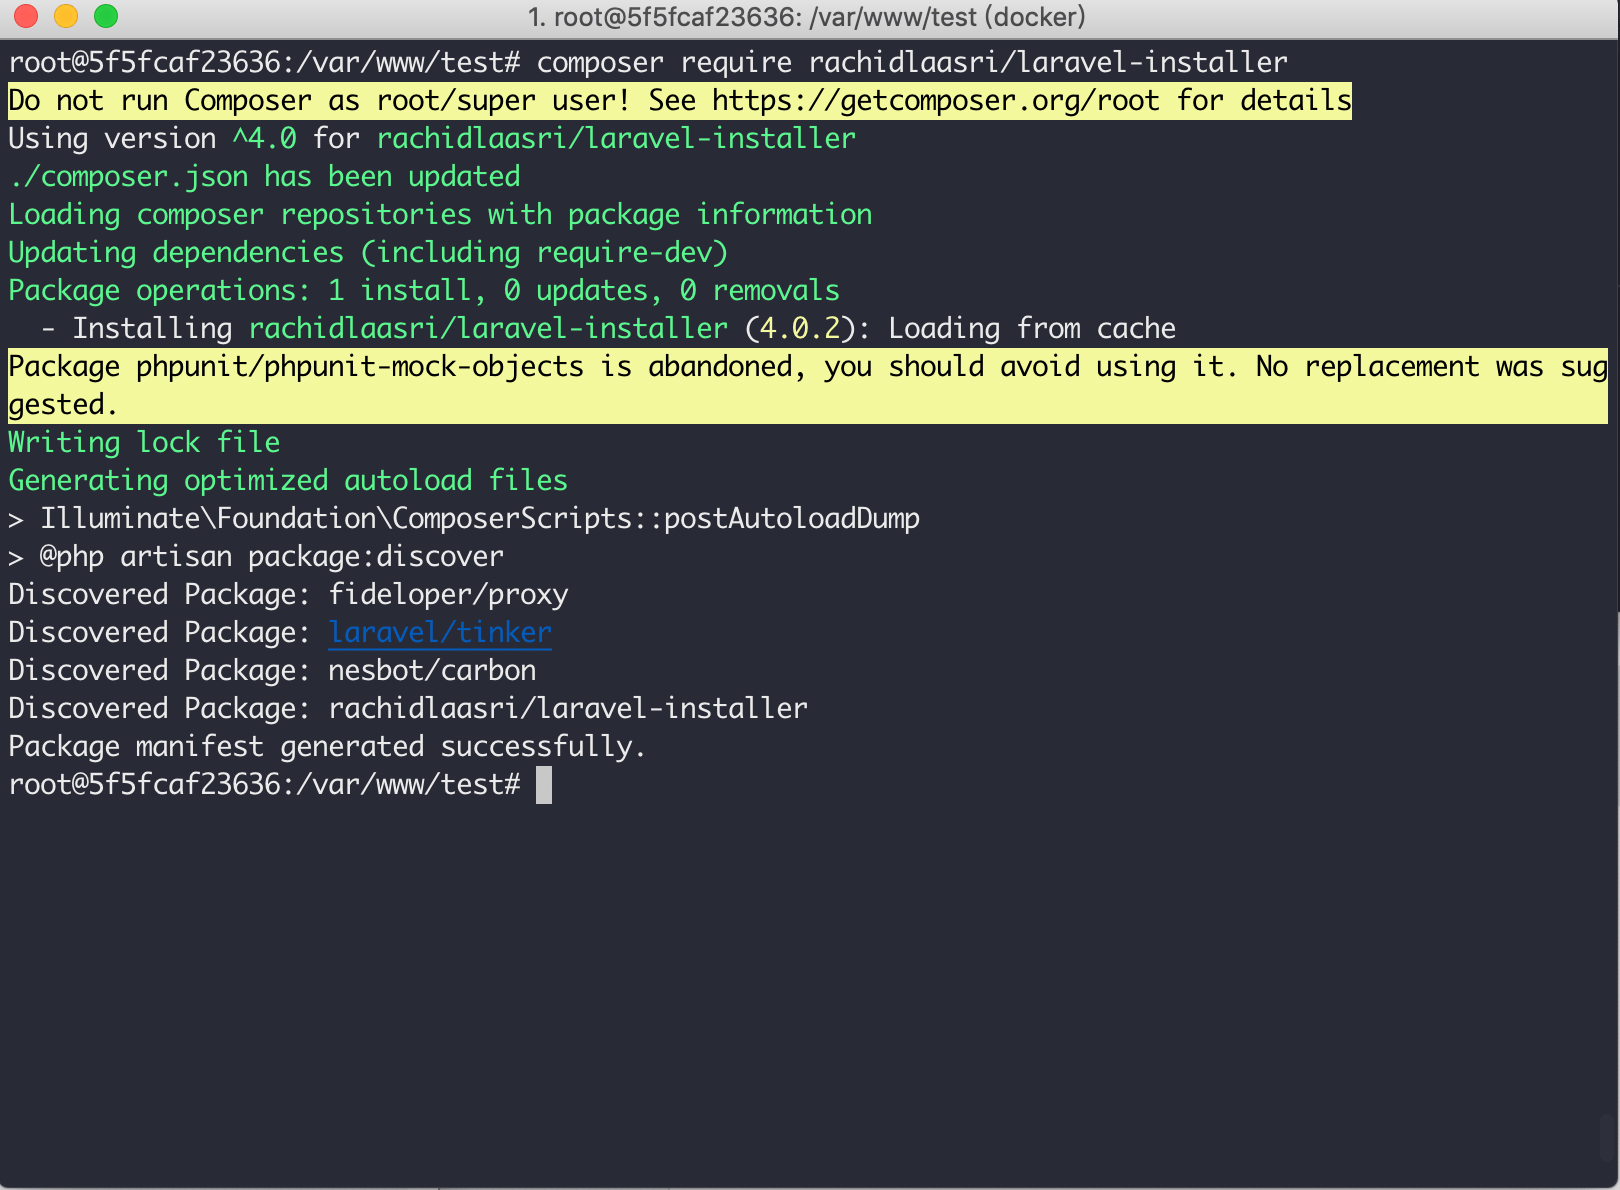
发布配置文件:
php artisan vendor:publish --tag=laravelinstaller可以看到生成了四个文件和目录。
第一行,/config/installer.php是此扩展包的配置文件:
<?php

use Illuminate\Validation\Rule;

return [

    /*
    |--------------------------------------------------------------------------
    | Server Requirements
    |--------------------------------------------------------------------------
    |
    | This is the default Laravel server requirements, you can add as many
    | as your application require, we check if the extension is enabled
    | by looping through the array and run "extension_loaded" on it.
    |
    */
    'core' => [
        'minPhpVersion' => '7.0.0'
    ],
    'final' => [
        'key' => true,
        'publish' => false
    ],
    'requirements' => [
        'php' => [
            'openssl',
            'pdo',
            'mbstring',
            'tokenizer',
            'JSON',
            'cURL',
        ],
        'apache' => [
            'mod_rewrite',
        ],
    ],

    /*
    |--------------------------------------------------------------------------
    | Folders Permissions
    |--------------------------------------------------------------------------
    |
    | This is the default Laravel folders permissions, if your application
    | requires more permissions just add them to the array list bellow.
    |
    */
    'permissions' => [
        'storage/framework/'     => '775',
        'storage/logs/'          => '775',
        'bootstrap/cache/'       => '775'
    ],

    /*
    |--------------------------------------------------------------------------
    | Environment Form Wizard Validation Rules & Messages
    |--------------------------------------------------------------------------
    |
    | This are the default form vield validation rules. Available Rules:
    | https://learnku.com/docs/laravel/5.4/validation#available-validation-rules
    |
    */
    'environment' => [
        'form' => [
            'rules' => [
                'app_name'              => 'required|string|max:50',
                'environment'           => 'required|string|max:50',
                'environment_custom'    => 'required_if:environment,other|max:50',
                'app_debug'             => [
                    'required',
                    Rule::in(['true', 'false']),
                ],
                'app_log_level'         => 'required|string|max:50',
                'app_url'               => 'required|url',
                'database_connection'   => 'required|string|max:50',
                'database_hostname'     => 'required|string|max:50',
                'database_port'         => 'required|numeric',
                'database_name'         => 'required|string|max:50',
                'database_username'     => 'required|string|max:50',
                'database_password'     => 'required|string|max:50',
                'broadcast_driver'      => 'required|string|max:50',
                'cache_driver'          => 'required|string|max:50',
                'session_driver'        => 'required|string|max:50',
                'queue_driver'          => 'required|string|max:50',
                'redis_hostname'        => 'required|string|max:50',
                'redis_password'        => 'required|string|max:50',
                'redis_port'            => 'required|numeric',
                'mail_driver'           => 'required|string|max:50',
                'mail_host'             => 'required|string|max:50',
                'mail_port'             => 'required|string|max:50',
                'mail_username'         => 'required|string|max:50',
                'mail_password'         => 'required|string|max:50',
                'mail_encryption'       => 'required|string|max:50',
                'pusher_app_id'         => 'max:50',
                'pusher_app_key'        => 'max:50',
                'pusher_app_secret'     => 'max:50',
            ],
        ],
    ],

    /*
    |--------------------------------------------------------------------------
    | Installed Middlware Options
    |--------------------------------------------------------------------------
    | Different available status switch configuration for the
    | canInstall middleware located in `canInstall.php`.
    |
    */
    'installed' => [
        'redirectOptions' => [
            'route' => [
                'name' => 'welcome',
                'data' => [],
            ],
            'abort' => [
                'type' => '404',
            ],
            'dump' => [
                'data' => 'Dumping a not found message.',
            ]
        ],
    ],

    /*
    |--------------------------------------------------------------------------
    | Selected Installed Middlware Option
    |--------------------------------------------------------------------------
    | The selected option fo what happens when an installer intance has been
    | Default output is to `/resources/views/error/404.blade.php` if none.
    | The available middleware options include:
    | route, abort, dump, 404, default, ''
    |
    */
    'installedAlreadyAction' => '',

    /*
    |--------------------------------------------------------------------------
    | Updater Enabled
    |--------------------------------------------------------------------------
    | Can the application run the '/update' route with the migrations.
    | The default option is set to False if none is present.
    | Boolean value
    |
    */
    'updaterEnabled' => 'true',

];
里面主要包含所有你部署时对目标服务器的配置参数、所需php扩展、目录权限以及.env文件参数规则定义,这将在安装时查看服务器环境是否符合预期。
第二行,/public/installer是安装程序的css、js、image等文件,这里就不一一展示了,有兴趣的自己安装下看看。
第三行,/resources/views/vendor/installer是程序的模版文件。
第四行,/resources/lang是程序的语言版本,可自定义设置程序中的文字。
开始安装
安装此扩展包后,有两条路由,/install和/update,前者是首次安装程序路由,后者是以后项目更新时使用的路由。
这里需要注意的是,第一次安装默认是/install路由,首次安装完成后,会在storage文件夹下生成一个installed文件,表示此项目已经安装过,如果想再次安装,需要删掉这个文件,否则会出现404。
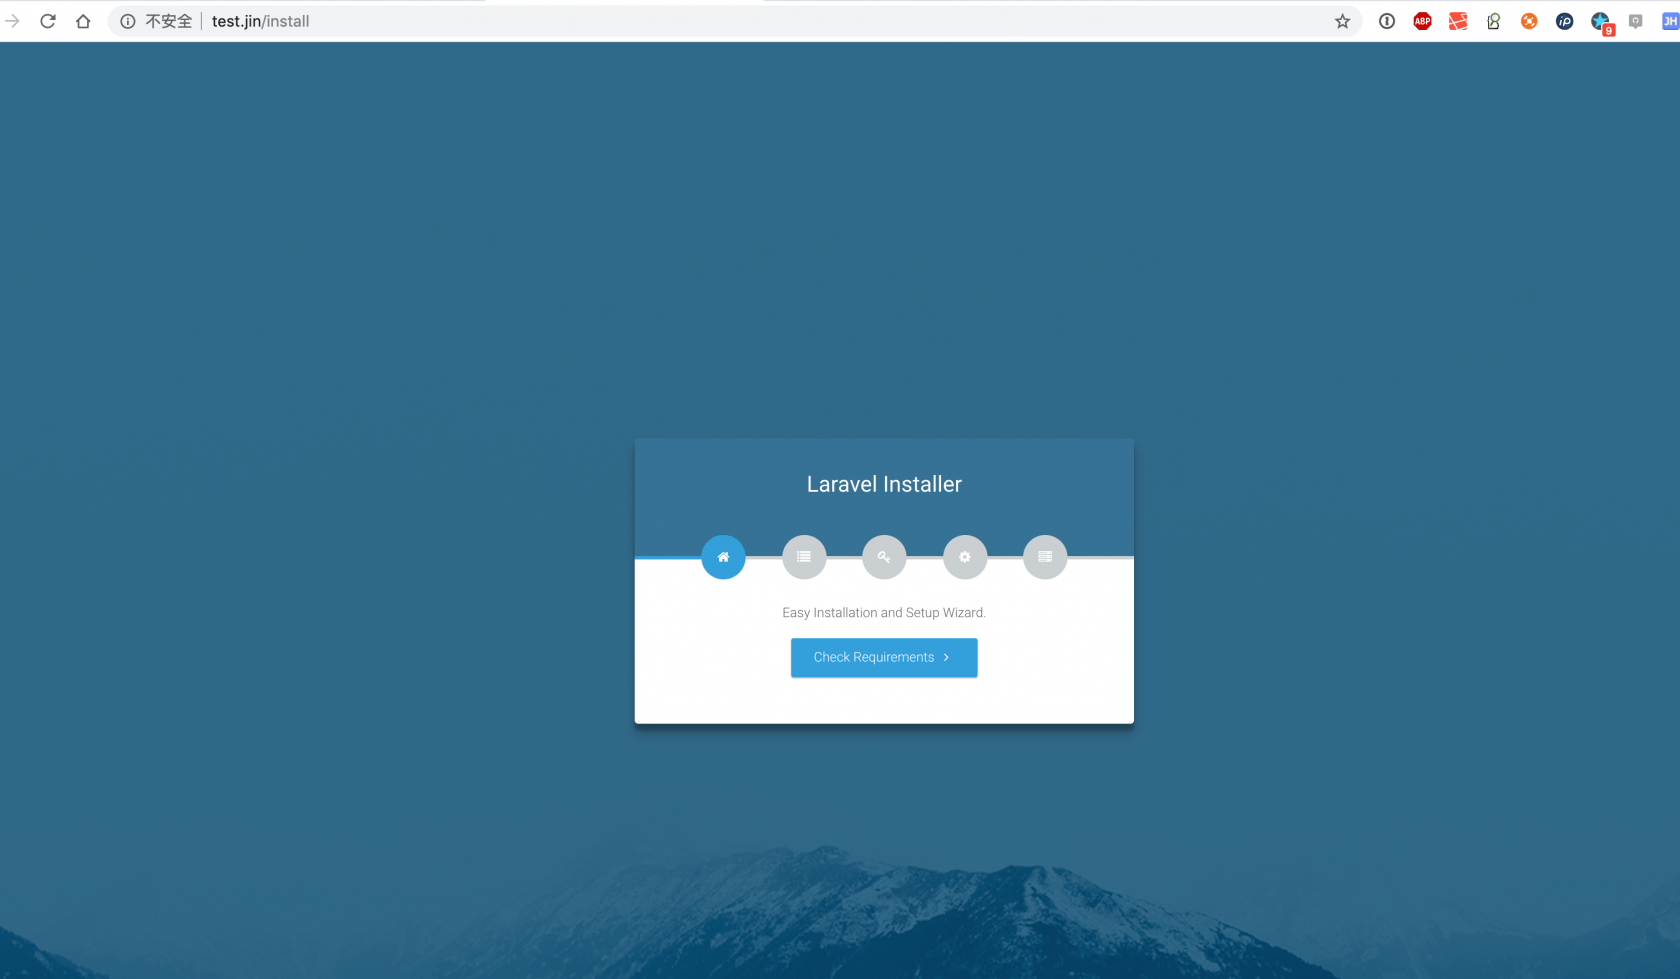
漂亮的安装界面,当然,你也可以自己修改你想展示的界面及文字。
服务器环境检测: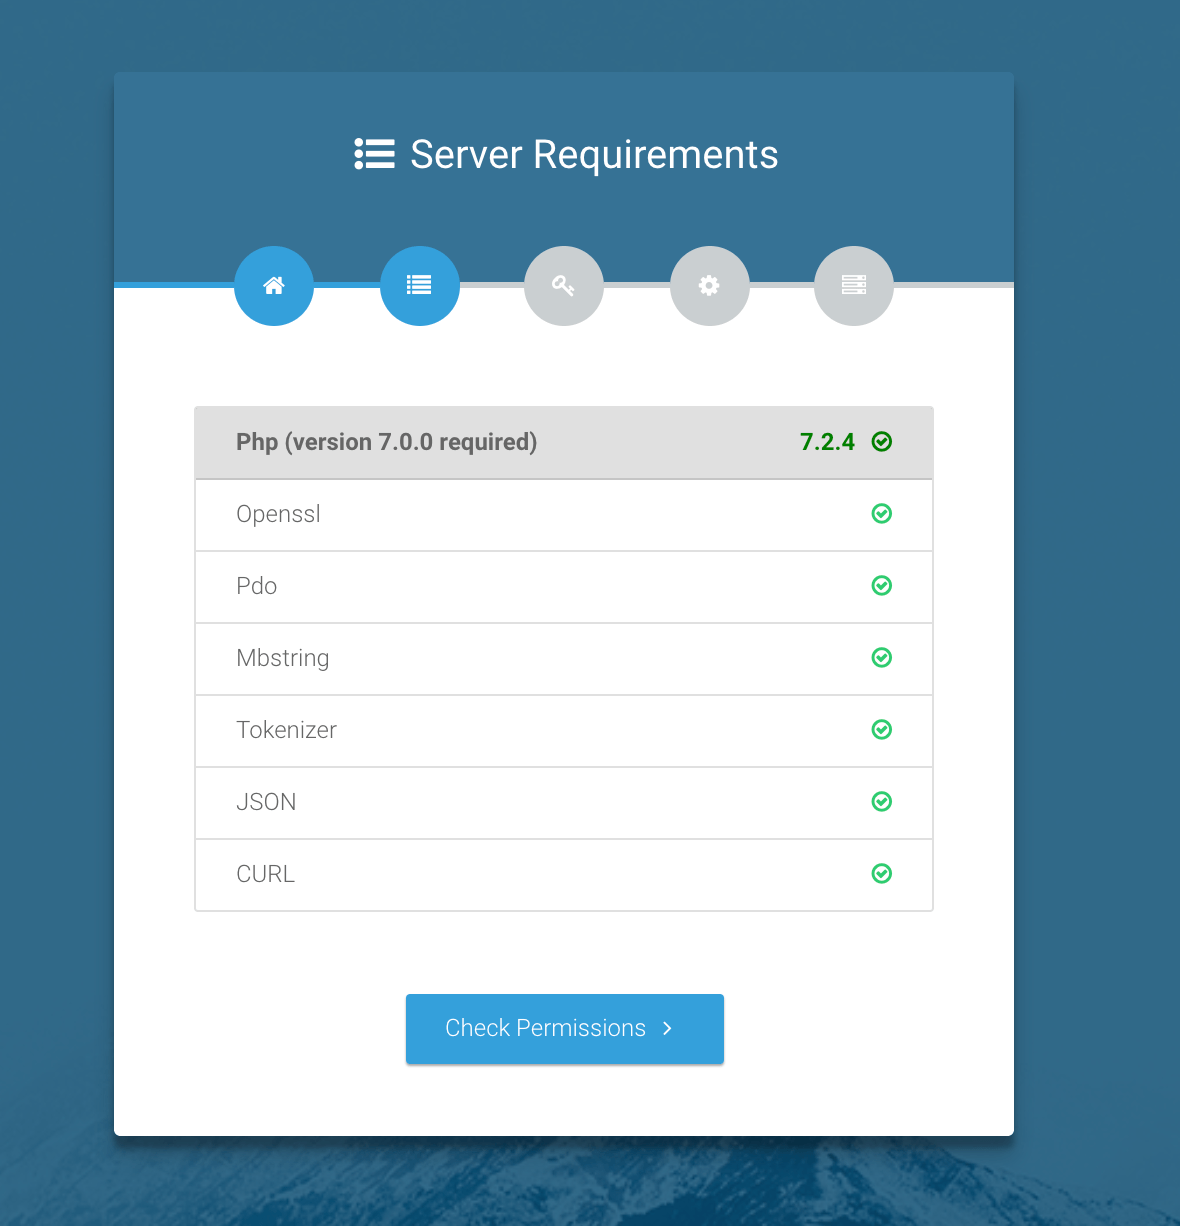
权限检测: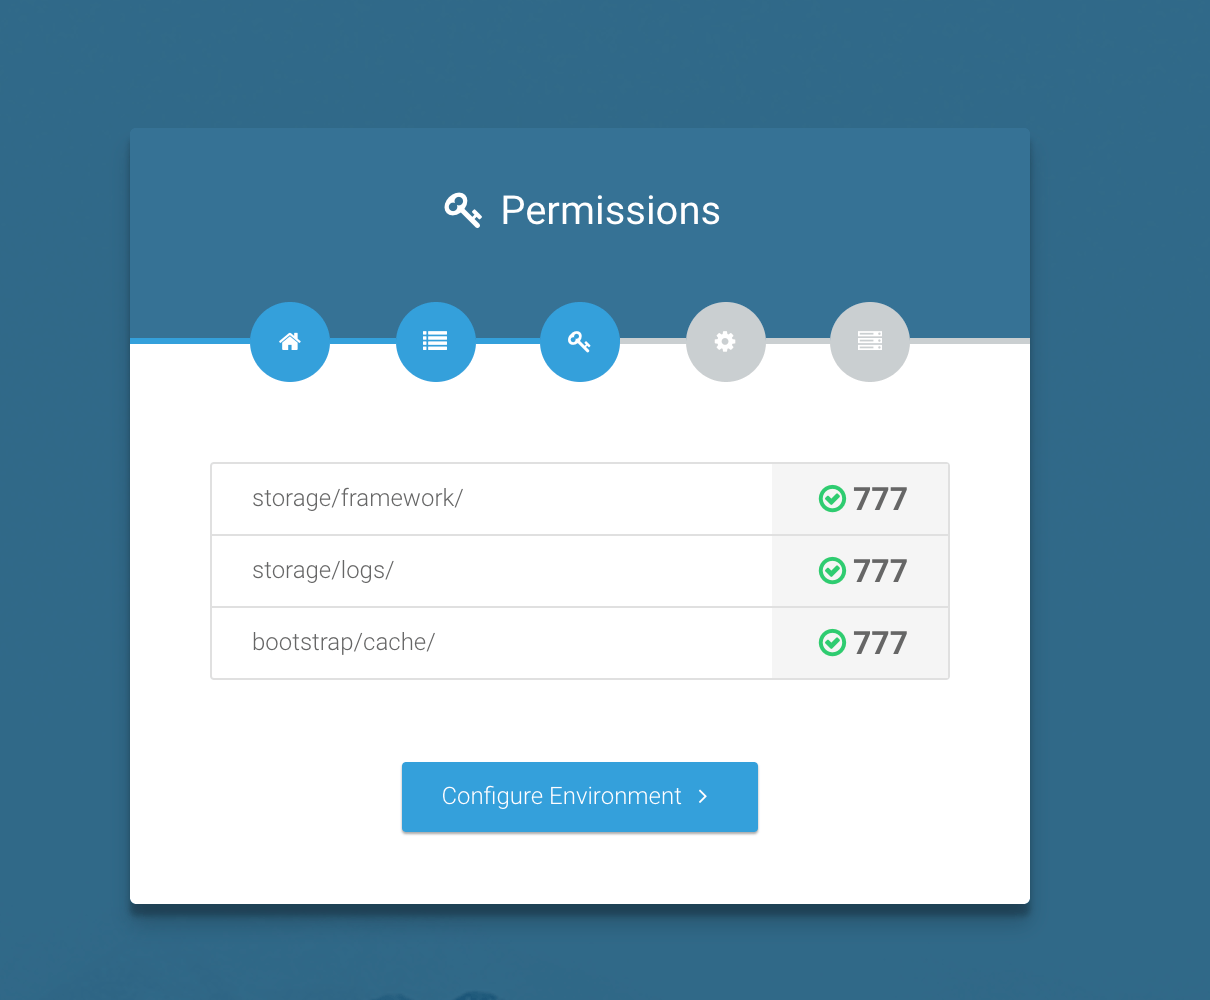
可选的两种.env文件配置方法: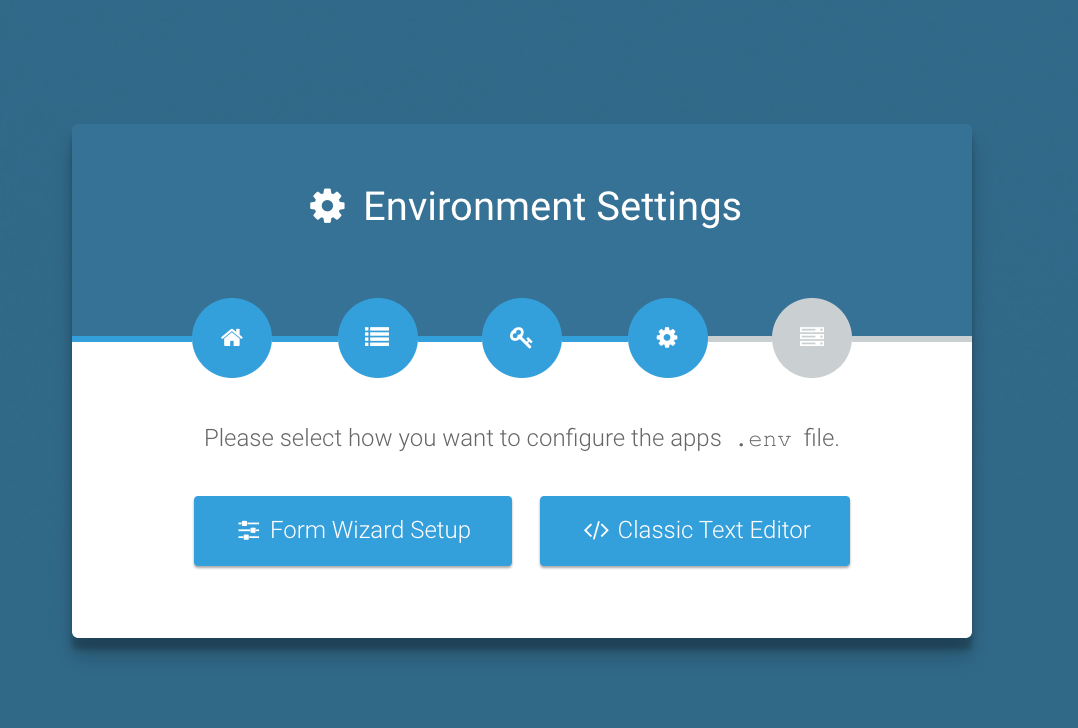
第一种,表单形式,逐项配置: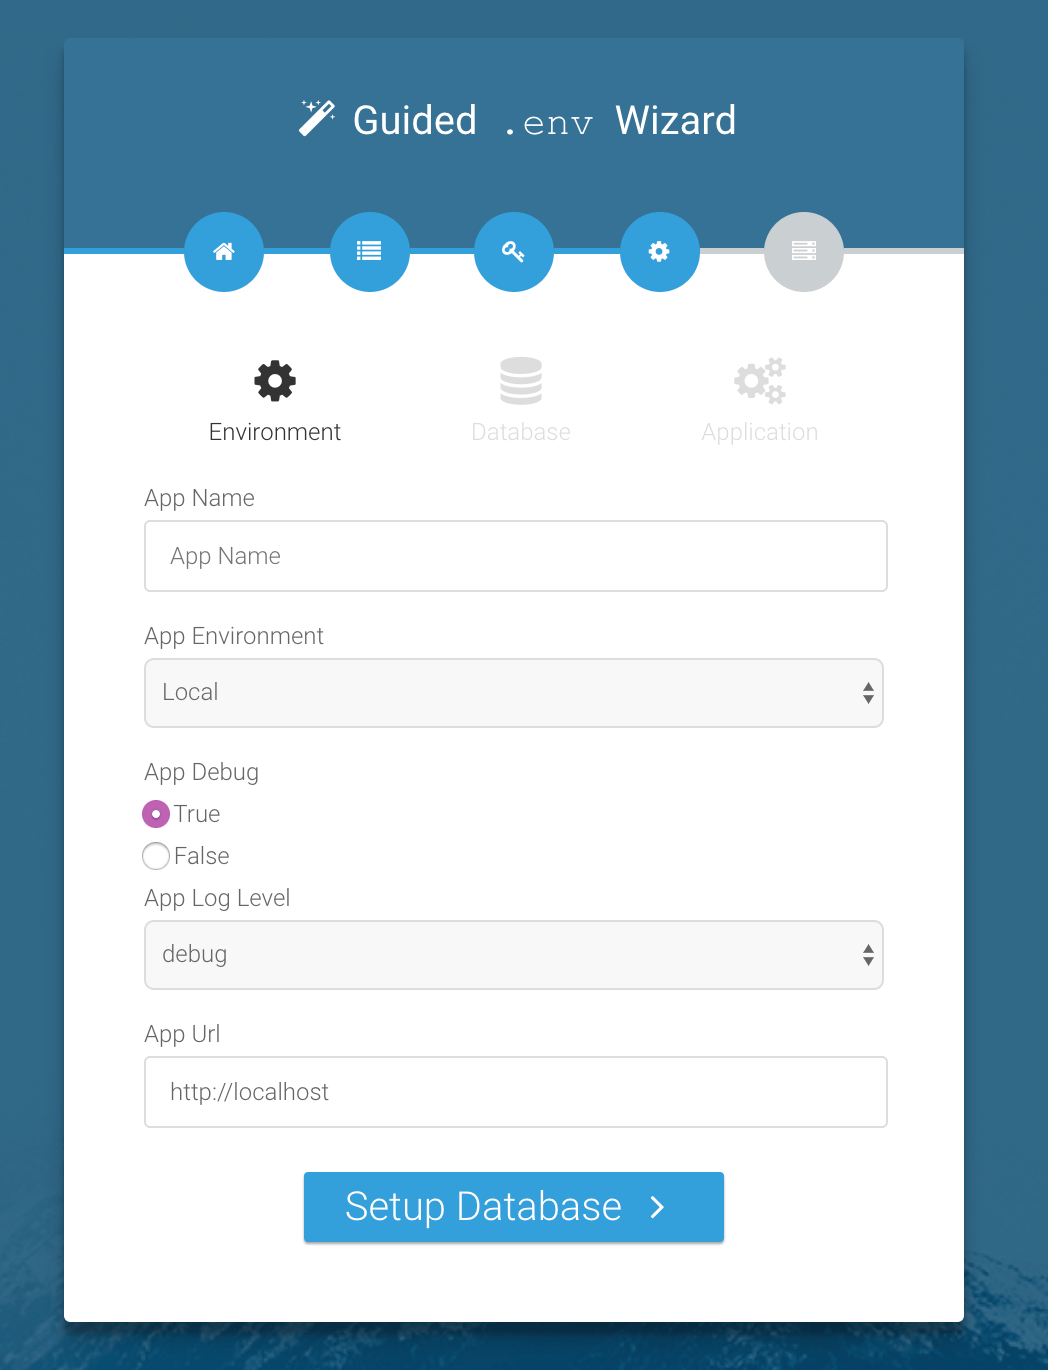
还有一种是直接复制粘贴你的.env文件信息: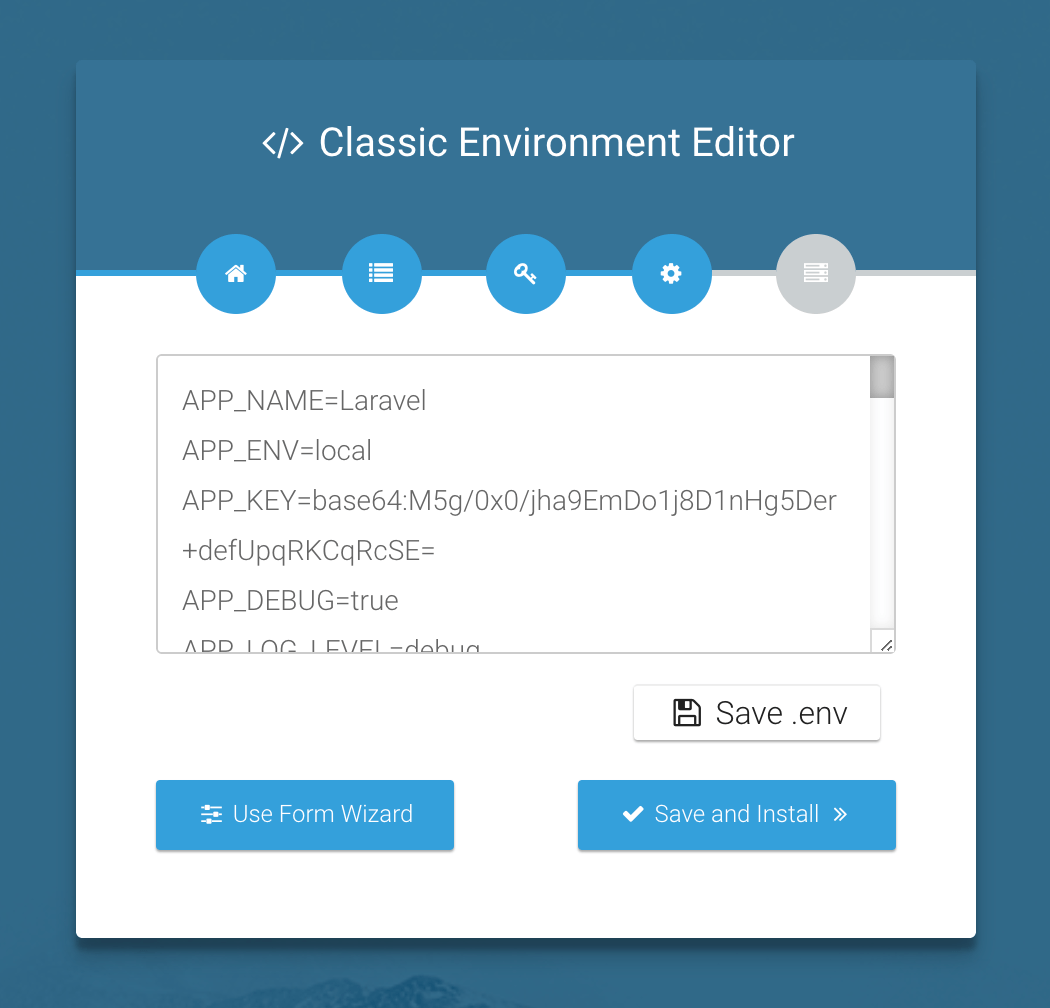
一切配置好后,点击安装: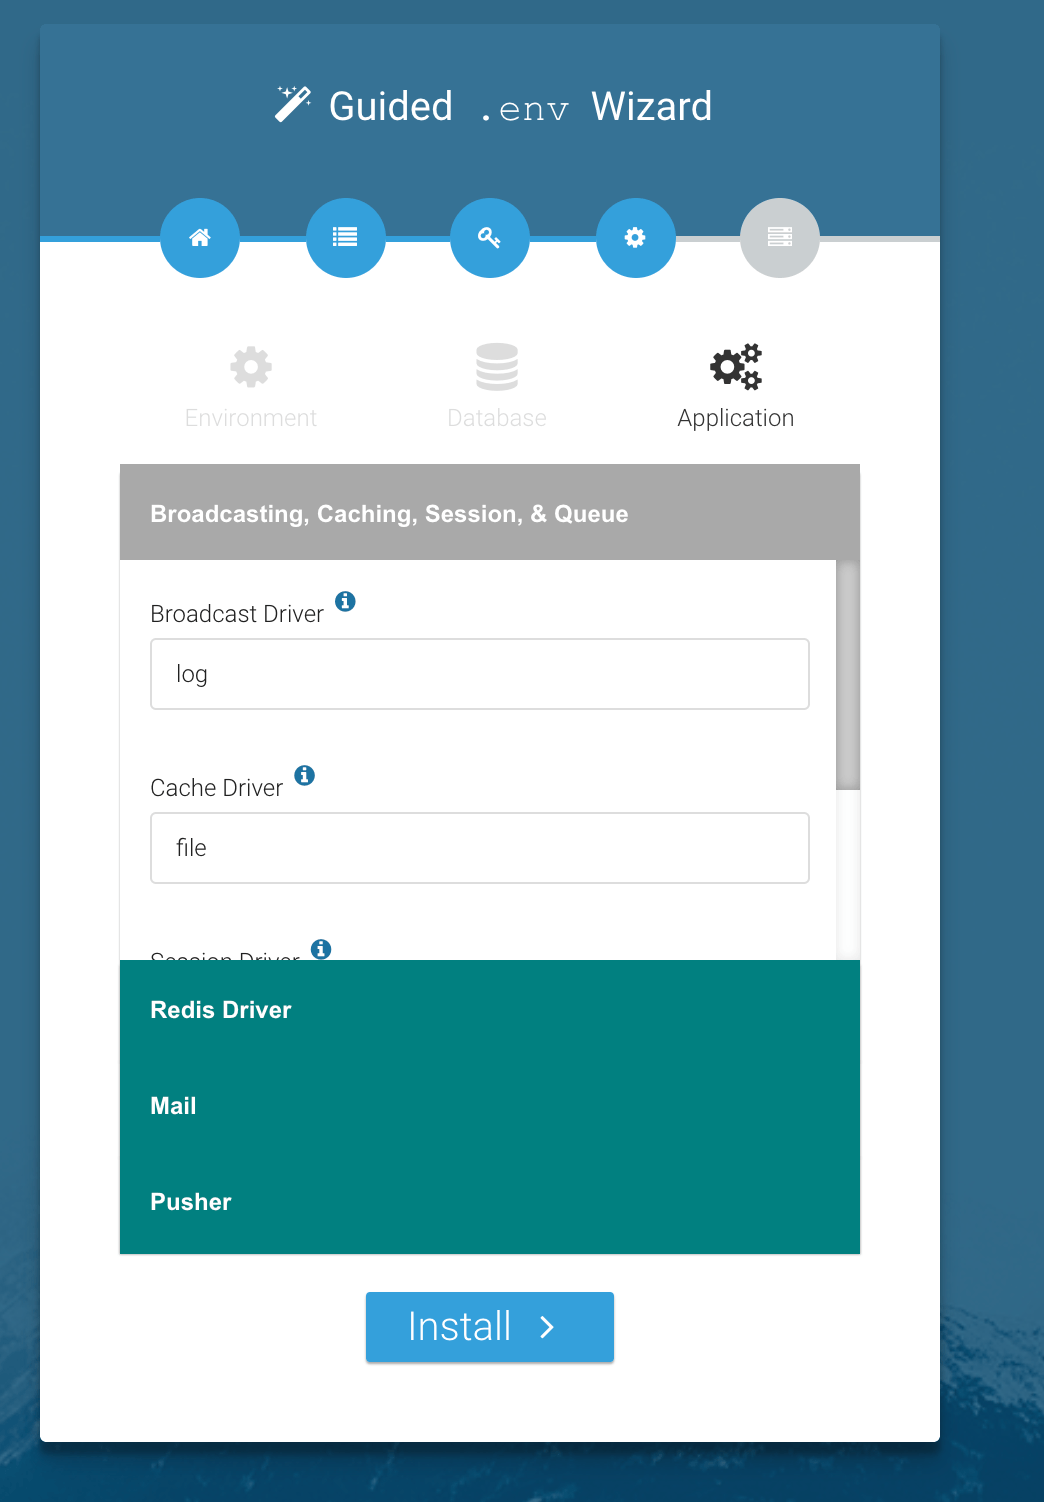
安装成功界面: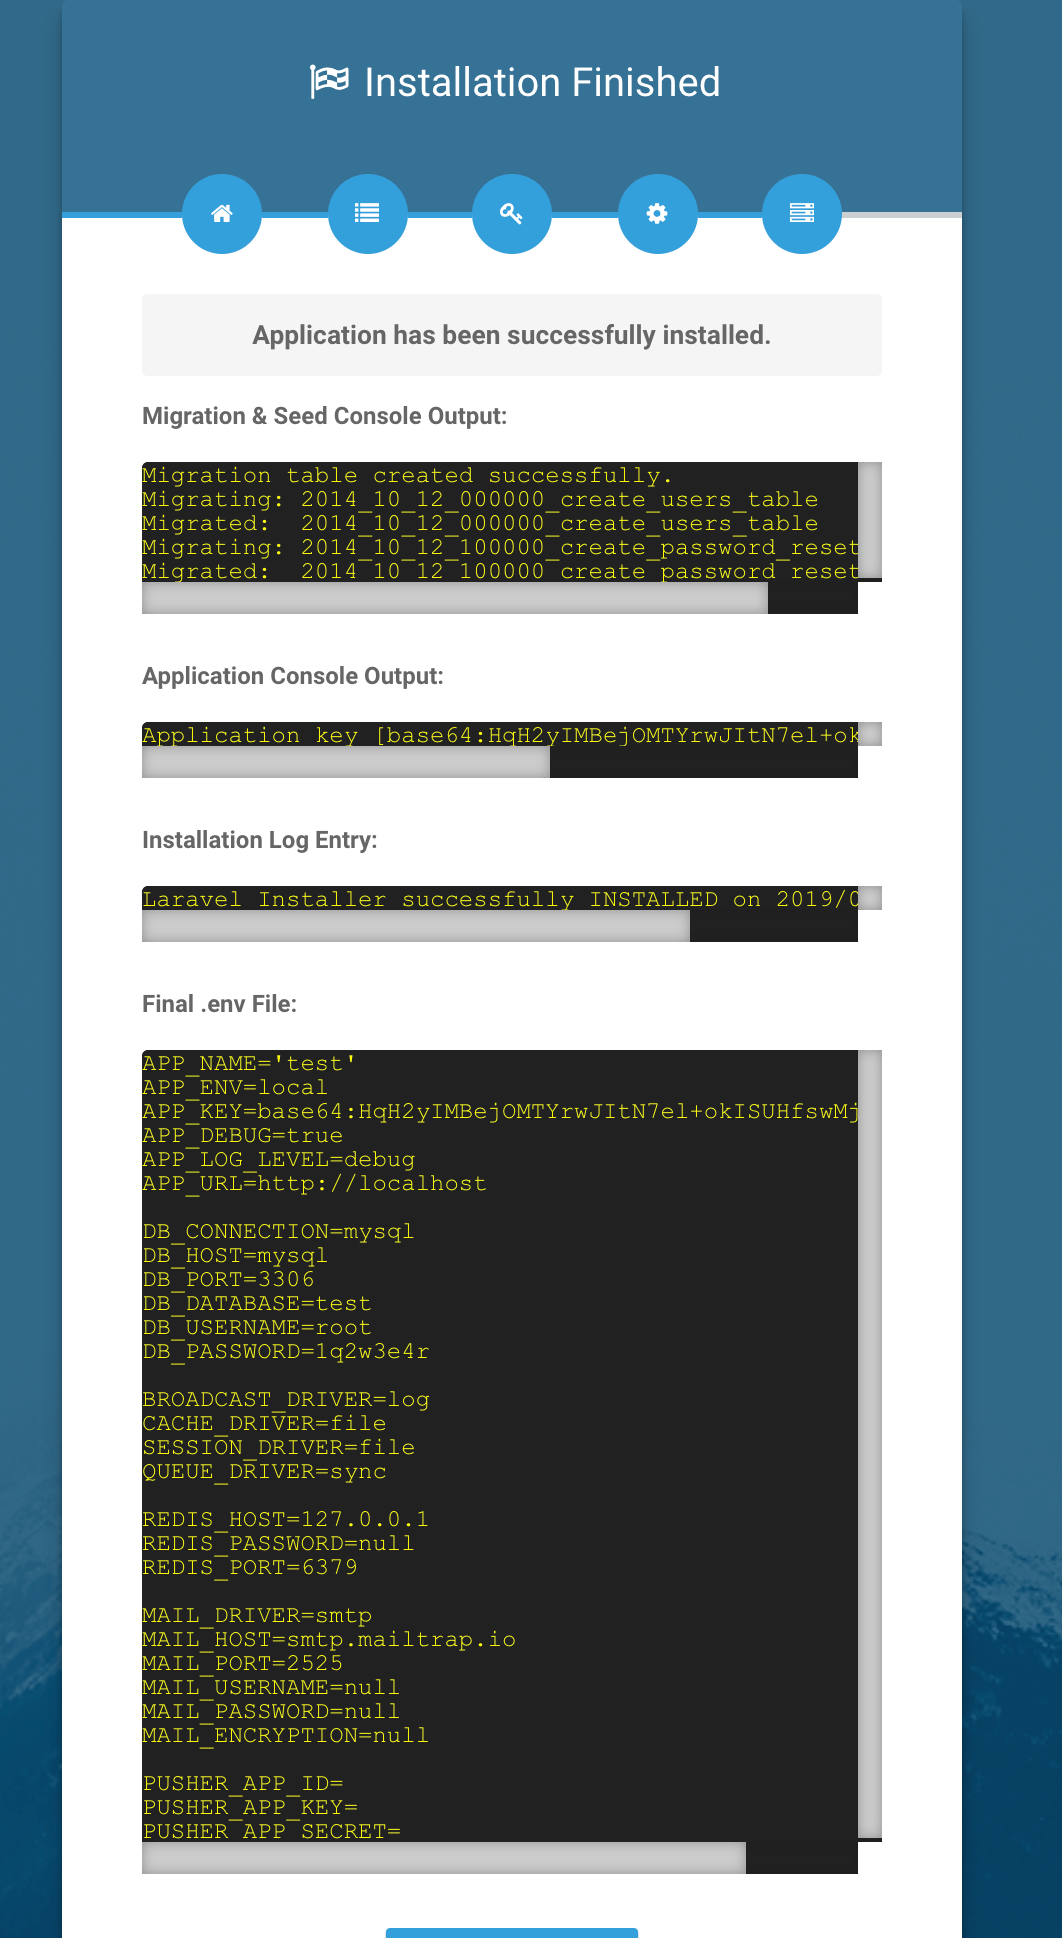
可以看到,这里展示了数据库迁移信息以及.env文件信息。点击退出,就可以展示你的项目首页了,是不是非常方便?
更新项目
由于进入/update路由之前会判断你项目中datebase/migrations文件夹下的文件数量,是否大于数据库migrations表中的记录行数,如果大于,将呈现更新程序界面,否则,展示404页面。
更新程序步骤界面: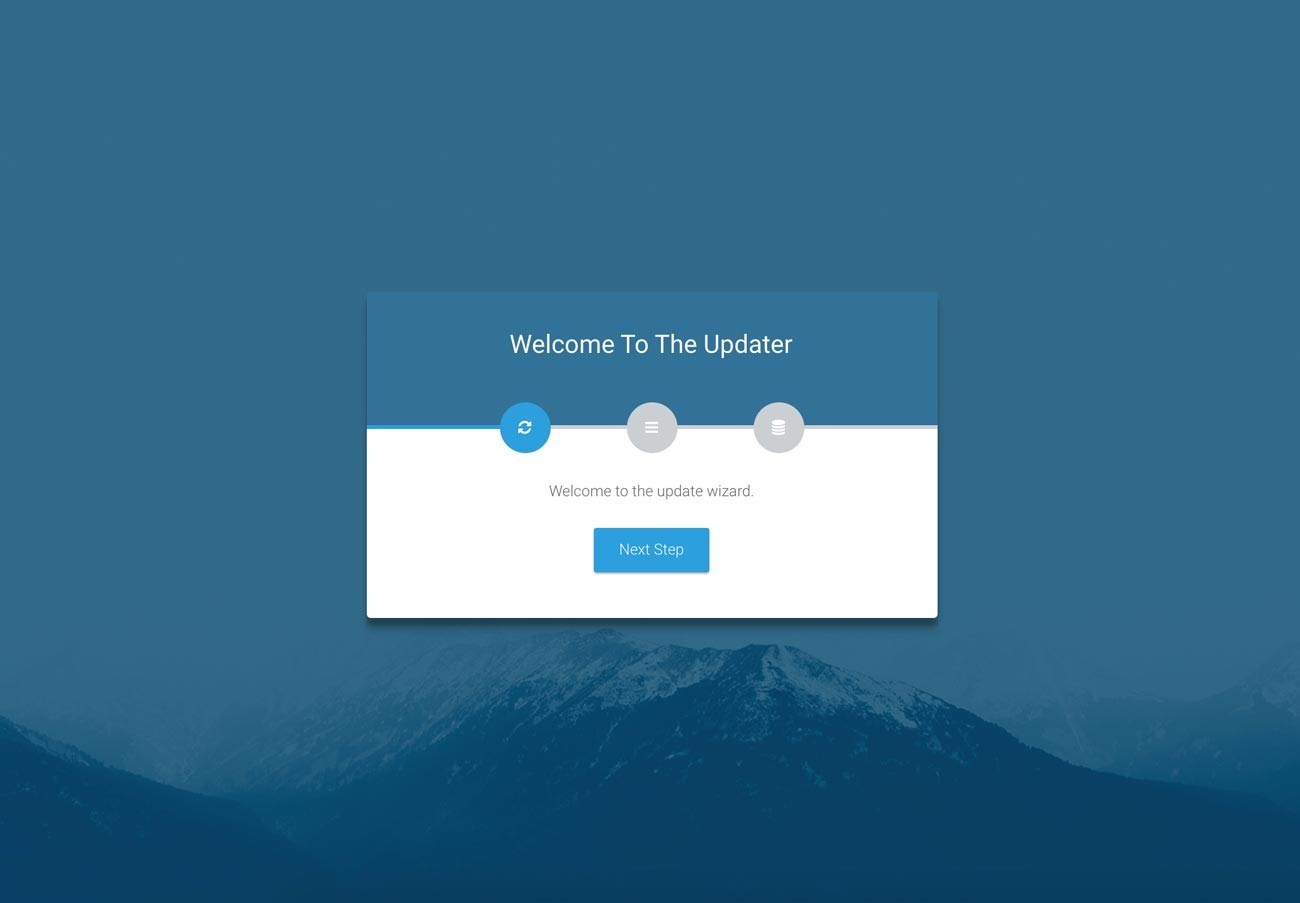
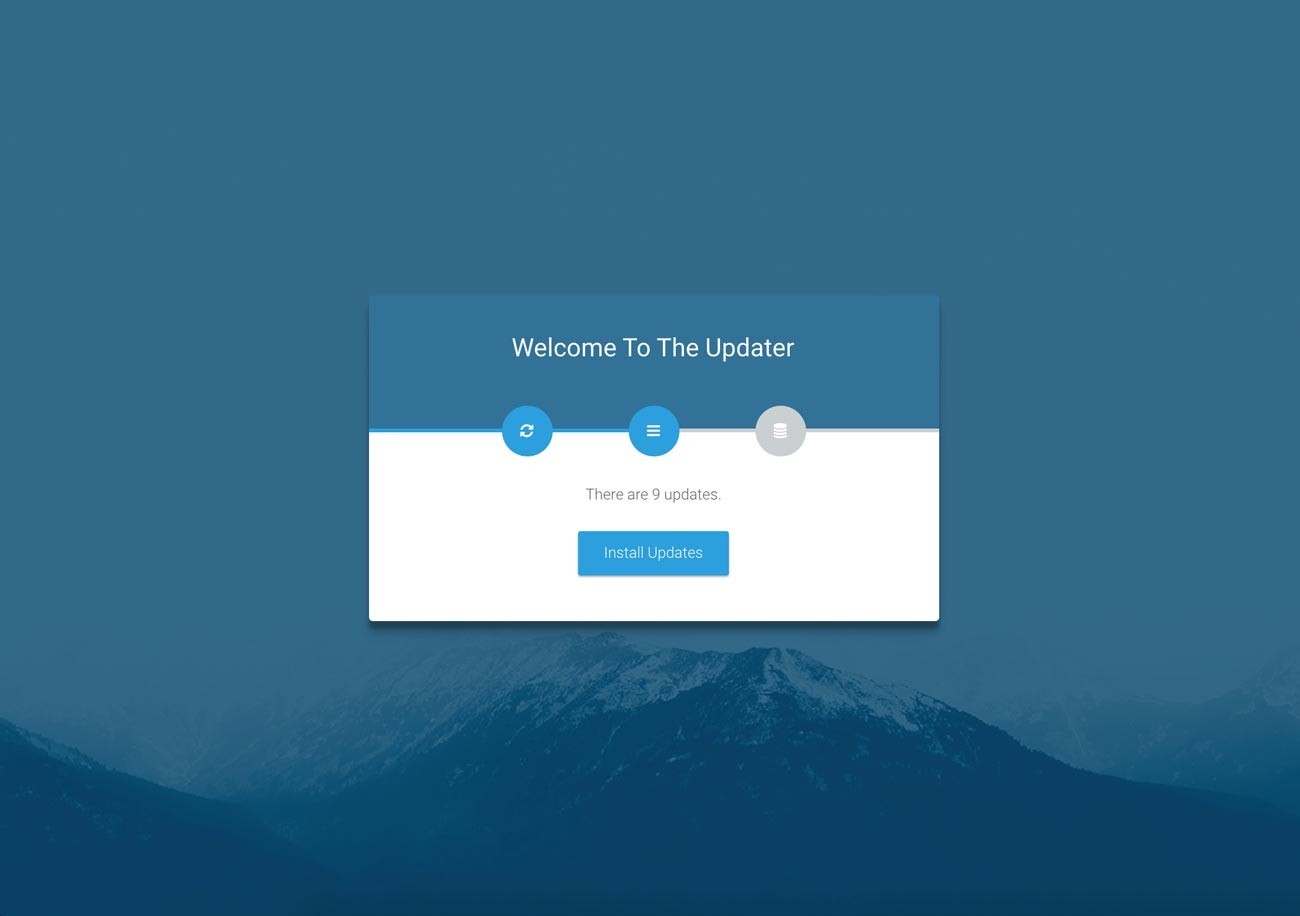
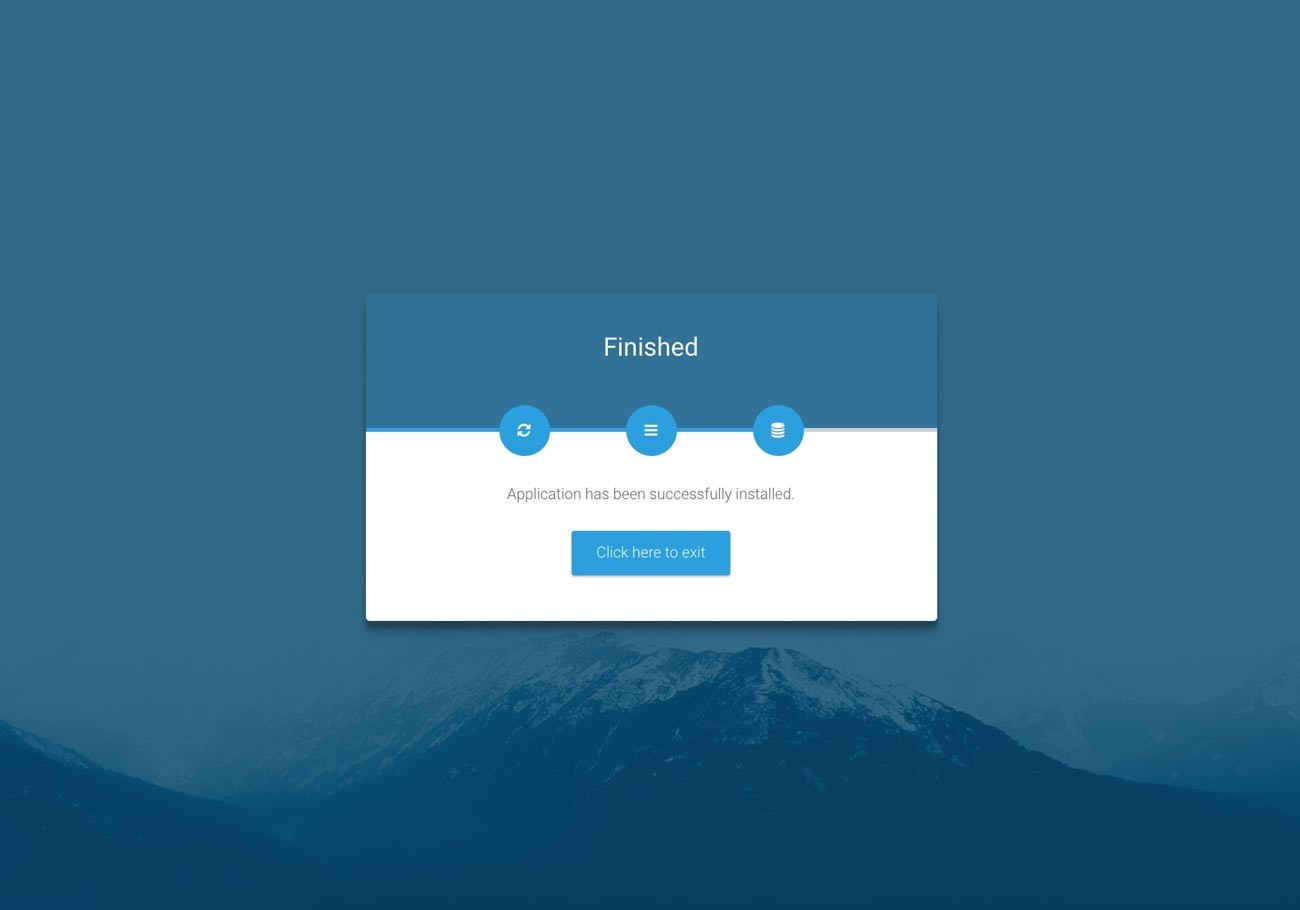
更新步骤比较简单,执行数据库迁移生成或者修改表。
至此,整个扩展包介绍完了,希望对你有用~~~
本作品采用《CC 协议》,转载必须注明作者和本文链接


 关于 LearnKu


推荐文章: