
(二)使用 jenkins 灵活的构建项目
11 / 0 / 创建于 6年前 /
 一个人的江湖 的个人博客
一、想要灵活的构建项目的不同分支怎么办?
1、安装 Git Parameter 插件
打开系统管理 –> 插件管理
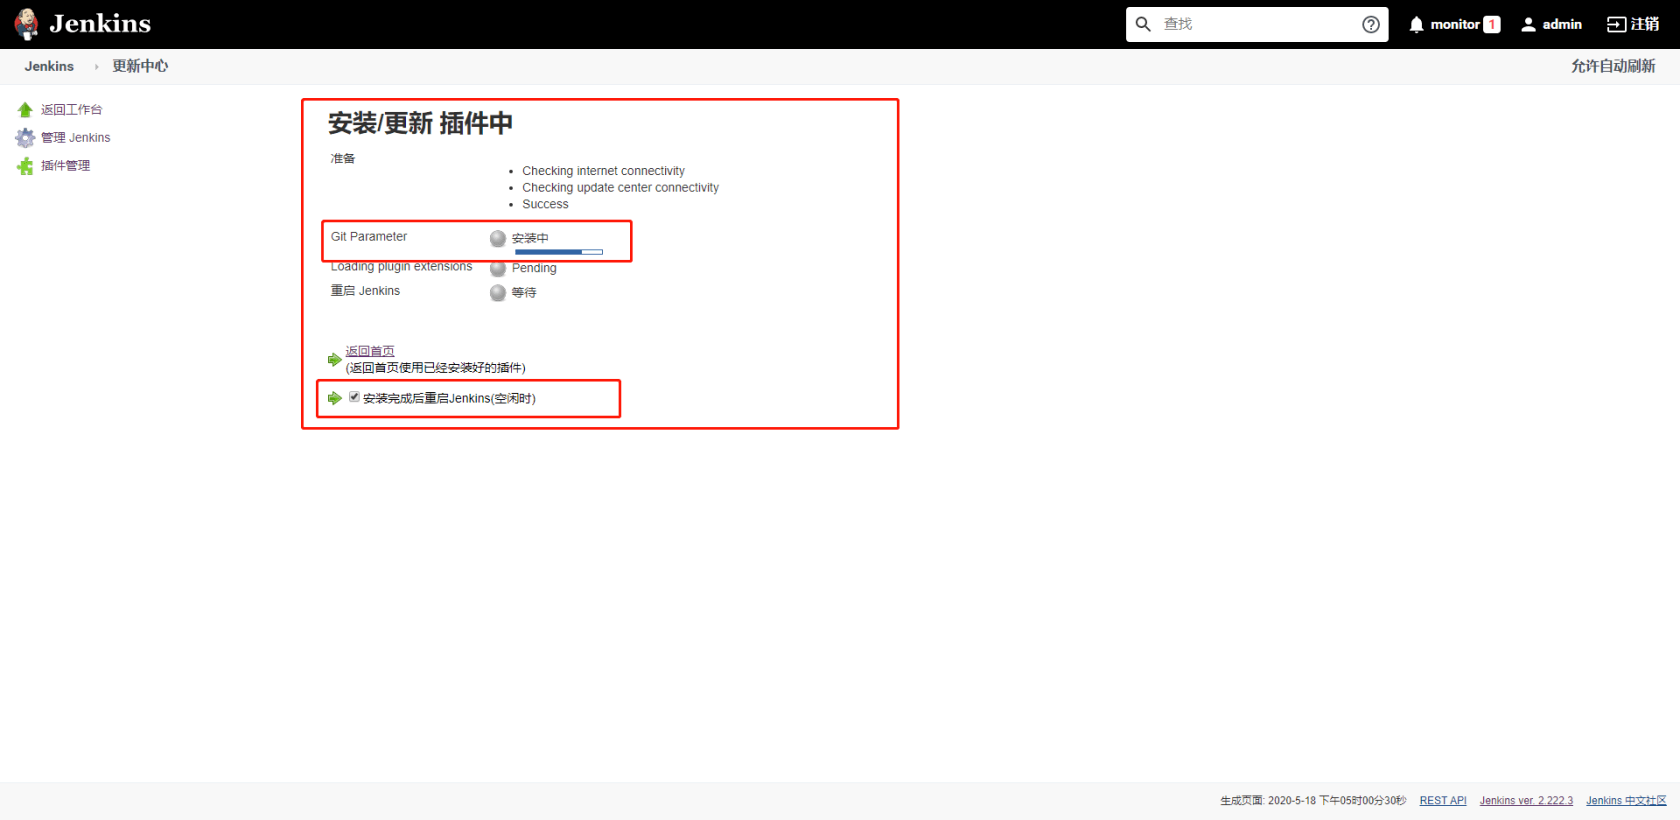
在可选插件选项中搜索 Git Parameter,并将它勾选,直接进行安装,等待安装完成并重启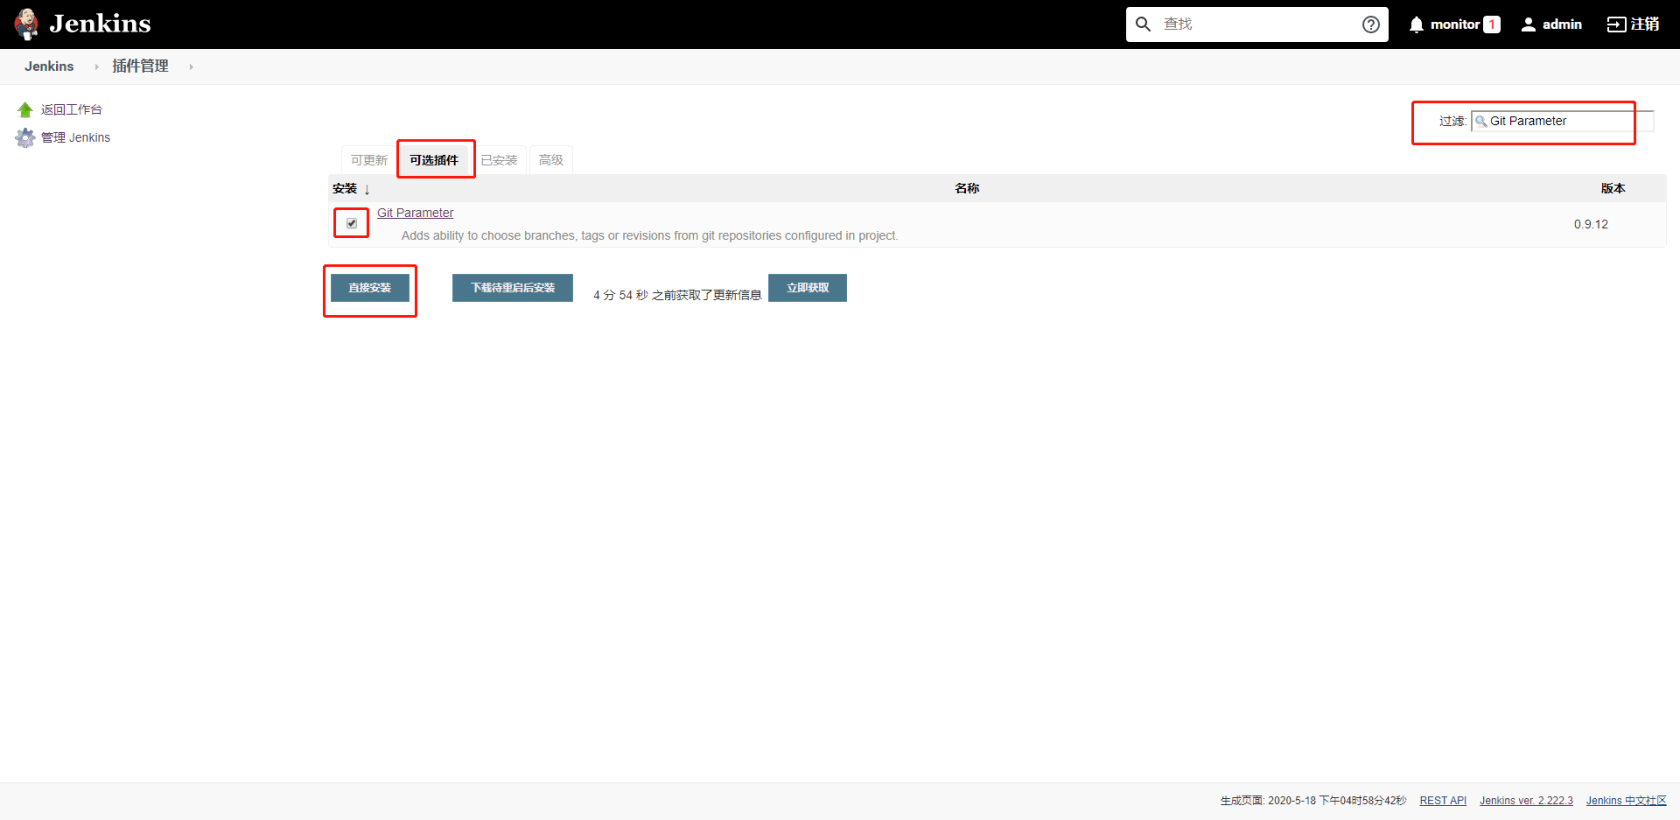

此时在已安装选项中可以看到该插件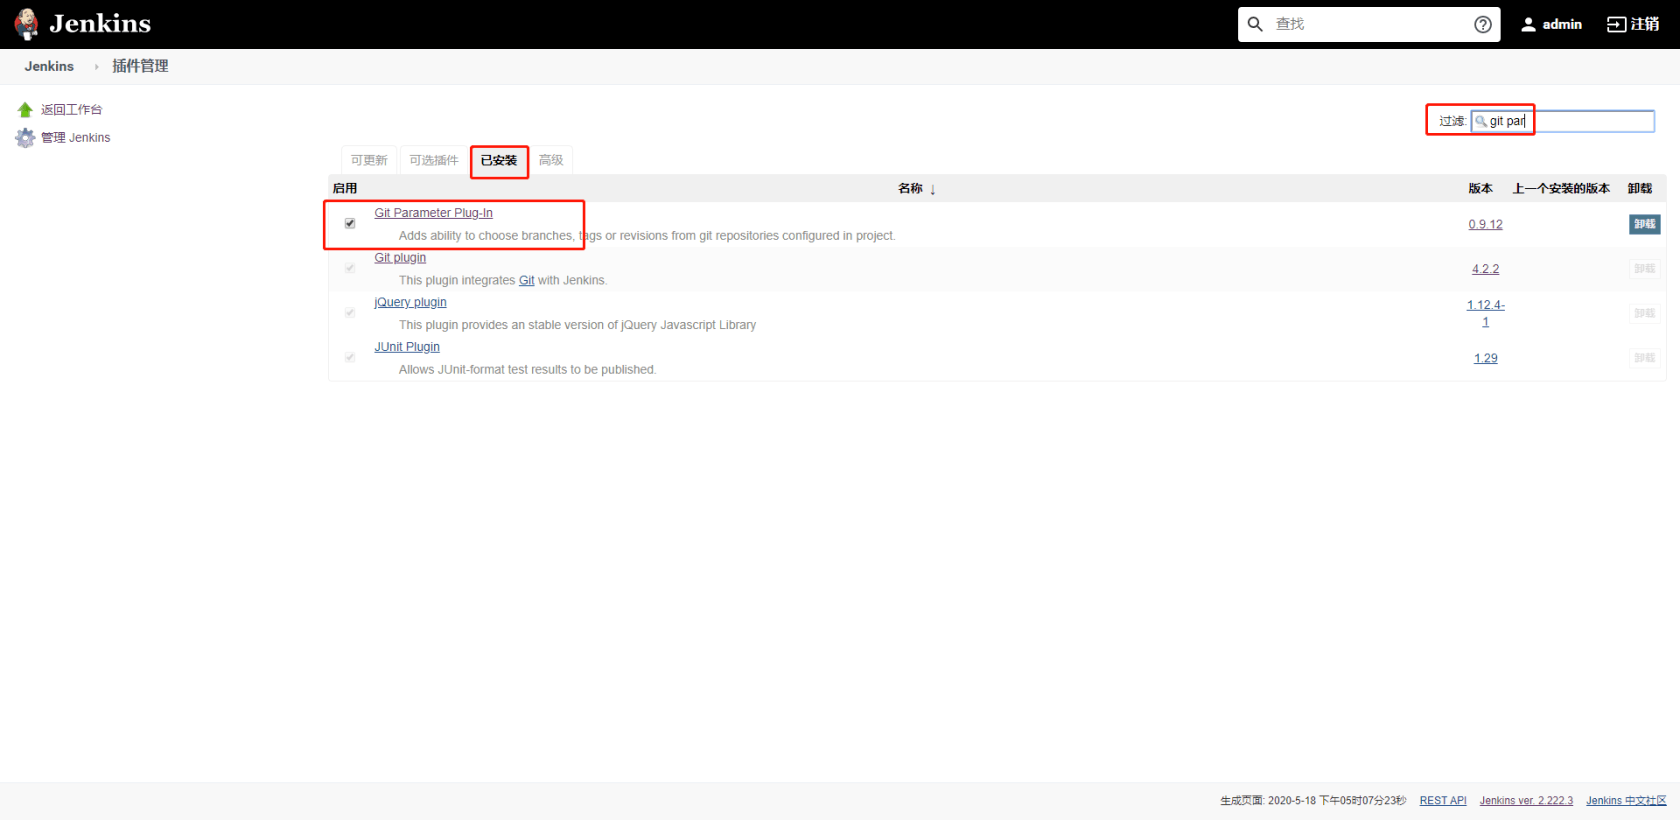
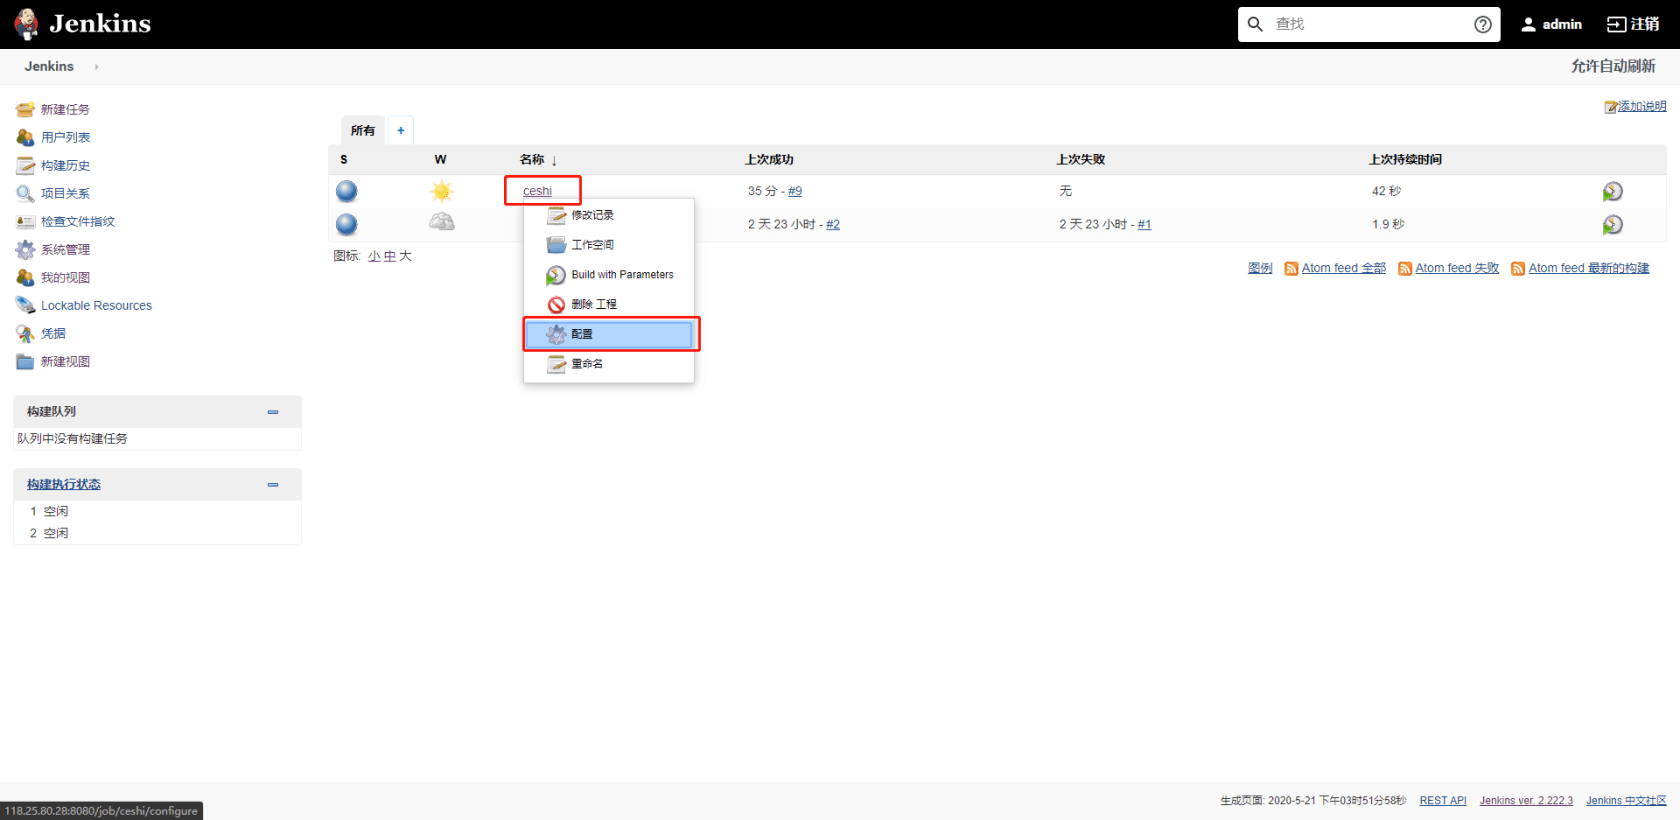
2、重新配置我们之前已有的任务工程
在 General 选项下,勾选参数化构建过程,并添加 Git 参数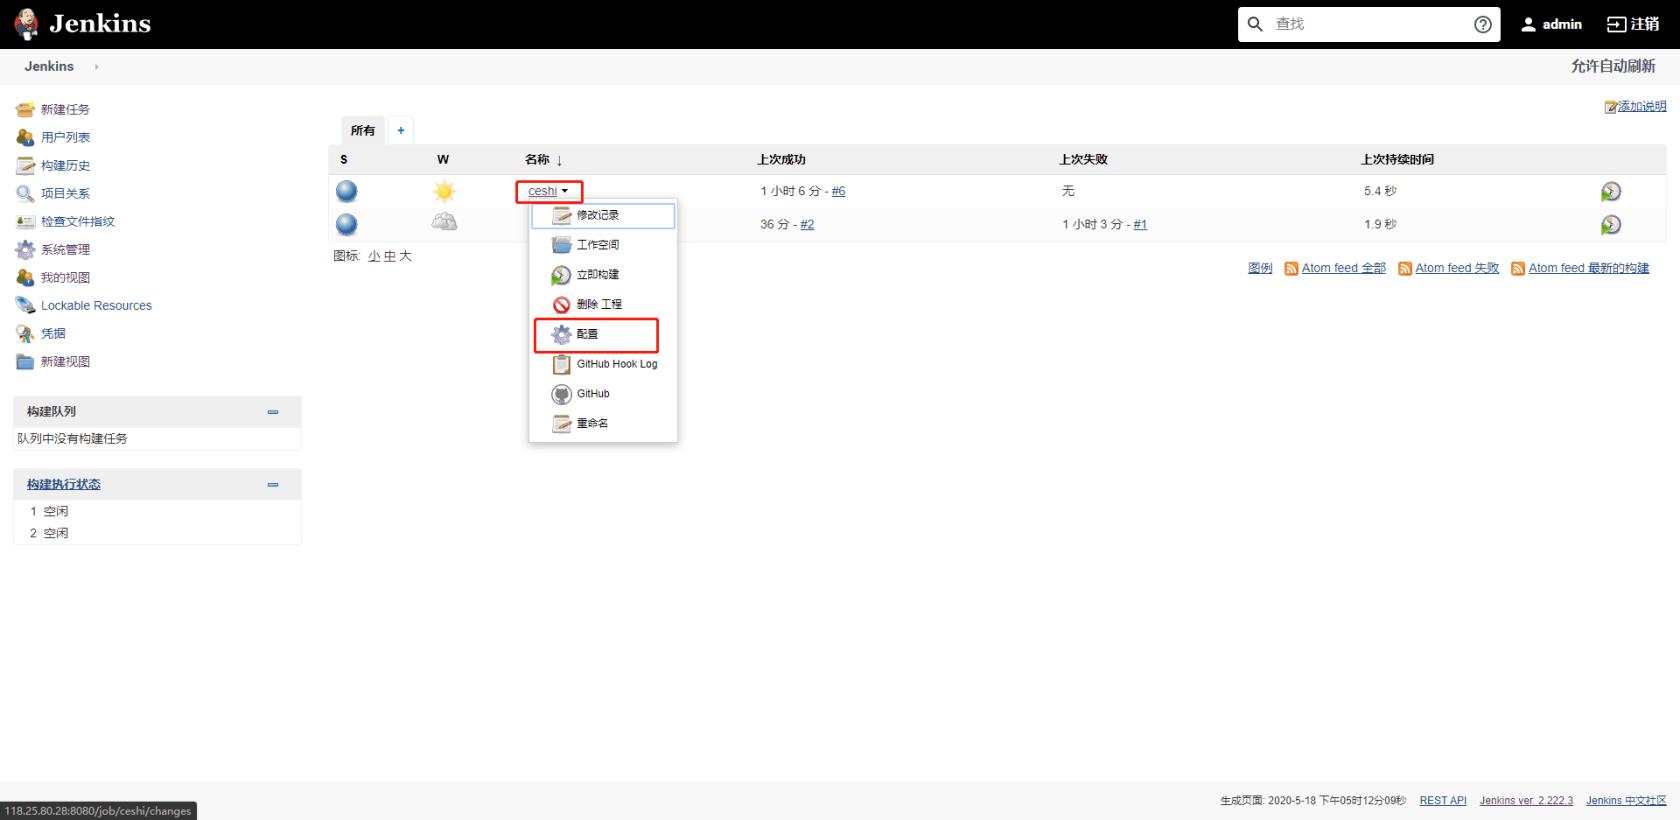
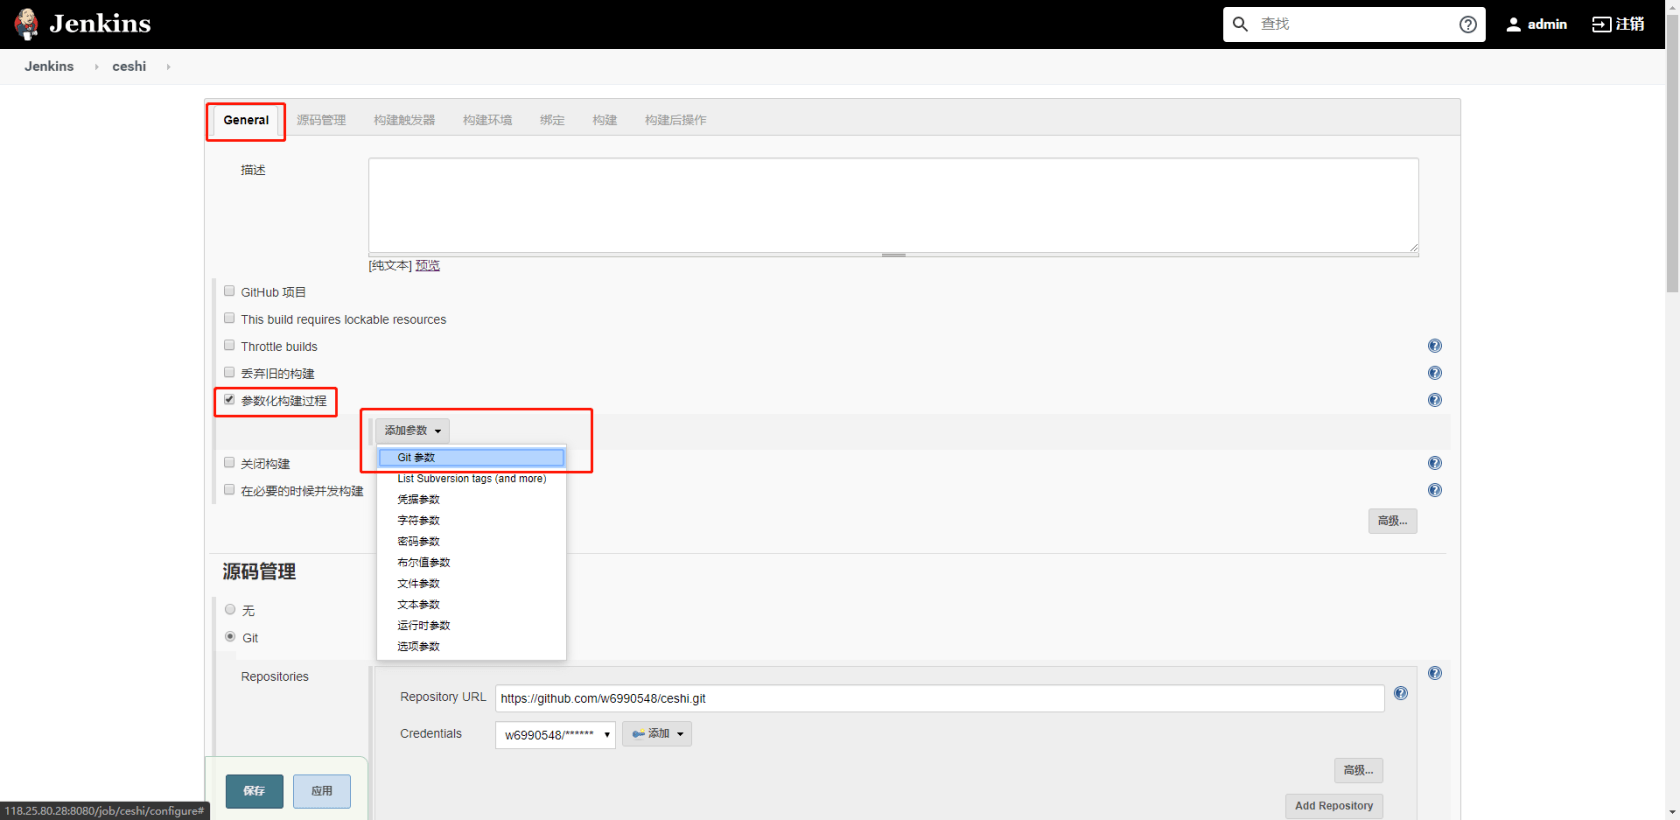
在新出现的参数配置中填写名称、选择参数类型为“分支”
在源码管理选项下,选择 Git 项,分支填写为上面定义的变量,源码库浏览器选择 “自动” 并保存。
3、测试并构建不同分支。
进入工程中,可以看到之前的 “立即构建” 已经改变为 Build with Parameters。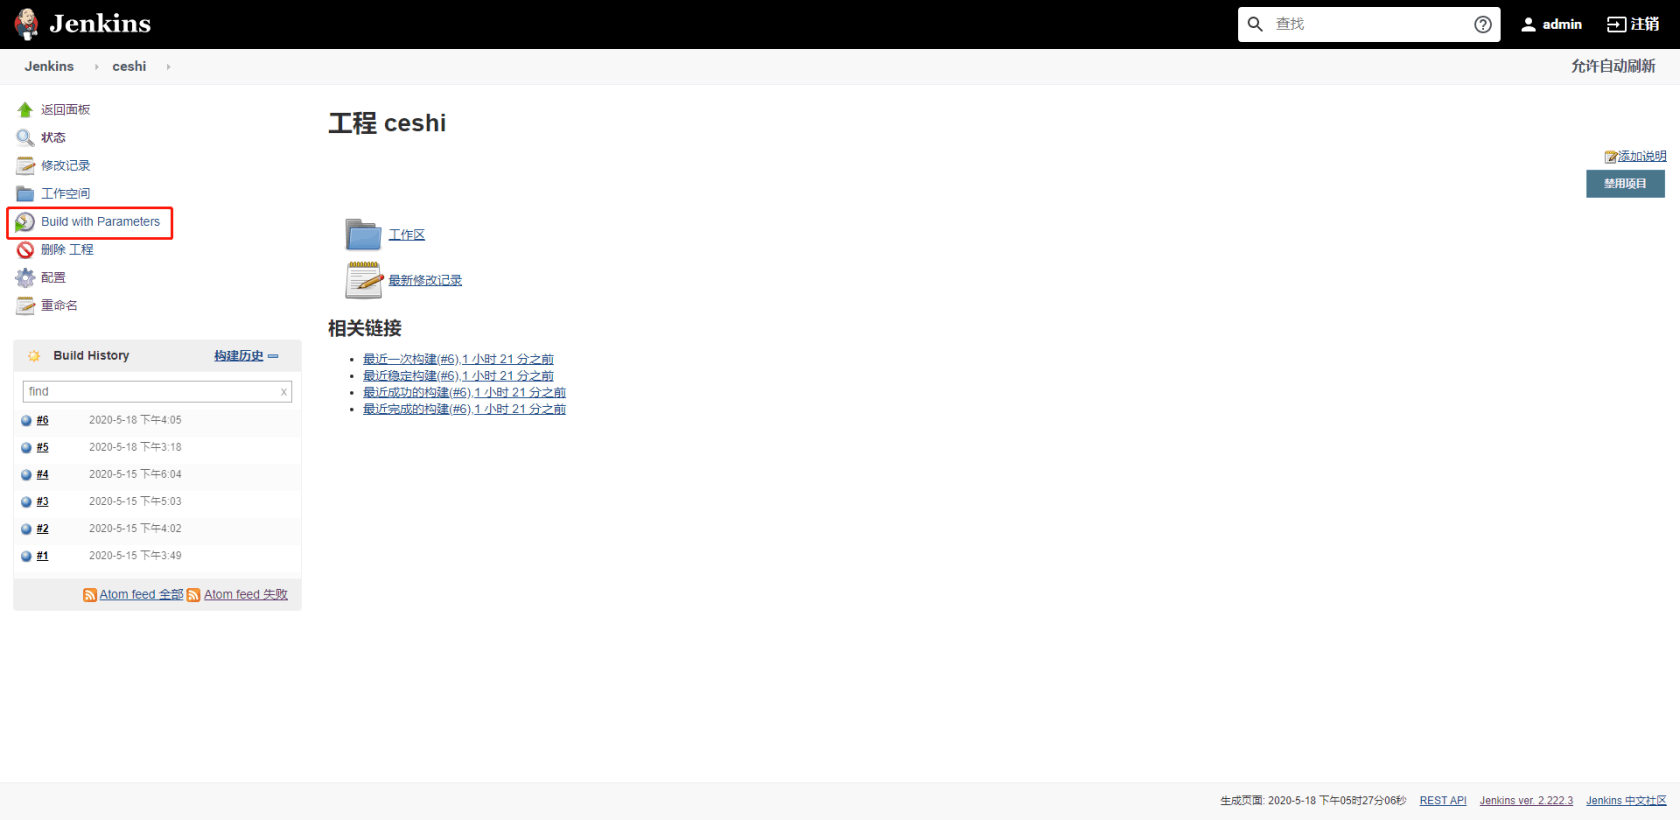
点击进入后可以看到分支列表,选中分支即可 “立即构建”,访问 ip 地址,可以看到页面内容已经发生改变,说明配置成功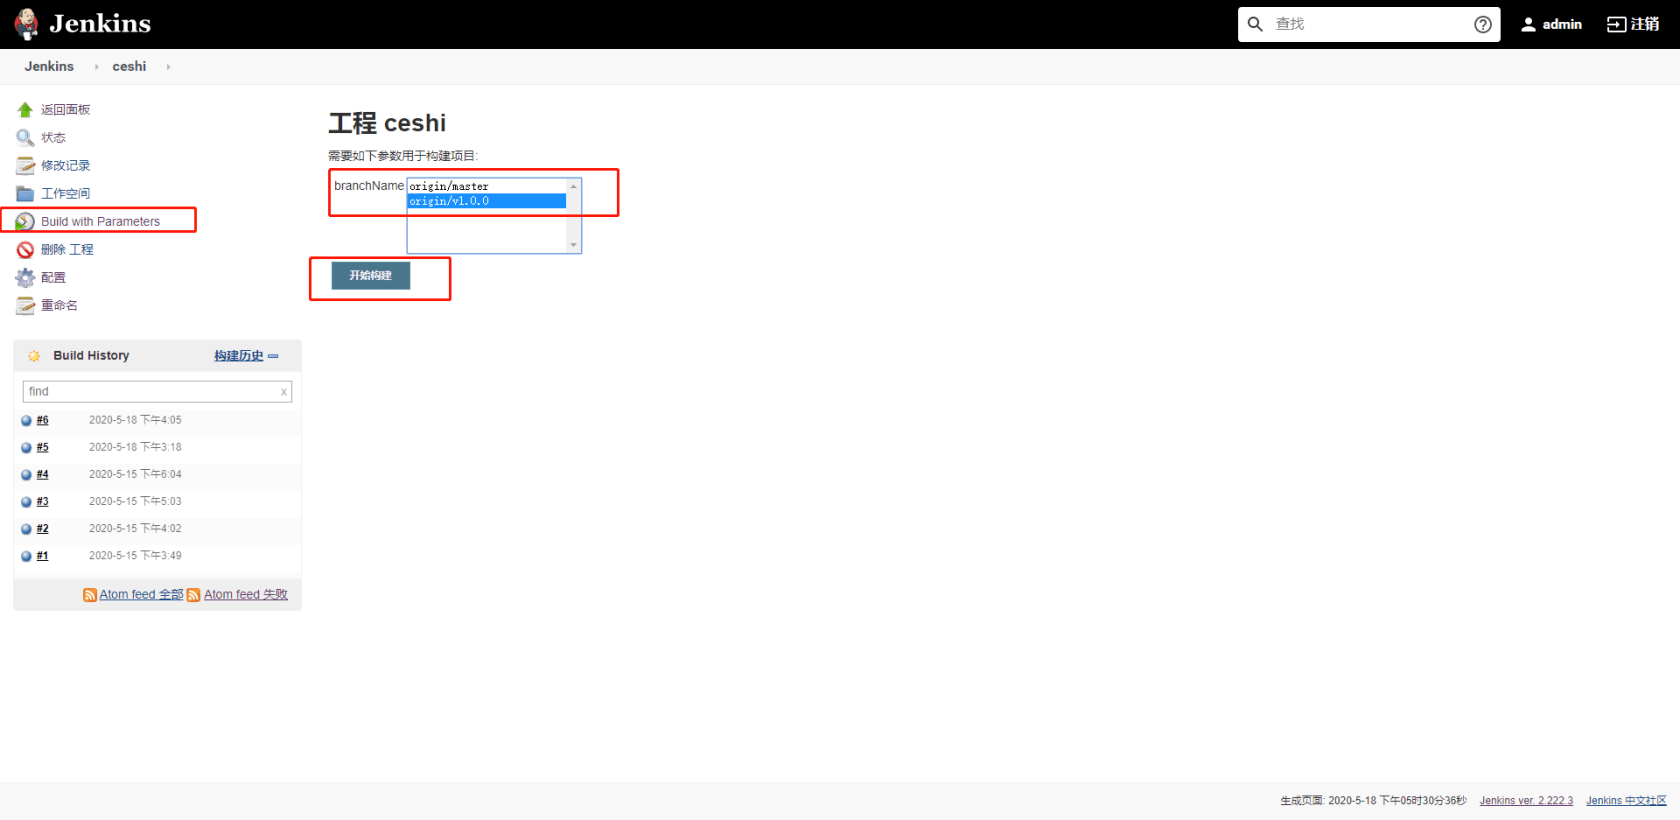


二、想要 npm run 选项怎么办?
之前的演示项目只是单纯的 h5,现在我们以 laravel + vue 来进行演示。我们知道,vue 项目中,若页面内容发生改变,需要编译过后才能把效果展示出来。那用 jenkins 怎么方便的操作呢。
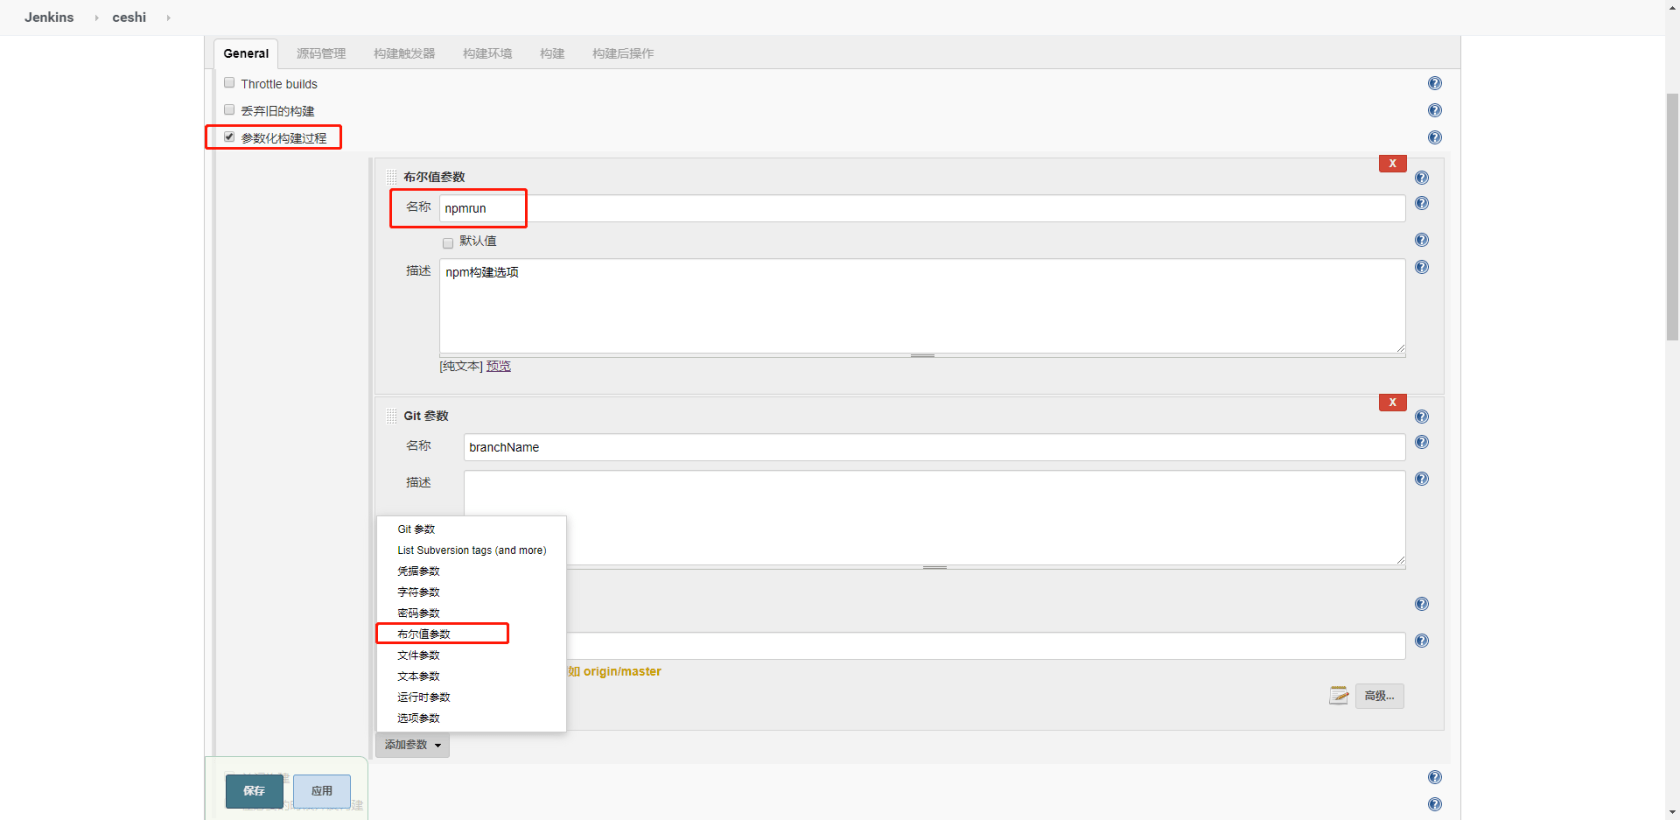
1、配置任务工程
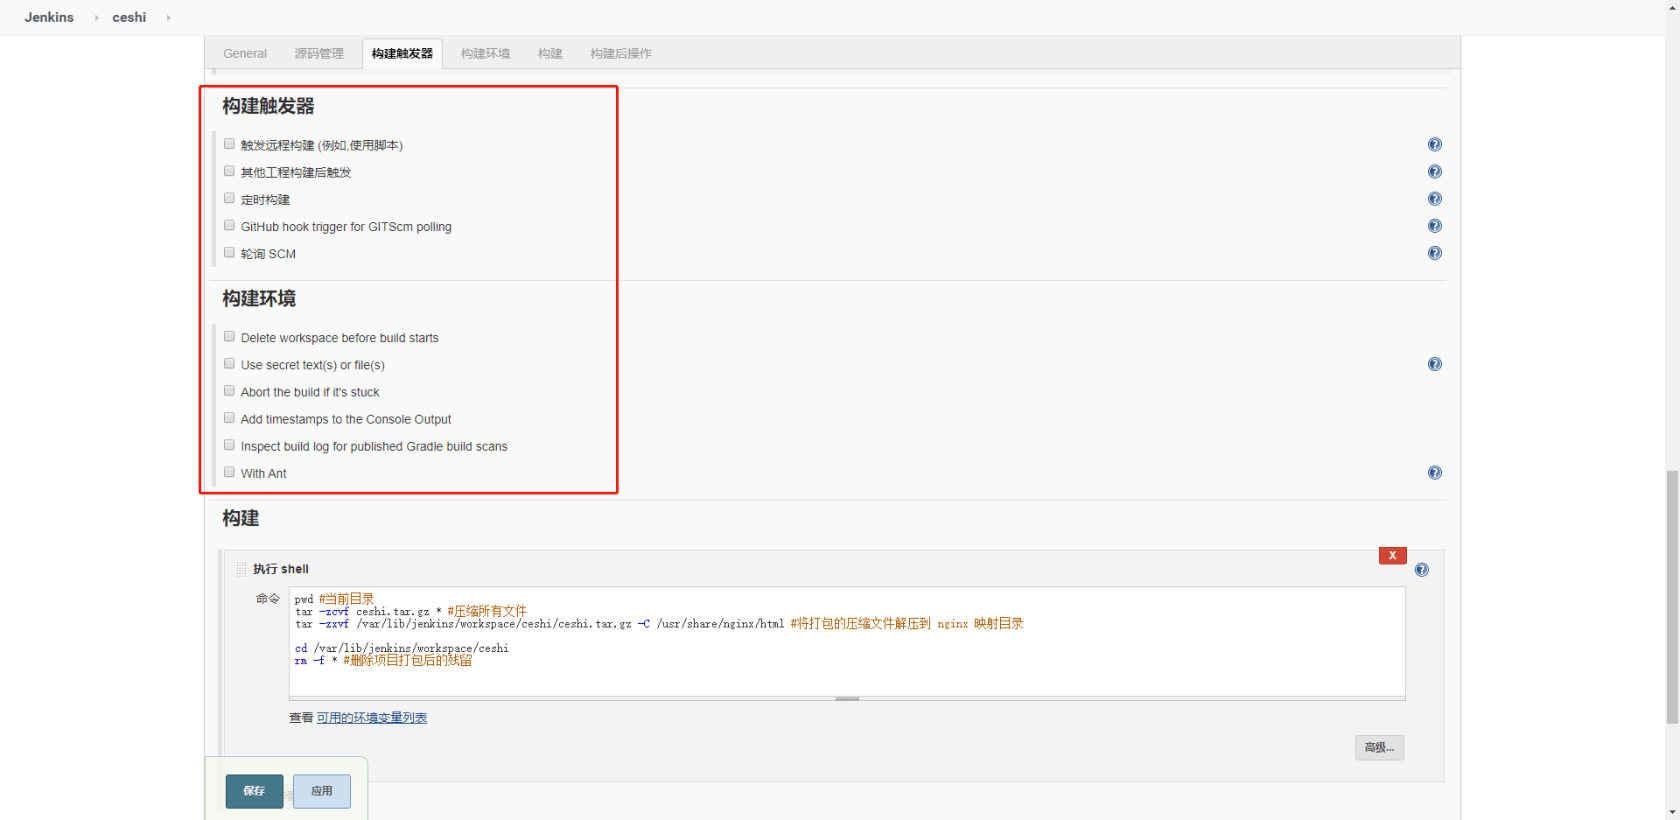
2、在参数化构建过程下,添加参数,选择布尔值参数,如图所示。
3、修改 shell 命令,命令如下。
// 当前目录
pwd

composer install

// 若不勾选 `npmrun` 选项,将除了以下这几个文件打包到指定目录
if [ $npmrun = 'false' ];then
    rsync -arlh --exclude=node_modules --exclude=.git --exclude=.env --exclude=public * /usr/share/nginx/html/ceshi #将文件除了这几个文件打包到指定目录
fi

chmod -R 777 storage

// 若勾选 `npmrun` 选项,将除了以下这几个文件打包到指定目录,并编译
if [ $npmrun = 'true' ];then
    rsync -arlh --exclude=node_modules --exclude=.git --exclude=.env * /usr/share/nginx/html/ceshi
    cd /usr/share/nginx/html/ceshi
    npm install
    npm run dev
fi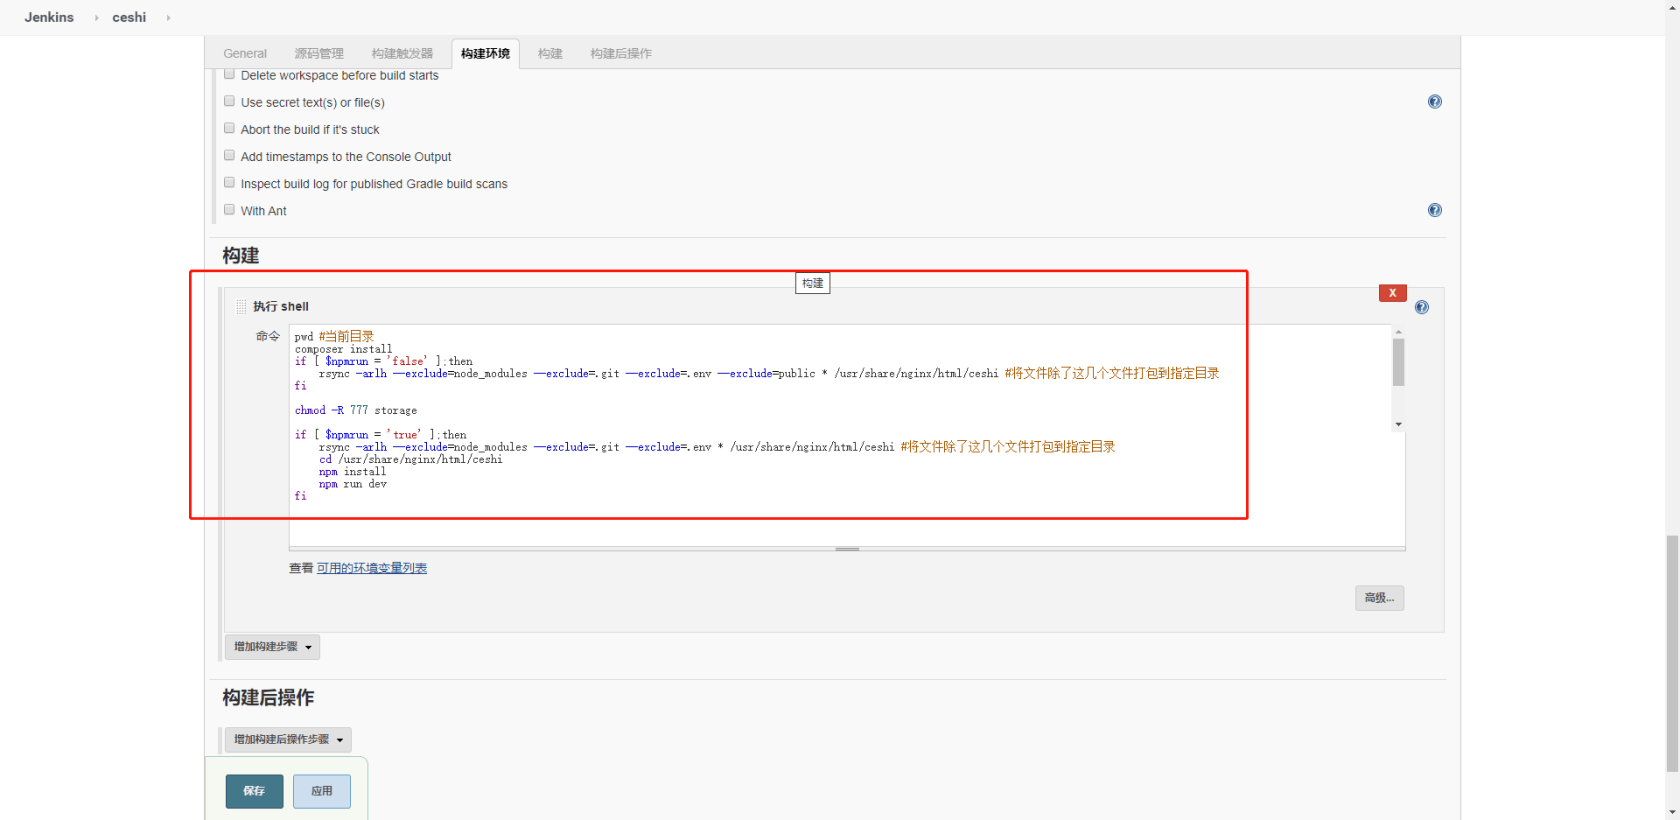
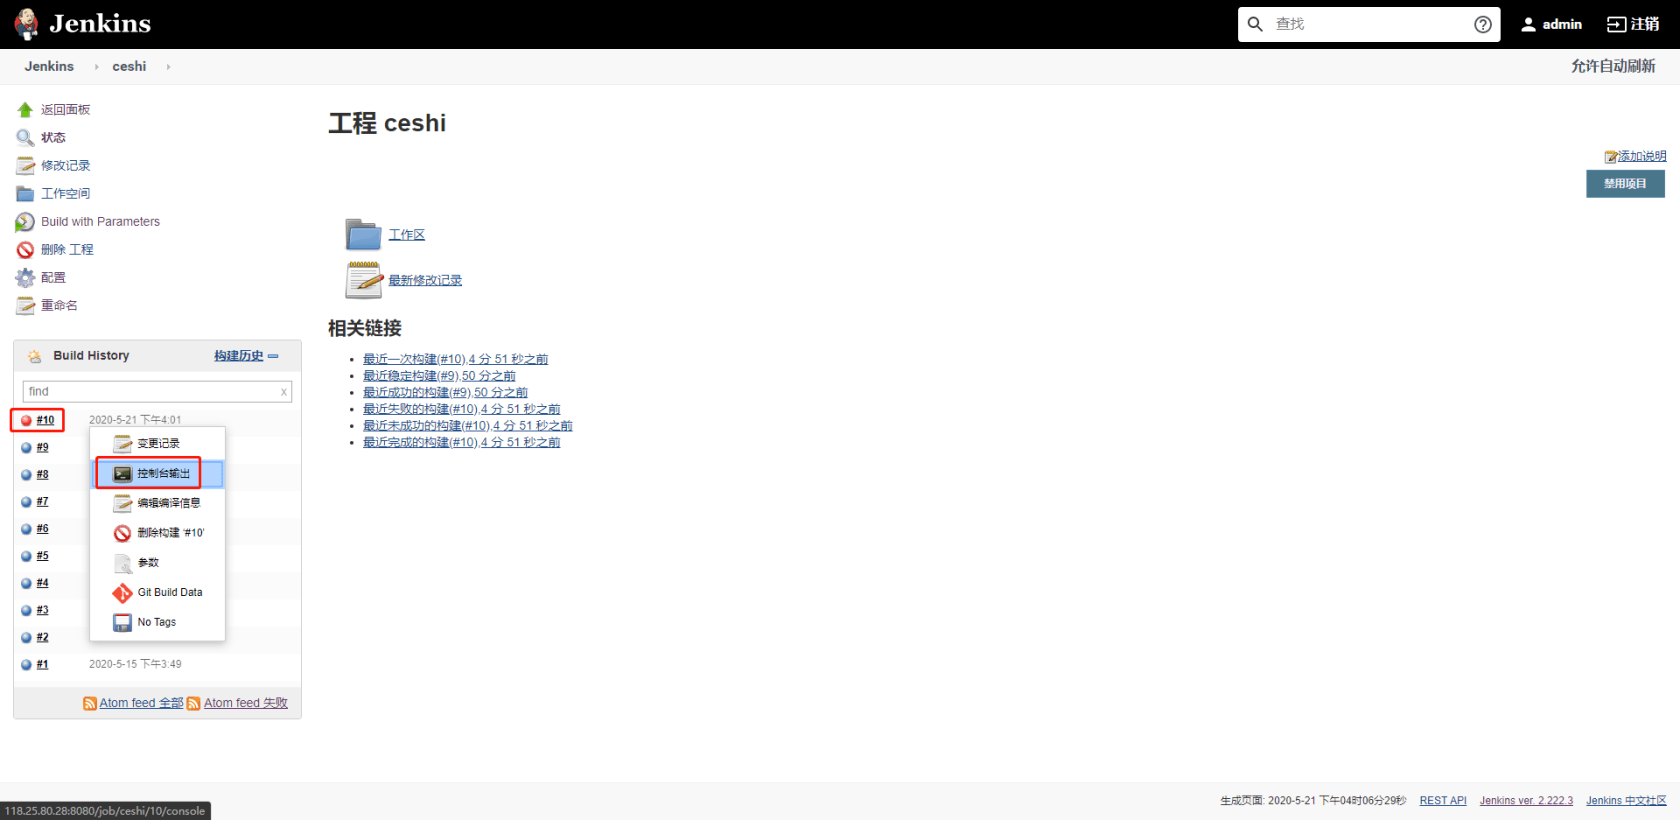
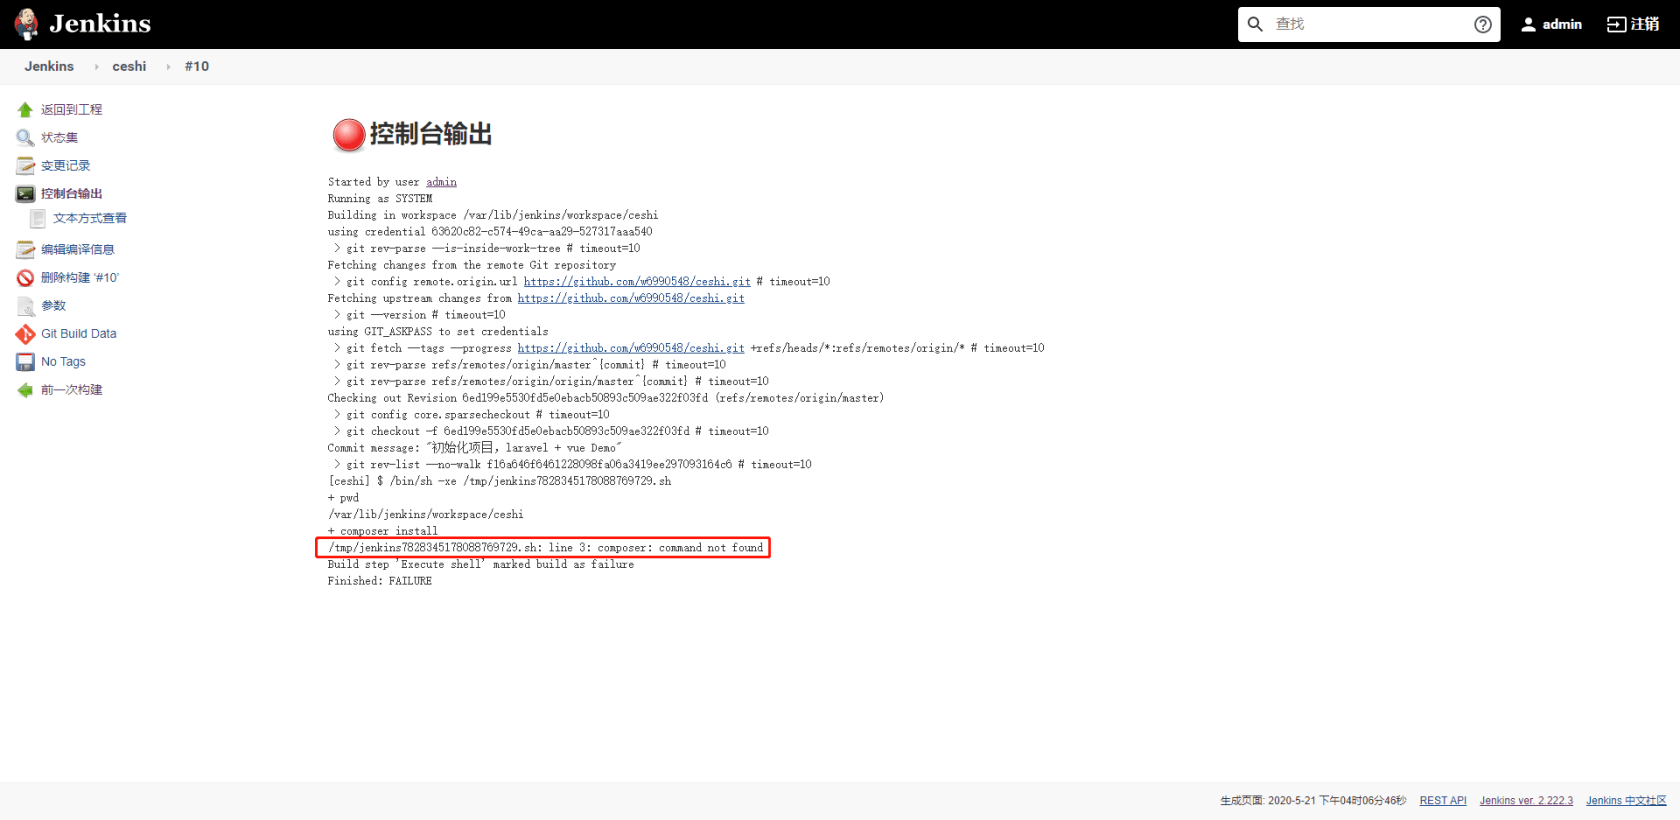
4、此时我们去构建项目时,会出错,打开控制台输出,可以看到报 composer: command not found
5、我们去安装 composer,PHP,nodeJs
PHP 安装教程
composer 安装教程
nodejs 安装教程
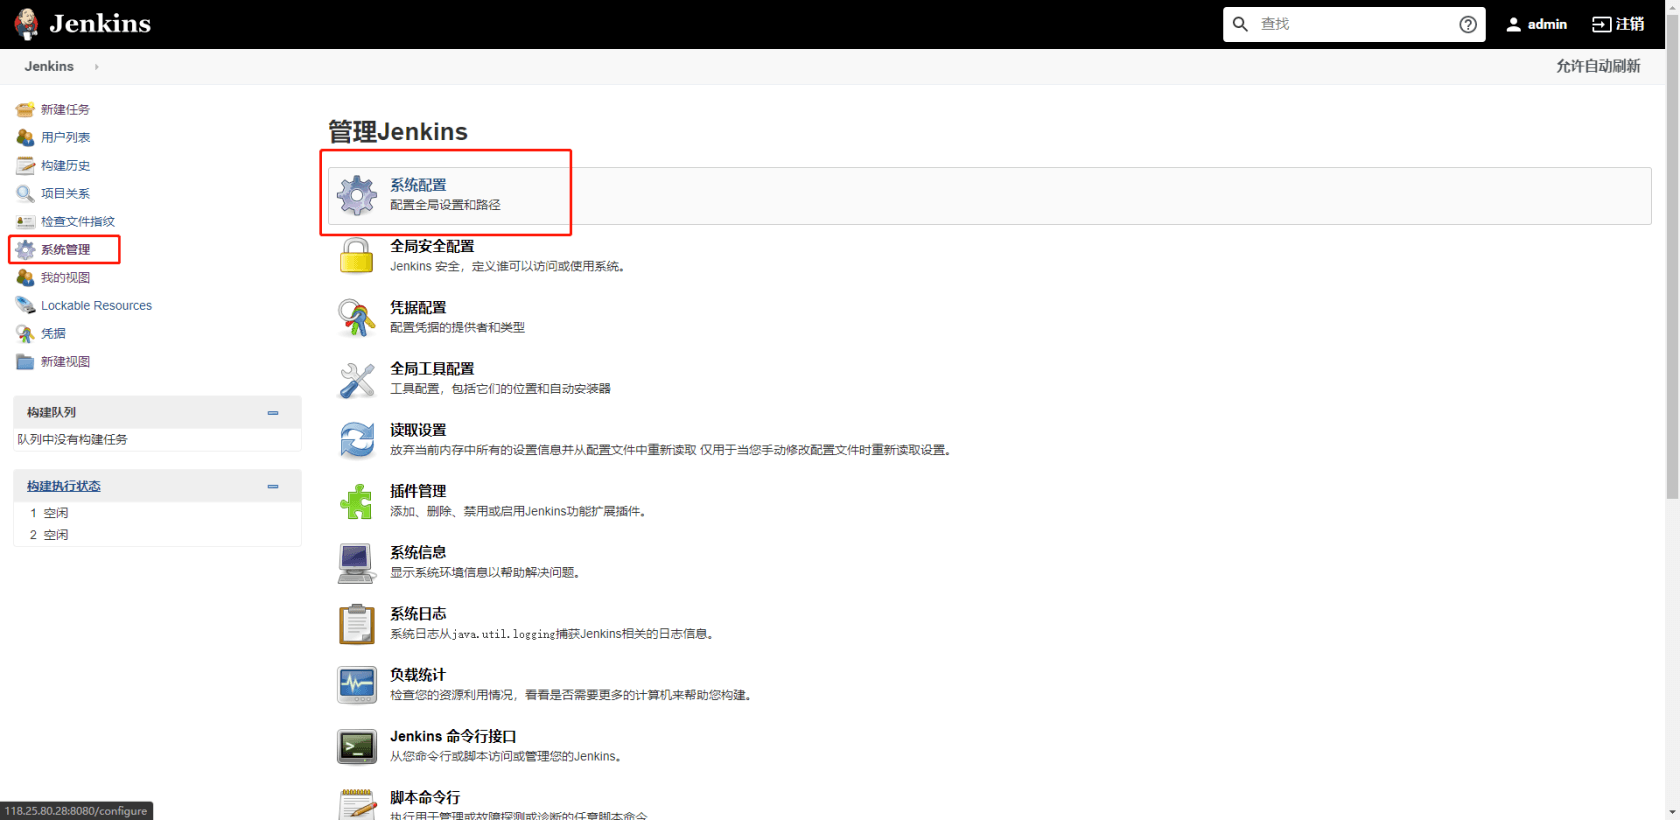
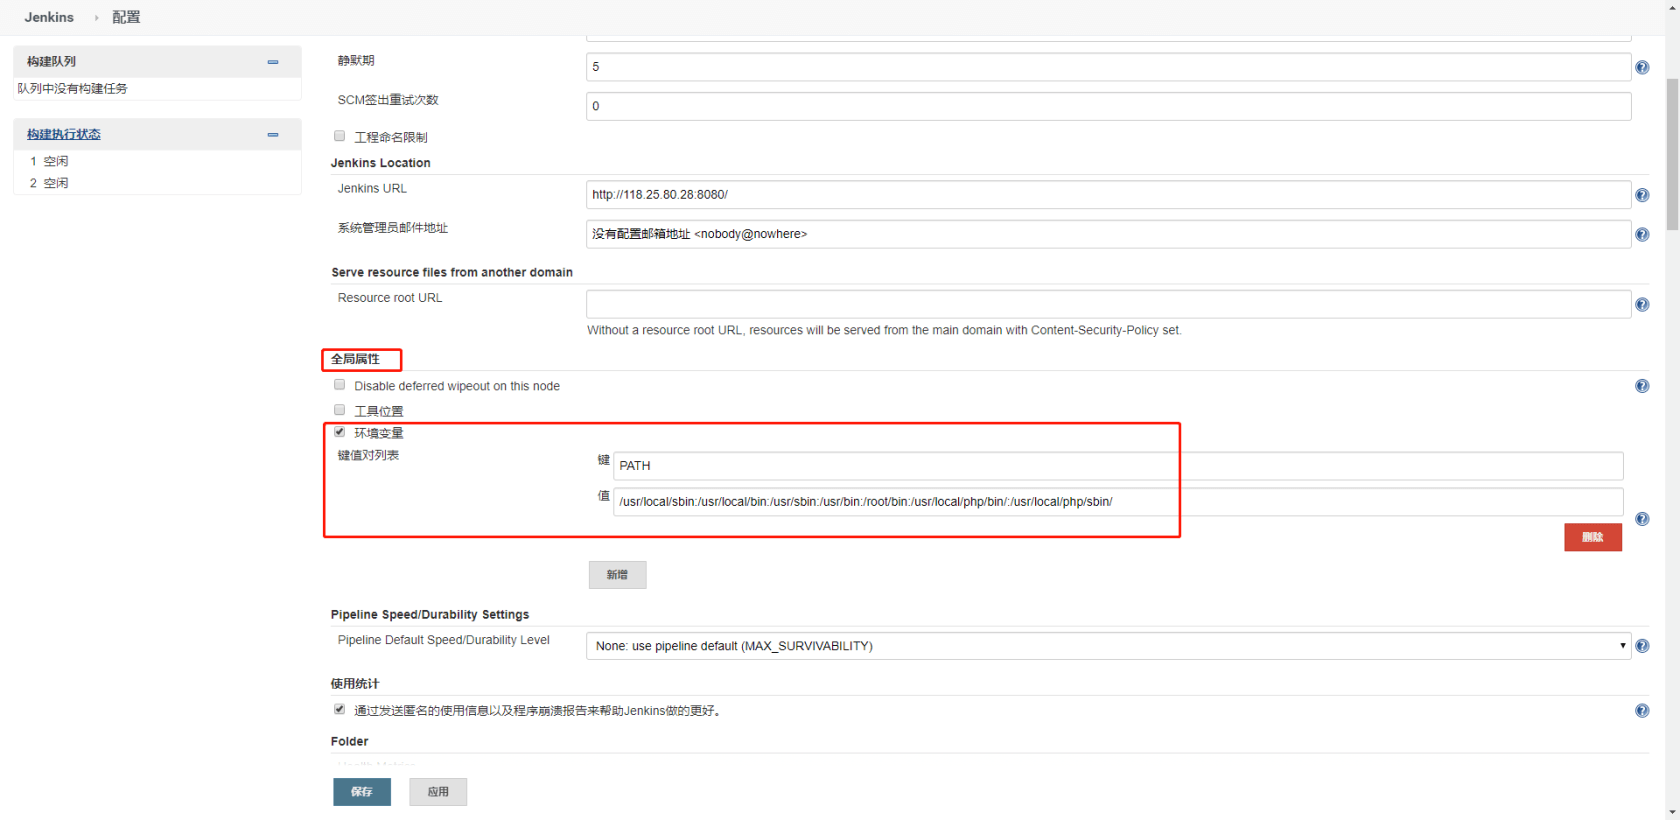
6、安装完毕之后,若再次构建的时候还是出现 composer: command not found,在命令行输入 echo $PATH,拿到环境变量,将之配置到 jenkins 中。

系统管理 –> 系统配置 –> 全局属性 –> 环境变量,新建键值
7、修改 nginx 配置文件,并使用 nginx -s reload 命令重启 nginx
server {
    listen 80;
    server_name localhost;
    root  /usr/share/nginx/html/ceshi/public;

    index index.html
    index.php;

    location / {
    try_files $uri $uri/
        /index.php$is_args$query_string;
    }

    location ~ \.php$ {
    try_files $uri = 404;
        fastcgi_pass   127.0.0.1:9000;
        fastcgi_index  index.php;
        fastcgi_param  SCRIPT_FILENAME  $document_root$fastcgi_script_name;
        include        fastcgi_params;
    }
}
8、访问服务器 ip,若出现错误,可以到 nginx 的错误日志里去看具体原因 /var/log/nginx/error.log。出现 500 错误,可能是 vendor,storage文件夹权限问题。
chown -R nginx:nginx vendor     // vendor文件夹的所有者修改为nginx
chown -R nginx:nginx storage    // storage文件夹的所有者修改为nginx
大功告成

本作品采用《CC 协议》,转载必须注明作者和本文链接


 关于 LearnKu


推荐文章: