
Ubuntu 安装 docker[laradock]
2 / 1 / 创建于 5年前 /
 Wsmallnews 的个人博客
尝试卸载旧版
$ sudo apt-get remove docker \
               docker-engine \
               docker.io
Apt 安装
由于 apt 源使用 HTTPS 以确保软件下载过程中不被篡改。因此,我们首先需要添加使用 HTTPS 传输的软件包以及 CA 证书。
$ sudo apt-get update

$ sudo apt-get install \
    apt-transport-https \
    ca-certificates \
    curl \
    software-properties-common
更换软件源
为了确认所下载软件包的合法性,需要添加软件源的 GPG 密钥
# 阿里云的源 GPG 密钥
$ curl -fsSL https://mirrors.aliyun.com/docker-ce/linux/ubuntu/gpg | sudo apt-key add -

# 中科大 GPG 密钥
$ curl -fsSL https://mirrors.ustc.edu.cn/docker-ce/linux/ubuntu/gpg | sudo apt-key add -


# 官方源
# $ curl -fsSL https://download.docker.com/linux/ubuntu/gpg | sudo apt-key add -
我们需要向 source.list 中添加 Docker 软件源
# 阿里云docker 源
// 使用这个
$ sudo add-apt-repository "deb [arch=amd64] https://mirrors.aliyun.com/docker-ce/linux/ubuntu $(lsb_release -cs) stable"

$ sudo add-apt-repository \
    "deb [arch=amd64] https://mirrors.aliyun.com/docker-ce/linux/ubuntu \ $(lsb_release -cs) \
    stable"

# 中科大的源
$ sudo add-apt-repository \
    "deb [arch=amd64] https://mirrors.ustc.edu.cn/docker-ce/linux/ubuntu \
    $(lsb_release -cs) \
    stable"


# 官方源
# $ sudo add-apt-repository \
#    "deb [arch=amd64] https://download.docker.com/linux/ubuntu \
#    $(lsb_release -cs) \
#    stable"
安装
$ sudo apt-get update

$ sudo apt-get install docker-ce
更换docker源 为 阿里云的 docker 源
$ vim /etc/docker/daemon.json
输入以下内容
{
  "registry-mirrors": ["https://6n29kkt0.mirror.aliyuncs.com"]
}

# 重新加载某个服务的配置文件,如果新安装了一个服务,
# 归属于 systemctl 管理,要是新服务的服务程序配置文件生效,需重新加载
sudo systemctl daemon-reload
# 重启 docker
sudo systemctl restart docker
安装 docker-compose
# 不翻墙特别慢
$ sudo curl -L https://github.com/docker/compose/releases/download/1.24.1/docker-compose-`uname -s`-`uname -m` > /usr/local/bin/docker-compose

$ sudo chmod +x /usr/local/bin/docker-compose
安装必备的服务
安装之前修改 .env
$ cd /data/html/laradock

$ cp .env-example .env

vim .env

# 修改 PHP 版本
PHP_VERSION=7.2

# 修改 MySQL 版本


# 修改为中国时区 UTC 改为 PRC
WORKSPACE_TIMEZONE=PRC

# 是否切换国内源,改为 true
CHANGE_SOURCE=true

# php 不安装 imageMagick ,这东西好像下载不下来,修改为 false
PHP_FPM_INSTALL_IMAGEMAGICK=false
$ docker-compose up -d nginx mysql
# 成功之后会有下面的容器
Starting laradock_docker-in-docker_1 ... done
Starting laradock_mysql_1 ... done
Starting laradock_workspace_1 ... done
Starting laradock_php-fpm_1 ... done
Starting laradock_nginx_1 ... done安装 php 多版本
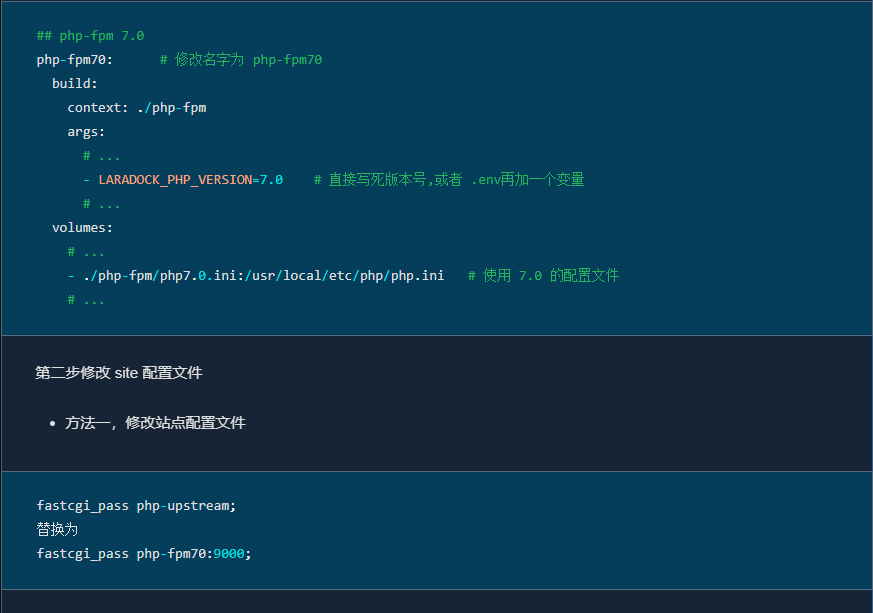
第一步复制 php-fpm 放到 php-fpm 的下面,修改如下
## php-fpm 7.0
php-fpm70:      # 修改名字为 php-fpm70
  build:
    context: ./php-fpm
    args:
      # ...
      - LARADOCK_PHP_VERSION=7.0    # 直接写死版本号,或者 .env再加一个变量
      # ...
  volumes:
    # ...
    - ./php-fpm/php7.0.ini:/usr/local/etc/php/php.ini   # 使用 7.0 的配置文件
    # ...
第二步修改 site 配置文件
- 方法一,修改站点配置文件
fastcgi_pass php-upstream;
替换为
fastcgi_pass php-fpm70:9000;
- 方法二
nginx Dockerfile 文件修改

在这里增加变量
ARG PHP_UPSTREAM_CONTAINER=php-fpm
ARG PHP70_UPSTREAM_CONTAINER=php-fpm70        // 新添加的


在这句下面
# Set upstream conf and remove the default conf
RUN echo "upstream php-upstream { server ${PHP_UPSTREAM_CONTAINER}:${PHP_UPSTREAM_PORT}; }" > /etc/nginx/conf.d/upstream.conf \
    && rm /etc/nginx/conf.d/default.conf

增加 php-fpm70
# 写入 php-fpm70
RUN echo "upstream php70-upstream { server ${PHP70_UPSTREAM_CONTAINER}:${PHP_UPSTREAM_PORT}; }" >> /etc/nginx/conf.d/upstream.conf

然后将站点配置文件修改为
fastcgi_pass php-upstream;
替换为
fastcgi_pass php70-upstream;
第三步,自动跟随启动
docker-compose  nginx 模块
depends_on:
    - php-fpm
    - php-fpm70     # 增加 php-fpm70
报错
docker-compose up -d nginx mysql redis 报错
报错内容
 ---> Running in 17f639d49f8a
  % Total    % Received % Xferd  Average Speed   Time    Time     Time  Current
                                 Dload  Upload   Total   Spent    Left  Speed
  0     0    0     0    0     0      0      0 --:--:-- --:--:-- --:--:--     0curl: (7) Failed to connect to raw.githubusercontent.com port 443: Connection refused
/bin/sh: 1: .: Can't open /home/laradock/.nvm/nvm.sh
ERROR: Service 'workspace' failed to build: The command '/bin/sh -c if [ ${INSTALL_NODE} = true ]; then     mkdir -p $NVM_DIR &&     curl -o- https://raw.githubusercontent.com/creationix/nvm/v0.33.11/install.sh | bash         && . $NVM_DIR/nvm.sh         && nvm install ${NODE_VERSION}         && nvm use ${NODE_VERSION}         && nvm alias ${NODE_VERSION}         && if [ ${NPM_REGISTRY} ]; then         npm config set registry ${NPM_REGISTRY}         ;fi         && if [ ${INSTALL_NPM_GULP} = true ]; then         npm install -g gulp         ;fi         && if [ ${INSTALL_NPM_BOWER} = true ]; then         npm install -g bower         ;fi         && if [ ${INSTALL_NPM_VUE_CLI} = true ]; then         npm install -g @vue/cli         ;fi         && if [ ${INSTALL_NPM_ANGULAR_CLI} = true ]; then         npm install -g @angular/cli         ;fi         && ln -s `npm bin --global` /home/laradock/.node-bin ;fi' returned a non-zero code: 2
解决
GWF 的问题,在 https://www.ipaddress.com/ 查询 raw.githubusercontent.com 的真实 IP, 然后手工添加到 /etc/hosts, 比如
199.232.28.133 raw.githubusercontent.com
更换软件源
报错内容
sudo add-apt-repository \
>     "deb [arch=amd64] https://mirrors.ustc.edu.cn/docker-ce/linux/ubuntu \
>     $(lsb_release -cs) \
>     stable"
Traceback (most recent call last):
  File "/usr/bin/add-apt-repository", line 95, in <module>
    sp = SoftwareProperties(options=options)
  File "/usr/lib/python3/dist-packages/softwareproperties/SoftwareProperties.py", line 109, in __init__
    self.reload_sourceslist()
  File "/usr/lib/python3/dist-packages/softwareproperties/SoftwareProperties.py", line 599, in reload_sourceslist
    self.distro.get_sources(self.sourceslist)
  File "/usr/lib/python3/dist-packages/aptsources/distro.py", line 93, in get_sources
    (self.id, self.codename))
aptsources.distro.NoDistroTemplateException: Error: could not find a distribution template for Deepin/stable
解决:
sudo vim /usr/share/python-apt/templates/Deepin.info

Suite: unstable
改为
Suite: stable
更换完软件源,apt-get update 更新报错
错误:7 https://mirrors.aliyun.com/docker-ce/linux/ubuntu stable/stable amd64 Packages
  404  Not Found
命中:8 http://packages.microsoft.com/repos/vscode stable InRelease
正在读取软件包列表... 完成
W: 仓库 “https://mirrors.aliyun.com/docker-ce/linux/ubuntu stable Release” 没有 Release 文件。
N: 无法认证来自该源的数据,所以使用它会带来潜在风险。
N: 参见 apt-secure(8) 手册以了解仓库创建和用户配置方面的细节。
E: 无法下载 https://mirrors.aliyun.com/docker-ce/linux/ubuntu/dists/stable/stable/binary-amd64/Packages  404  Not Found
E: 部分索引文件下载失败。如果忽略它们,那将转而使用旧的索引文件。
解决:
没有解决,并不影响后续 apt-get install docker-ce本作品采用《CC 协议》,转载必须注明作者和本文链接


 找了几个方案,有的让加端口配置,有的要改nginx配置,都没用。
赞👍
找了几个方案,有的让加端口配置,有的要改nginx配置,都没用。
赞👍


 关于 LearnKu


推荐文章: