
webpack 学习笔记:入门介绍
0 / 0 / 创建于 5年前 /
 zhangbao 的个人博客
简单介绍
webpack 是现在最流行的前端项目打包工具,官网地址 webpack.js.org/ 。这个系列的学习笔记,是基于最新的 webpack 4.x 版本。
访问官网,首先看到的就是下面这张图。
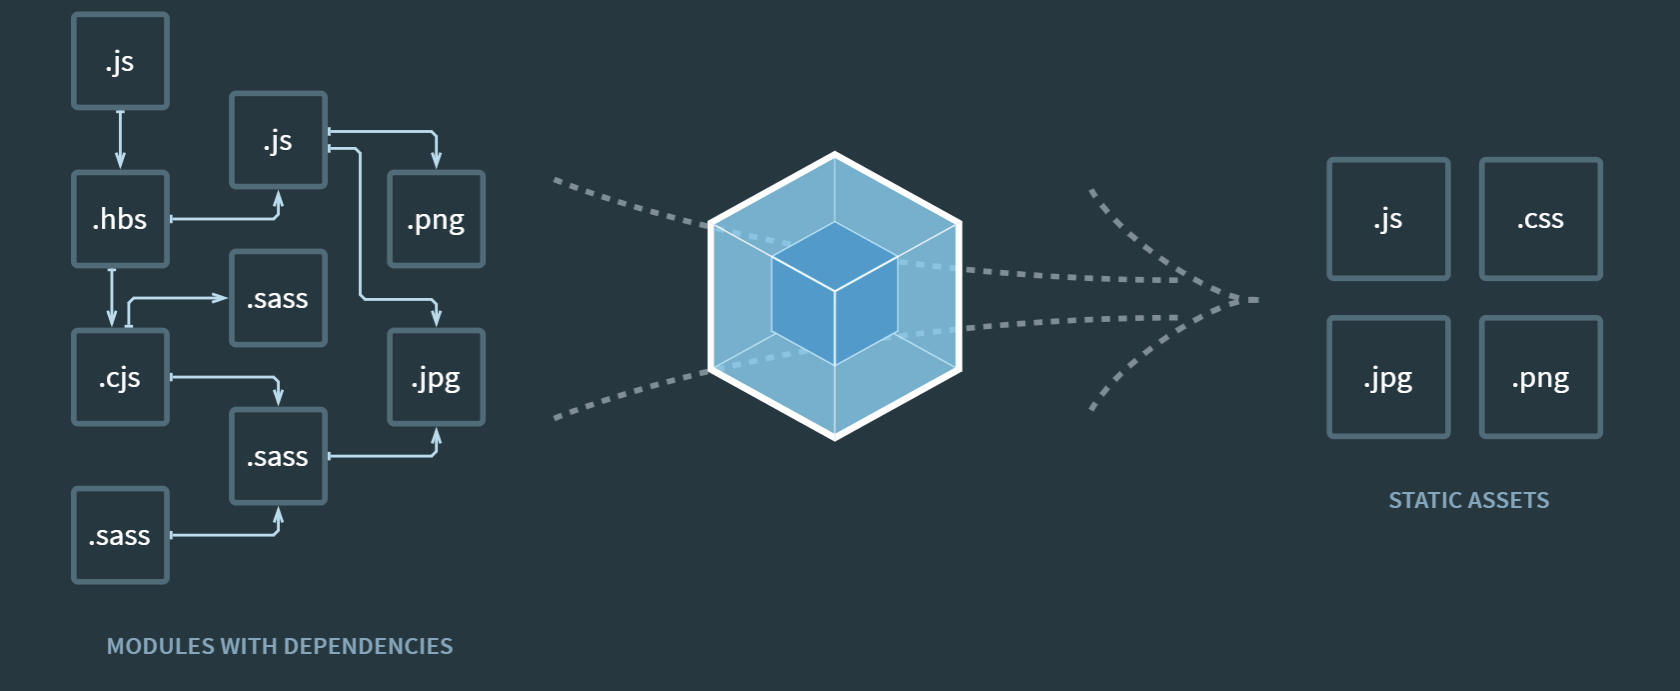
webpack 做的就是把前端项目中使用的脚本、样式和图片等资源,统一打包、处理成可以直接使用的静态资源。
想一下:一个稍有规模的前端项目,为了重用和维护考虑,可能会被拆分成若干个代码片段和资源目录,人为管理各个资源的引入和依赖关系非常麻烦,而且也容易出错;而 webpack 能分析项目中各个资源间的依赖关系,建立起一个依赖图,确保这种复杂的依赖图,最终能被毫无错误的打包在一起,处理成可以直接使用的静态资源。这是打包工具最基础的功能。
另外,webpack 还提供了 plugin 和 loader 的机制,能实现 ES6+ 代码转 ES5、CSS 预处理器(比如 Sass)、HTML 模板、图片 base64 嵌入、文件压缩、代码拆分、tree shaking 等功能。
快速上手
白看不如一练,我们同样照着官网上的贴的例子快速上手一下。
一、初始化项目
$ mkdir webpack-demo
$ cd webpack-demo
$ npm init -y
# 下载必要依赖
$ npm install webpack webpack-cli --save-dev
二、搭建项目骨架
webpack-demo/
│ page.html
│ webpack.config.js
│
└─src
bar.js
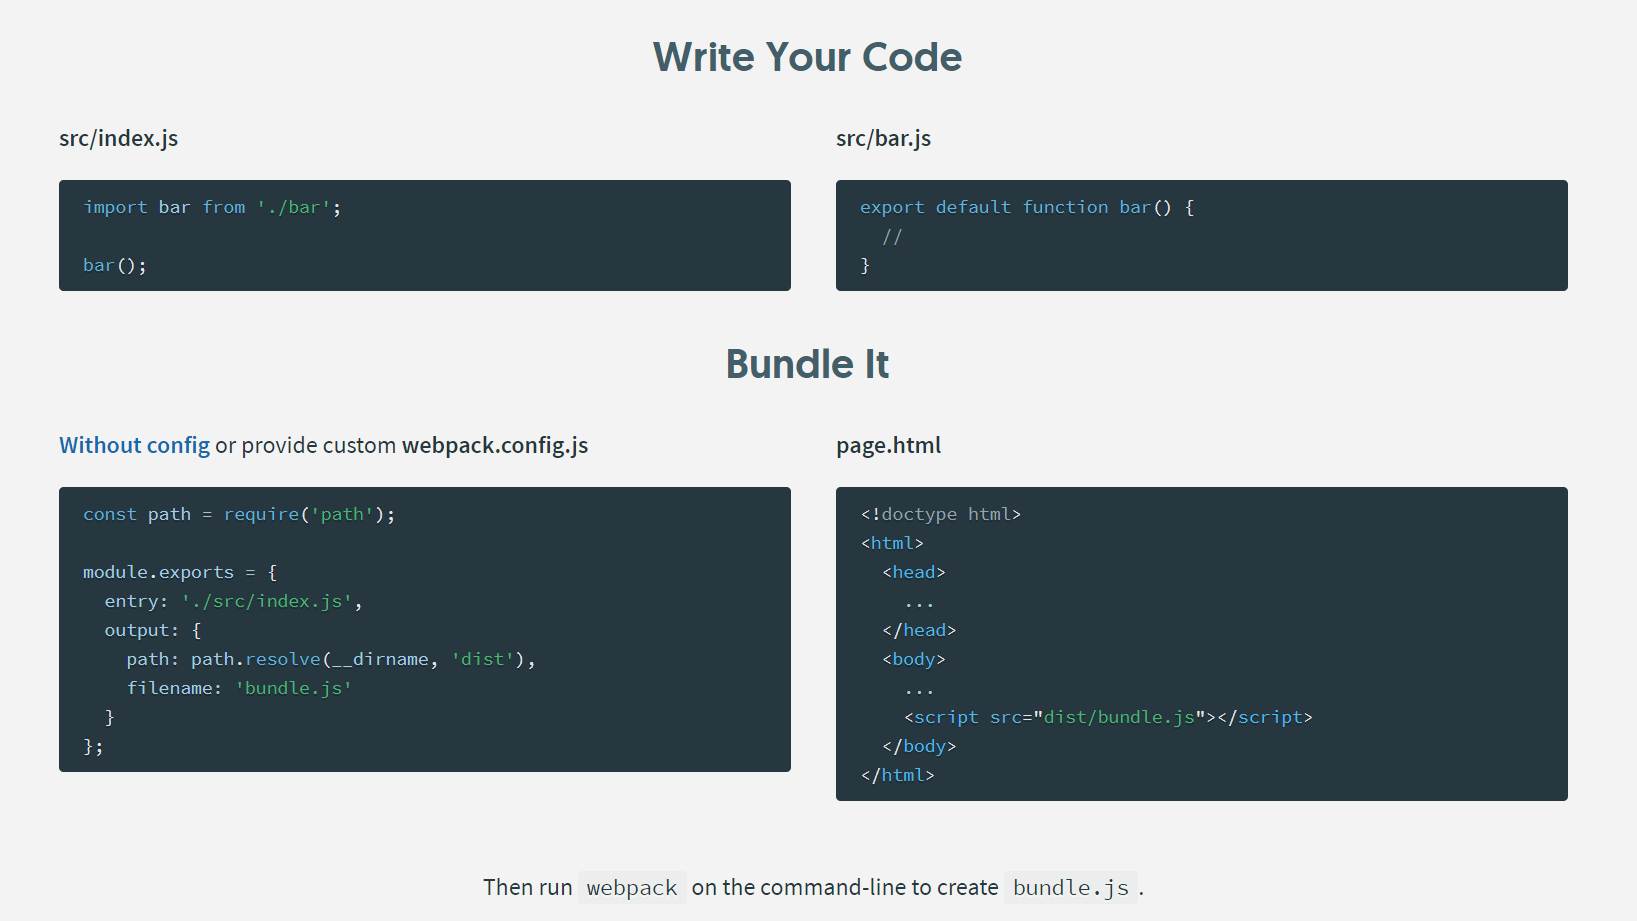
index.js三、编写内容
src/index.js:
import bar from './bar'

alert(bar())
src/bar.js:
export default function hello() {
    return `hello, here's your first bundle file!`
}
webpack.config.js:
Tip: 如果未提供 webpack.config.js 配置文件,默认输出地址是 dist/main.js,而非下面的 dist/bundle.js。
const path = require('path');

module.exports = {
  entry: './src/index.js',
  output: {
    path: path.resolve(__dirname, 'dist'),
    filename: 'bundle.js'
  }
};
page.html:
<!DOCTYPE html>
<html lang="en">
<head>
    <meta charset="UTF-8">
    <meta name="viewport" content="width=device-width, initial-scale=1.0">
    <title>Hello, webpack!</title>
</head>
<body>
    <h1>Hello, webpack!</h1>
    <script src="./dist/bundle.js"></script>
</body>
</html>
四、打包项目
$ npx webpack

Hash: 9cd3da7ad4499a9395d1
Version: webpack 4.44.2
Time: 65ms
Built at: 2020-09-25 11:49:10 ├F10: PM┤
    Asset       Size  Chunks             Chunk Names
bundle.js  998 bytes       0  [emitted]  main
Entrypoint main = bundle.js
[0] ./src/index.js + 1 modules 159 bytes {0} [built]
    | ./src/index.js 41 bytes [built]
    | ./src/bar.js 118 bytes [built]

WARNING in configuration
The 'mode' option has not been set, webpack will fallback to 'production' for this value. Set 'mode' option to 'development' or 'production' to enable defaults for each environment.
You can also set it to 'none' to disable any default behavior. Learn more: https://webpack.js.org/configuration/mode/
最终我们得到了 /dist/bundle.js 这个打包文件(因为未指定“mode”,默认启用了生产环境打包行为)。
!function(e){var t={};function r(n){if(t[n])return t[n].exports;var o=t[n]={i:n,l:!1,exports:{}};return e[n].call(o.exports,o,o.exports,r),o.l=!0,o.exports}r.m=e,r.c=t,r.d=function(e,t,n){r.o(e,t)||Object.defineProperty(e,t,{enumerable:!0,get:n})},r.r=function(e){"undefined"!=typeof Symbol&&Symbol.toStringTag&&Object.defineProperty(e,Symbol.toStringTag,{value:"Module"}),Object.defineProperty(e,"__esModule",{value:!0})},r.t=function(e,t){if(1&t&&(e=r(e)),8&t)return e;if(4&t&&"object"==typeof e&&e&&e.__esModule)return e;var n=Object.create(null);if(r.r(n),Object.defineProperty(n,"default",{enumerable:!0,value:e}),2&t&&"string"!=typeof e)for(var o in e)r.d(n,o,function(t){return e[t]}.bind(null,o));return n},r.n=function(e){var t=e&&e.__esModule?function(){return e.default}:function(){return e};return r.d(t,"a",t),t},r.o=function(e,t){return Object.prototype.hasOwnProperty.call(e,t)},r.p="",r(r.s=0)}([function(e,t,r){"use strict";r.r(t),alert("hello, here's your first bundle file!")}])现在浏览器打开。
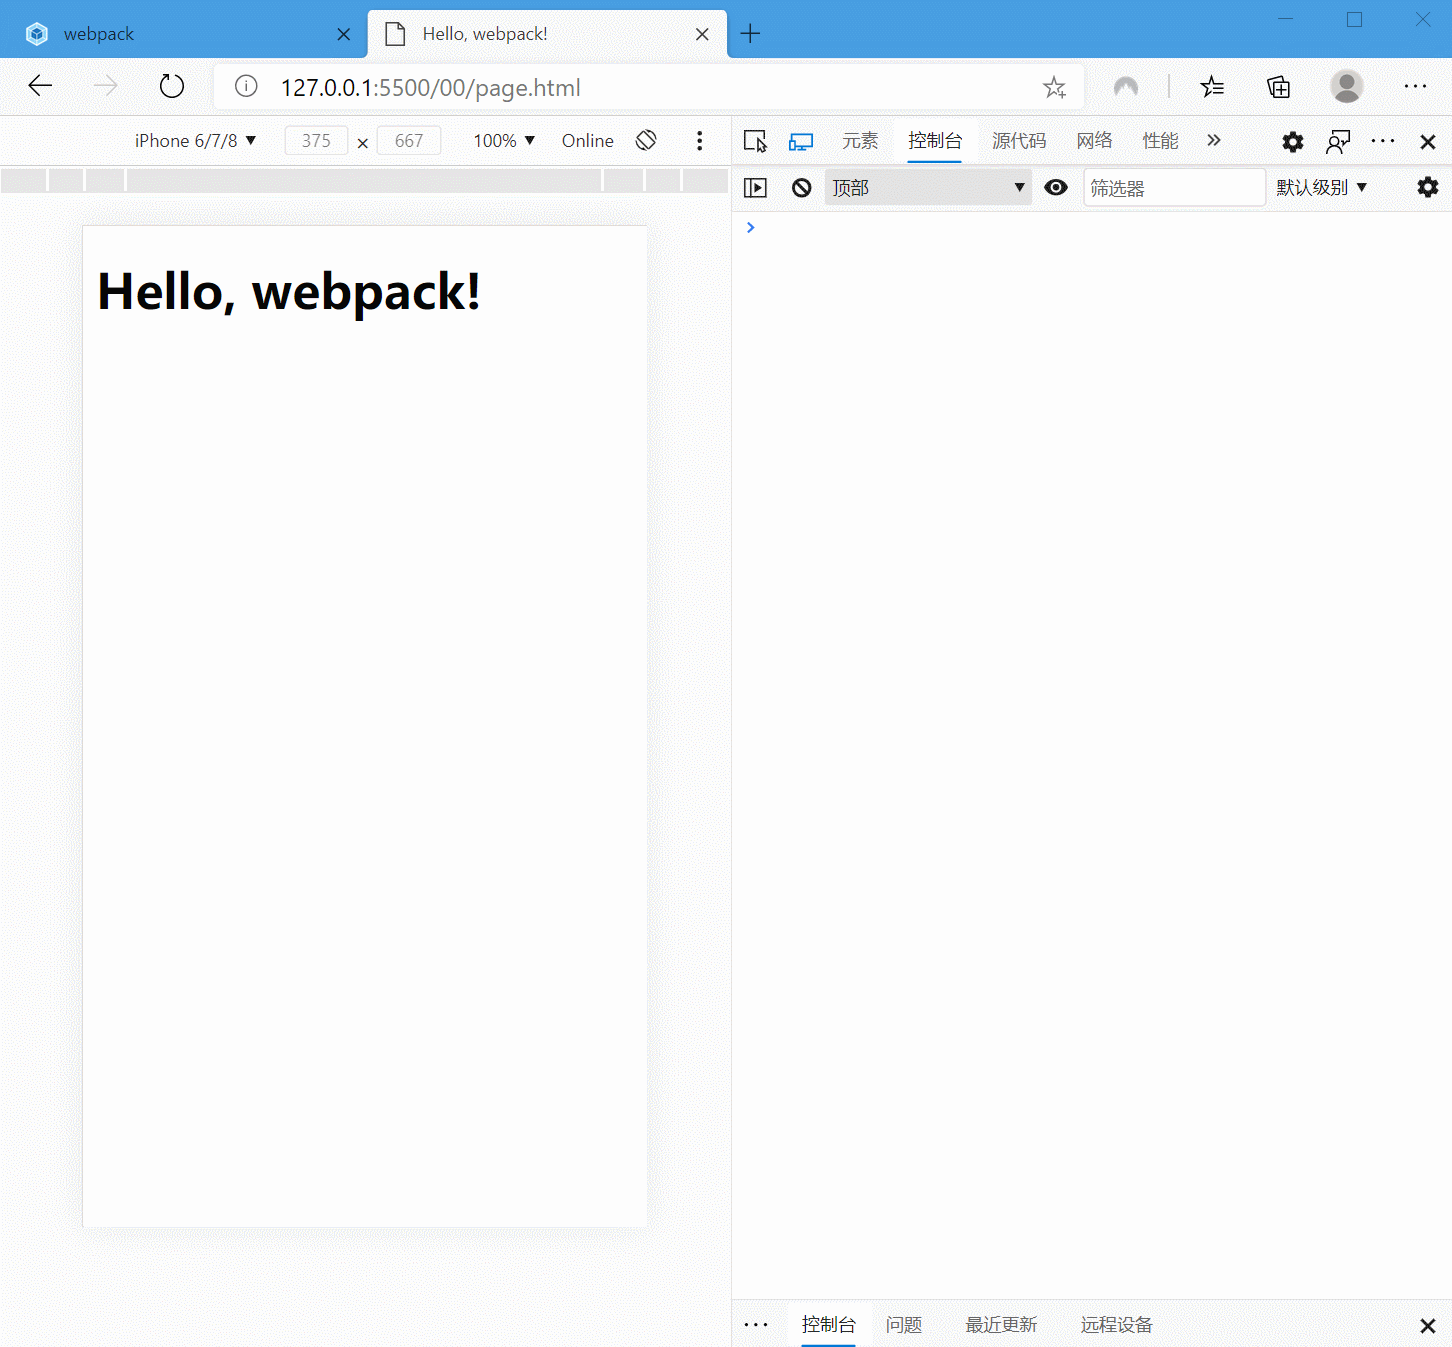
完成!
本作品采用《CC 协议》,转载必须注明作者和本文链接


 关于 LearnKu


