
dolphinscheduler 调度的部署
1 / 0 / 创建于 4年前 /
 Camouflage 的个人博客
修改hosts文件:
[hdfs@x ~]$ sudo vim /etc/hosts
172.20.151.26   xl.bdata.testdolphin01-151.26
172.20.151.27   xl.bdata.testdolphin02-151.27
172.20.151.28   xl.bdata.testdolphin03-151.28
172.20.151.29   xl.bdata.testdolphin04-151.29
172.20.151.30   xl.bdata.testdolphin05-151.30
设置免密:5台都进行设置免密
[hdfs@xl ~]$ ssh-keygen -t rsa -P '' -f ~/.ssh/id_rsa
[hdfs@xl ~]$ cat ~/.ssh/id_rsa.pub >> ~/.ssh/authorized_keys
[hdfs@xl ~]$ chmod 600 ~/.ssh/authorized_keys
[hdfs@xl ~]$ chmod 700 ~/.ssh/
#配置完成后进行测试是否能连接成功,每台节点都进行测试连接
[hdfs@xl ~]$ ssh -p22 hdfs@172.20.151.27
[hdfs@xl ~]$ ssh -p22 hdfs@172.20.151.28
创建普通用户:
# 创建用户需使用 root 登录
[root@xl ~]# useradd hdfs
# 添加密码
[root@xl ~]# echo "hdfs"|passwd --stdin hdfs
# 配置 sudo 免密
[root@xl ~]# sed -i '$ahdfs ALL=(ALL) NOPASSWD: NOPASSWD: ALL' /etc/sudoers
[root@xl ~]# sed -i 's/Defaults requirett/#Defaults requirett/g' /etc/sudoers
安装部署dolphinscheduler:(更新的时候以下两步不需要再执行,只需要在 conf/config/install_config.conf 配置好就可以)
- 初始化数据库:
[hdfs@xl ~]$ mysql -uroot -proot@2021 -h172.20.151.26 -P3306 mysql> CREATE DATABASE dolphin DEFAULT CHARACTER SET utf8 DEFAULT COLLATE utf8mb4_unicode_ci; Query OK, 1 row affected (0.00 sec) mysql> GRANT ALL PRIVILEGES ON dolphin.* TO '{hdfs}'@'%' IDENTIFIED BY '{hdfs@2021}'; Query OK, 0 rows affected, 1 warning (0.00 sec) mysql> GRANT ALL PRIVILEGES ON dolphin.* TO '{hdfs}'@'localhost' IDENTIFIED BY '{hdfs@2021}'; Query OK, 0 rows affected, 1 warning (0.00 sec) mysql> flush privileges; Query OK, 0 rows affected (0.01 sec) - 运行对应数据库的最新定义文件,位置在安装目录 sql/sql/dolphinscheduler_*.sql 。例如你是 MySQL ,运行 sql/sql/dolphinscheduler_mysql.sql ,是 PostgreSQL 则运行 sql/sql/dolphinscheduler_postgre.sql
将hadoop的xml配置文件复制到conf下:[hdfs@xl ~]$ mysql -uhdfs -phdfs@2021 -h172.20.151.26 -P3306 mysql> source /data1/software/dolphins-2.0.3/sql/sql/dolphinscheduler_mysql.sql; NOTICE: 最新版本目前通过运行命令 [hdfs@xl dolphins-2.0.3]$ sh script/create-dolphinscheduler.sh . ____ _ __ _ _ /\\ / ___'_ __ _ _(_)_ __ __ _ \ \ \ ( ( )\___ | '_ | '_| | '_ \/ _` | \ \ \ \\/ ___)| |_)| | | | | || (_| | ) ) ) ) ' |____| .__|_| |_|_| |_\__, | / / / / =========|_|==============|___/=/_/_/_/ :: Spring Boot :: (v2.5.6) 2021-12-21 17:05:20.909 INFO 27691 --- [ main] o.a.d.d.u.shell.CreateDolphinScheduler : StartingCreateDolphinScheduler v2.0.2-SNAPSHOT using Java 1.8.0_202 on xl-zhouhuitest-2-73 with PID 27691(/data/software/dolphins-2.0.2/lib/dolphinscheduler-dao-2.0.2-SNAPSHOT.jar started by hdfs in /data/software/dolphins-2.0.2) 2021-12-21 17:05:20.915 INFO 27691 --- [ main] o.a.d.d.u.shell.CreateDolphinScheduler : The following profiles areactive: shell-create,shell-cli,default,mysql 2021-12-21 17:05:22.702 INFO 27691 --- [ main] ru.yandex.clickhouse.ClickHouseDriver : Driver registered 2021-12-21 17:05:23.245 INFO 27691 --- [ main] com.zaxxer.hikari.HikariDataSource : DolphinScheduler - Starting... Tue Dec 21 17:05:23 CST 2021 WARN: Establishing SSL connection without server's identity verification is not recommended. According to MySQL 5.5.45+, 5.6.26+ and 5.7.6+ requirements SSL connection must be established by default if explicit optionisn't set. For compliance with existing applications not using SSL the verifyServerCertificate property is set to 'false'. You needeither to explicitly disable SSL by setting useSSL=false, or set useSSL=true and provide truststore for server certificateverification. 2021-12-21 17:05:23.878 INFO 27691 --- [ main] com.zaxxer.hikari.HikariDataSource : DolphinScheduler - Startcompleted. Tue Dec 21 17:05:23 CST 2021 WARN: Establishing SSL connection without server's identity verification is not recommended. According to MySQL 5.5.45+, 5.6.26+ and 5.7.6+ requirements SSL connection must be established by default if explicit optionisn't set. For compliance with existing applications not using SSL the verifyServerCertificate property is set to 'false'. You needeither to explicitly disable SSL by setting useSSL=false, or set useSSL=true and provide truststore for server certificateverification. Tue Dec 21 17:05:24 CST 2021 WARN: Establishing SSL connection without server's identity verification is not recommended. According to MySQL 5.5.45+, 5.6.26+ and 5.7.6+ requirements SSL connection must be established by default if explicit optionisn't set. For compliance with existing applications not using SSL the verifyServerCertificate property is set to 'false'. You needeither to explicitly disable SSL by setting useSSL=false, or set useSSL=true and provide truststore for server certificateverification. Tue Dec 21 17:05:24 CST 2021 WARN: Establishing SSL connection without server's identity verification is not recommended. According to MySQL 5.5.45+, 5.6.26+ and 5.7.6+ requirements SSL connection must be established by default if explicit optionisn't set. For compliance with existing applications not using SSL the verifyServerCertificate property is set to 'false'. You needeither to explicitly disable SSL by setting useSSL=false, or set useSSL=true and provide truststore for server certificateverification. Tue Dec 21 17:05:24 CST 2021 WARN: Establishing SSL connection without server's identity verification is not recommended. According to MySQL 5.5.45+, 5.6.26+ and 5.7.6+ requirements SSL connection must be established by default if explicit optionisn't set. For compliance with existing applications not using SSL the verifyServerCertificate property is set to 'false'. You needeither to explicitly disable SSL by setting useSSL=false, or set useSSL=true and provide truststore for server certificateverification
修改 application-mysql.yaml:[hdfs@xl ~]$ cp core-site.xml /data/software/dolphins-2.0.3/conf/ [hdfs@xl ~]$ cp hdfs-site.xml /data/software/dolphins-2.0.3/conf/
修改相关配置:# Licensed to the Apache Software Foundation (ASF) under one # or more contributor license agreements. See the NOTICE file # distributed with this work for additional information # regarding copyright ownership. The ASF licenses this file # to you under the Apache License, Version 2.0 (the # "License"); you may not use this file except in compliance # with the License. You may obtain a copy of the License at # # http://www.apache.org/licenses/LICENSE-2.0 # # Unless required by applicable law or agreed to in writing, # software distributed under the License is distributed on an # "AS IS" BASIS, WITHOUT WARRANTIES OR CONDITIONS OF ANY # KIND, either express or implied. See the License for the # specific language governing permissions and limitations # under the License. # spring: datasource: driver-class-name: com.mysql.cj.jdbc.Driver url: jdbc:mysql://192.168.2.177:3306/dolphins?useUnicode=true&characterEncoding=utf8&zeroDateTimeBehavior=convertToNull&useSSL=true&serverTimezone=GMT%2B8&allowPublicKeyRetrie val=true username: dolphin password: dolphin123 hikari: connection-test-query: select 1 minimum-idle: 5 auto-commit: true validation-timeout: 3000 pool-name: DolphinScheduler maximum-pool-size: 50 connection-timeout: 30000 idle-timeout: 600000 leak-detection-threshold: 0 initialization-fail-timeout: 1
完成了基础环境的准备后,在运行部署命令前,还需要根据环境修改配置文件。配置文件在路径在conf/config/install_config.conf下,一般部署只需要修改INSTALL MACHINE、DolphinScheduler ENV、Database、RegistryServer部分即可完成部署,下面对必须修改参数进行说明
修改 conf/env 目录下的 .dolphinscheduler_env.sh:[hdfs@xl dolphins-2.0.3]$ vim conf/config/install_config.conf # # Licensed to the Apache Software Foundation (ASF) under one or more # contributor license agreements. See the NOTICE file distributed with # this work for additional information regarding copyright ownership. # The ASF licenses this file to You under the Apache License, Version 2.0 # (the "License"); you may not use this file except in compliance with # the License. You may obtain a copy of the License at # # http://www.apache.org/licenses/LICENSE-2.0 # # Unless required by applicable law or agreed to in writing, software # distributed under the License is distributed on an "AS IS" BASIS, # WITHOUT WARRANTIES OR CONDITIONS OF ANY KIND, either express or implied. # See the License for the specific language governing permissions and # limitations under the License. # # --------------------------------------------------------- # INSTALL MACHINE # --------------------------------------------------------- # A comma separated list of machine hostname or IP would be installed DolphinScheduler, # including master, worker, api, alert. If you want to deploy in pseudo-distributed # mode, just write a pseudo-distributed hostname # Example for hostnames: ips="ds1,ds2,ds3,ds4,ds5", Example for IPs: ips="192.168.8.1,192.168.8.2,192.168.8.3,192.168.8.4,192.168.8.5" ips="172.20.151.26,172.20.151.27,172.20.151.28,172.20.151.29,172.20.151.30" # Port of SSH protocol, default value is 22. For now we only support same port in all `ips` machine # modify it if you use different ssh port sshPort="22" # A comma separated list of machine hostname or IP would be installed Master server, it # must be a subset of configuration `ips`. # Example for hostnames: masters="ds1,ds2", Example for IPs: masters="192.168.8.1,192.168.8.2" masters="172.20.151.27" # A comma separated list of machine <hostname>:<workerGroup> or <IP>:<workerGroup>.All hostname or IP must be a # subset of configuration `ips`, And workerGroup have default value as `default`, but we recommend you declare behind the hosts # Example for hostnames: workers="ds1:default,ds2:default,ds3:default", Example for IPs: workers="192.168.8.1:default,192.168.8.2:default,192.168.8.3:default" workers="172.20.151.28:default,172.20.151.29:default,172.20.151.30:default" # A comma separated list of machine hostname or IP would be installed Alert server, it # must be a subset of configuration `ips`. # Example for hostname: alertServer="ds3", Example for IP: alertServer="192.168.8.3" alertServer="172.20.151.26" # A comma separated list of machine hostname or IP would be installed API server, it # must be a subset of configuration `ips`. # Example for hostname: apiServers="ds1", Example for IP: apiServers="192.168.8.1" apiServers="172.20.151.26" # A comma separated list of machine hostname or IP would be installed Python gateway server, it # must be a subset of configuration `ips`. # Example for hostname: pythonGatewayServers="ds1", Example for IP: pythonGatewayServers="192.168.8.1" pythonGatewayServers="172.20.151.26" # The directory to install DolphinScheduler for all machine we config above. It will automatically be created by `install.sh` script if notexists. # Do not set this configuration same as the current path (pwd) installPath="/data/dolphins" # The user to deploy DolphinScheduler for all machine we config above. For now user must create by yourself before running`install.sh` # script. The user needs to have sudo privileges and permissions to operate hdfs. If hdfs is enabled than the root directory needs # to be created by this user deployUser="hdfs" # The directory to store local data for all machine we config above. Make sure user `deployUser` have permissions to read and writethis directory. dataBasedirPath="/data/dolphins" # --------------------------------------------------------- # DolphinScheduler ENV # --------------------------------------------------------- # JAVA_HOME, we recommend use same JAVA_HOME in all machine you going to install DolphinScheduler # and this configuration only support one parameter so far. javaHome="/usr/local/java" # DolphinScheduler API service port, also this is your DolphinScheduler UI component's URL port, default value is 12345 apiServerPort="12345" # --------------------------------------------------------- # Database # NOTICE: If database value has special characters, such as `.*[]^${}\+?|()@#&`, Please add prefix `\` for escaping. # --------------------------------------------------------- # The type for the metadata database # Supported values: ``postgresql``, ``mysql`, `h2``. DATABASE_TYPE=mysql # Spring datasource url, following <HOST>:<PORT>/<database>?<parameter> format, If you using mysql, you could use jdbc # string jdbc//127.0.0.1:3306/dolphinscheduler?useUnicode=true&characterEncoding=UTF-8 as example PRING_DATASOURCE_URL="jdbc//192.168.2.177:3306/dolphins?useUnicode=true&characterEncoding=UTF-8" # Spring datasource username SPRING_DATASOURCE_USERNAME=dolphin # Spring datasource password SPRING_DATASOURCE_PASSWORD=dolphin123 # --------------------------------------------------------- # Registry Server # --------------------------------------------------------- # Registry Server plugin name, should be a substring of `registryPluginDir`, DolphinScheduler use this for verifying configurationconsistency registryPluginName="zookeeper" # Registry Server address. registryServers="172.20.151.26:2181,172.20.151.27:2181,172.20.151.28:2181,172.20.151.29:2181,172.20.151.30:2181" # Registry Namespace registryNamespace="dolphins" # --------------------------------------------------------- # Worker Task Server # --------------------------------------------------------- # Worker Task Server plugin dir. DolphinScheduler will find and load the worker task plugin jar package from this dir. taskPluginDir="lib/plugin/task" # resource storage type: HDFS, S3, NONE resourceStorageType="HDFS" # resource store on HDFS/S3 path, resource file will store to this hdfs path, self configuration, please make sure the directory exists onhdfs and has read write permissions. "/dolphinscheduler" is recommended resourceUploadPath="/data/dolphins" # if resourceStorageType is HDFS,defaultFS write namenode address,HA, you need to put core-site.xml and hdfs-site.xml in theconf directory. # if S3,write S3 address,HA,for example :s3a://dolphinscheduler, # Note,S3 be sure to create the root directory /dolphinscheduler defaultFS="hdfs://coocaadata" # if resourceStorageType is S3, the following three configuration is required, otherwise please ignore #s3Endpoint="http://192.168.xx.xx:9010" #s3AccessKey="xxxxxxxxxx" #s3SecretKey="xxxxxxxxxx" # resourcemanager port, the default value is 8088 if not specified resourceManagerHttpAddressPort="8088" # if resourcemanager HA is enabled, please set the HA IPs; if resourcemanager is single node, keep this value empty yarnHaIps="xl.namenode2.coocaa.com,xl.namenode1.coocaa.com,xl.server1.coocaa.com" # if resourcemanager HA is enabled or not use resourcemanager, please keep the default value; If resourcemanager is single node, youonly need to replace 'yarnIp1' to actual resourcemanager hostname singleYarnIp="yarnIp1" # who has permission to create directory under HDFS/S3 root path # Note: if kerberos is enabled, please config hdfsRootUser= hdfsRootUser="hdfs" # kerberos config # whether kerberos starts, if kerberos starts, following four items need to config, otherwise please ignore #kerberosStartUp="false" # kdc krb5 config file path #krb5ConfPath="$installPath/conf/krb5.conf" # keytab username,watch out the @ sign should followd by \ #keytabUserName="hdfs-mycluster\\@ESZ.COM" # username keytab path #keytabPath="$installPath/conf/hdfs.headless.keytab" # kerberos expire time, the unit is hour #kerberosExpireTime="2" # use sudo or not sudoEnable="true" # worker tenant auto create workerTenantAutoCreate="false"
创建/data/dolphins:[hdfs@xl dolphins-2.0.3]$ vim conf/env/dolphinscheduler_env.sh export HADOOP_HOME=/usr/hdp/2.5.0.0-1245/hadoop export HADOOP_CONF_DIR=/usr/hdp/2.5.0.0-1245/hadoop/etc/hadoop # export SPARK_HOME1=/opt/soft/spark1 export SPARK_HOME2=/usr/hdp/2.5.0.0-1245/spark2 # export PYTHON_HOME=/opt/soft/python export JAVA_HOME=/usr/local/java # export HIVE_HOME=/opt/soft/hive export FLINK_HOME=/data/software/flink-1.14.3 #export DATAX_HOME=/opt/soft/datax exportPATH=$HADOOP_HOME/bin:$SPARK_HOME1/bin:$SPARK_HOME2/bin:$PYTHON_HOME/bin:$JAVA_HOME/bin:$HIVE_HOME/bin:$FLINK_HOME/bin:$DATAX_HOME/bin:$PATH
切换到部署用户,执行一键部署脚本[hdfs@xl dolphins-2.0.3]$ mkdir /data/dolphins [hdfs@xl dolphins-2.0.3]$ chown -R hdfs:hdfs /data/dolphins
脚本完成后,会启动以下5个服务,使用jps命令查看服务是否启动(jps为java JDK自带)[hdfs@xl dolphins-2.0.2]$ sh install.sh
访问前端页面地址,接口 ip (自行修改)172.20.151.26:12345/dolphinschedule... 账号:admin 密码:dolphinscheduler123[hdfs@xl dolphins-2.0.2]$ jps 30067 PythonGatewayServer ----- Python网关服务 30005 ApiApplicationServer ----- api服务 29944 AlertServer ----- alert服务 29865 LoggerServerr ----- logger服务 29757 MasterServer master服务 29807 WorkerServer ----- worker服务 [hdfs@xl-zhouhuitest-2-73 dolphins-2.0.3]$ netstat -nultp tcp6 0 0 :::12345 :::* LISTEN 30005/java tcp6 0 0 :::50051 :::* LISTEN 29865/java tcp6 0 0 :::50052 :::* LISTEN 29944/java tcp6 0 0 :::5678 :::* LISTEN 29757/java tcp6 0 0 :::1234 :::* LISTEN 29807/java tcp6 0 0 127.0.0.1:25333 :::* LISTEN 30067/java
告警实例管理:
完成上述操作后进行高警组管理:# 告警实例名称: # 选择插件:ding talkemailfeishuhttpscriptslackwechat # 收件人: # 抄送人: # mail.smtp.host:mail.coocaa.com # mail.smtp.port:25 # mail.sender:data_analysis_notice@coocaa.com # mail.smtp.auth:yes # mail.user:data_analysis_notice # mail.smtp.starttls.enable:yes # mail.smtp.ssl.enable:no # mail.smtp.ssl.trust:mail.coocaa.com # show_type:tabletextattachmenttable attachment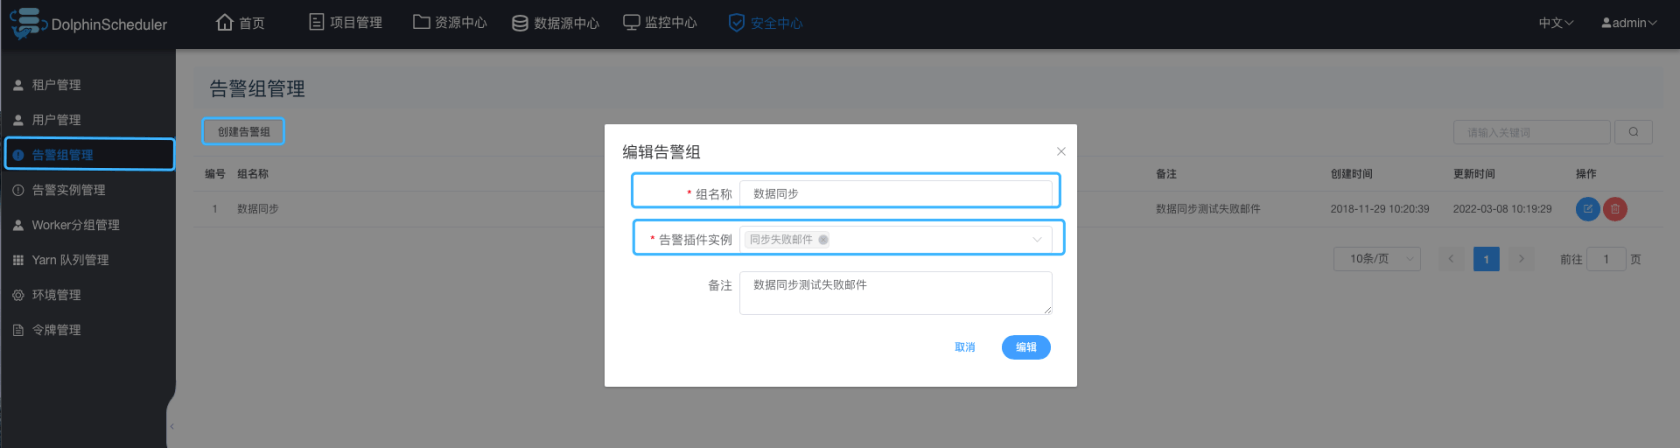
yarn队列管理:这里创建的队列要与yarn的队列相同,创建的队列不同则无法进行任务的执行!!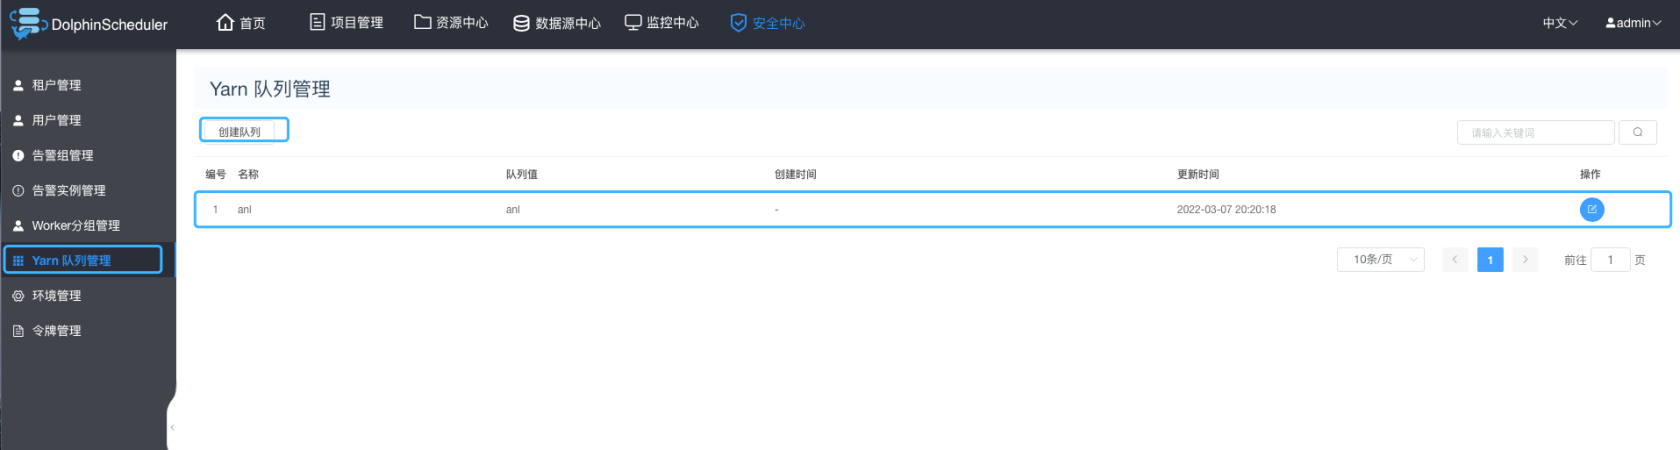
租用户管理:在执行任务时用那种用户去执行任务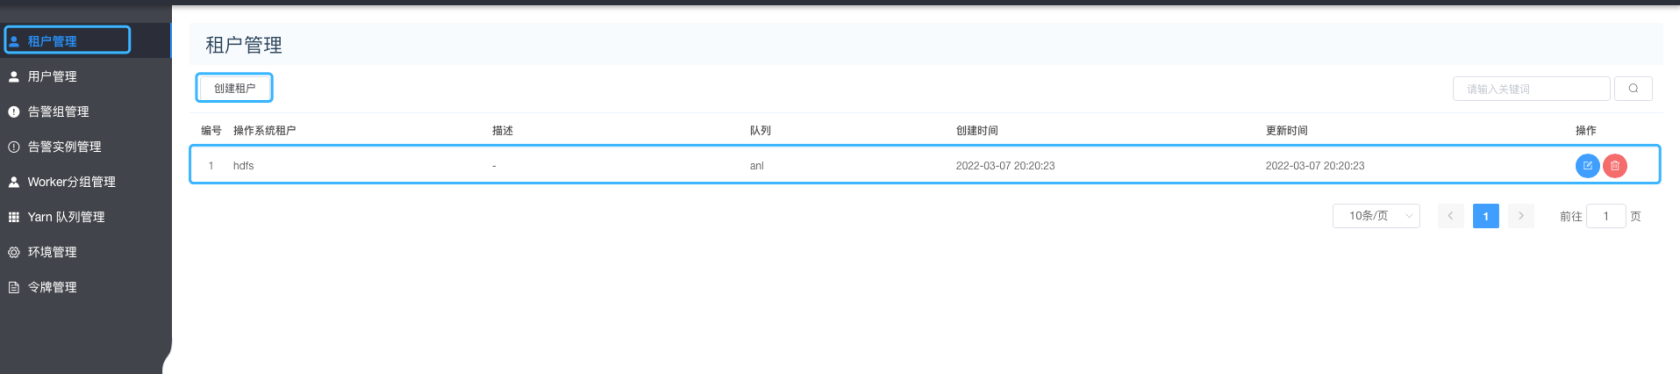
本作品采用《CC 协议》,转载必须注明作者和本文链接


 关于 LearnKu


