
Laravel - 服务设计模式
35 / 10 / 创建于 8年前
 PHPSIX 的个人博客
服务设计模式-start
- 服务模式
- 在 app 目录下建立一个 Repositories 目录,在 Repositories目录下,创建三个子目录:Contracts、Eloquent 和Exceptions。
Contracts: 接口目录
Eloquent: 用于存放实现Repository接口的抽象类和具体类。
Exceptions:目录用于存放异常处理类。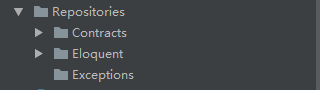
这种模式是参考Laravel的服务容器和服务提供者,Laravel 服务容器是一个用于管理类依赖和执行依赖注入的强大工具。依赖注入听上去很花哨,其实质是通过构造函数或者某些情况下通过 set 方法将类依赖注入到类中。服务提供者是所有Laravel应用启动的中心,你自己的应用以及所有Laravel的核心服务都是通过服务提供者启动。通过服务容器创建服务(service),然后在服务提供者中(provider)注册。 - 实现步骤:
- 定义接口
在app\Repositories\Contracts 文件夹下创建 UserInterface.php<?php namespace App\Repositories\Contracts; interface UserInterface{ public function findBy($id); } - 实现接口类
在app\Repositories\Eloquent 文件夹下创建UserServiceRepository.php<?php namespace App\Repositories\Eloquent; use App\Repositories\Contracts\UserInterface; use App\User; //服务模式 class UserServiceRepository implements UserInterface{ public function findBy($id) { return User::find($id); } } - 注册服务
创建provider或在系统的provider中注册(接口与实现类的绑定):php artisan make:provider RepositoryServiceProvider
打开app\Providers\RepositoryServiceProvider.phppublic function register() { //接口与实现类的两种绑定模式 //单例模式(个人推荐) $this->app->singleton('App\Repositories\Contracts\UserInterface',function ($app){ return new \App\Repositories\Eloquent\UserServiceRepository(); }); //绑定 // $this->app->bind('App\Repositories\Contracts\UserInterface','App\Repositories\Eloquent\UserServiceRepository'); } - 添加到配置文件中:
注:如果不是自己创建provider,而是直接在AppServiceProvider.php中绑定的话,则不需要操作本步骤,因为系统已经引入了那4个Provider 。
具体步骤:
打开 config/app.php, providers 数组中添加下面一行:app\Providers\RepositoryServiceProvider::class, - 在控制器中调用
首先要在控制器中引入:use App\Repositories\Contracts\UserInterface;
然后再进行依赖注入:private $user; //定义一个私有的变量 public function __construct(UserInterface $user){ $this->user = $user; } public function index(){ dd($this->user->findBy(1)->toArray()); }
- 定义接口
- 在 app 目录下建立一个 Repositories 目录,在 Repositories目录下,创建三个子目录:Contracts、Eloquent 和Exceptions。
-
门面模式
- 门面为应用的服务容器中的绑定类提供了一个“静态”接口。Laravel 内置了很多门面,你可能在不知道的情况下正在使用它们。Laravel 的门面作为服务容器中的底层类的“静态代理”,相比于传统静态方法,在维护时能够提供更加易于测试、更加灵活的、简明且富有表现力的语法。门面就是一个提供访问容器中对象的类。该机制原理由 Facade 类实现,Laravel 自带的门面,以及创建的自定义门面,都会继承自 Illuminate\Support\Facades\Facade 基类。门面类只需要实现一个方法:getFacadeAccessor。正是 getFacadeAccessor 方法定义了从容器中解析什么,然后 Facade 基类使用魔术方法 __callStatic() 从你的门面中调用解析对象。
-
实现步骤:
- 定义接口(建议):
虽然门面模式中可以不用定义接口,个人建议还是定义接口。在以后的项目功能升级并兼容老功能的时候非常有用,增加了开发时间,却减少了后期维护或升级功能的难度。
具体步骤:
在 app\Repositories\Contracts 文件夹下新建UserInterface.php<?php namespace App\Repositories\Contracts; interface UserInterface{ public function findBy($id); } - 接口实现类
具体步骤:
在 app\Repositories\Eloquent 文件夹下新建 UserFacadeRepository.php<?php namespace App\Repositories\Eloquent; use App\Repositories\Contracts\UserInterface; use App\User; class UserFacadeRepository implements UserInterface{ //根据id查找用户信息 public function findBy($id){ return User::find($id); } } - 注册服务
执行如下命令,新建一个RepositoryServiceProvider:php artisan make:provider RepositoryServiceProvider
在register 方法中添加如下代码来注册服务:$this->app->singleton('UserFacadeRepository',function ($app){ return new \App\Repositories\Eloquent\UserFacadeRepository(); }); -
定义Facade(门面)
在 app目录下创建一个 Facades 目录, Facades目录下新建一个 UserFacade.php<?php namespace App\Facades; use Illuminate\Support\Facades\Facade; class UserFacade extends Facade{ protected static function getFacadeAccessor(){ return 'UserFacadeRepository'; } } - 在app\config\app.php中的aliases 数组中添加下面代码:
//自己新建的门面 'UserRepository' => App\Facades\UserFacade::class, - 使用门面
首先在方法中引入门面:use UserRepository;
使用门面:public function index(){ dd(UserRepository::findBy(1)->toArray()); }
- 定义接口(建议):
-
仓库(Repository)模式
- Repository 是衔接数据映射层和领域层之间的一个纽带,作用相当于一个在内存中的域对象集合。客户端对象把查询的一些实体进行组合,并把它们提交给 Repository。对象能够从 Repository 中移除或者添加。Repository 是MVC中衔接Controller和Model之间的一个纽带。从概念上讲,Repository 是把将数据给封装后的集合并提供给Controller的操作。
-
实现步骤:
- 定义接口
在app\Repositories\Contracts 目录下新建一个UserInterface.php<?php namespace App\Repositories\Contracts; interface UserInterface{ public function findBy($id); } -
定义一个基本的抽象类:
在 app\Repositories\Eloquent目录下新建一个Repository.php<?php namespace App\Repositories\Eloquent; use App\Repositories\Contracts\UserInterface; use Illuminate\Database\Eloquent\Model; use Illuminate\Container\Container as App; abstract class Repository implements UserInterface{ protected $app; //App容器 protected $model; //操作model public function __construct(App $app){ $this->app = $app; $this->makeModel(); } abstract function model(); public function findBy($id){ return $this->model->find($id); } public function makeModel(){ $model = $this->app->make($this->model()); /*是否是Model实例*/ if (!$model instanceof Model){ throw new RepositoryException("Class {$this->model()} must be an instance of Illuminate\\Database\\Eloquent\\Model"); } $this->model = $model; } } - 创建UserRepository.php 并继承抽象类
在 app\Repositories\Eloquent 目录下新建一个UserRepository.php<?php namespace App\Repositories\Eloquent; use App\Repositories\Eloquent\Repository; use App\User; class UserRepository extends Repository{ public function model(){ return User::class; } public function findBy($id){ return $this->model->where('id',$id)->first()->toArray(); } } - 控制器依赖注入
首先需要引入文件,然后在HomeController类里书写代码:<?php namespace App\Http\Controllers; use App\Http\Requests; use Illuminate\Http\Request; use App\Repositories\Contracts\UserInterface; use UserRepository; use App\Repositories\Eloquent\UserRepository as UserRepo; class HomeController extends Controller{ private $user; //定义一个私有的变量 private $userRepo; public function __construct(UserInterface $user,UserRepo $userRepo){ $this->user = $user; $this->userRepo = $userRepo; } public function index(){ dd($this->userRepo->findBy(2)); return view('home'); } }
- 定义接口
- 总结:
- 这种将数据访问从业务逻辑中分离出来的模式有很多好处:
- 集中数据访问逻辑使代码易于维护
- 业务和数据访问逻辑完全分离
- 减少重复代码
- 使程序出错的几率降低
- 一个控制器调用多个Repository数据的时候,要么都在相应的Repository中进行注入或引用,要么在控制其中添加。避免交叉引用乱象!
服务设计模式-end
本作品采用《CC 协议》,转载必须注明作者和本文链接
老郭博客:laughing:
个人博客地址:www.phpsix.com
本帖由系统于 7年前 自动加精


 关于 LearnKu


推荐文章: