
 AdonisJS 中文文档
发送邮件
你可以在你的应用程序中使用 AdonisJS 的 Mailer 模块发送邮件。它建立在 nodemailer 的基础上,增加了一些功能,如 预览邮件 和 在测试期间捕获电子邮件。
在开始发送电子邮件之前,请确保按照以下说明安装和配置该程序包。
# 安装
npm i @adonisjs/mail
# 配置
node ace configure @adonisjs/mail
# CREATE: config/mail.ts
# CREATE: contracts/mail.ts
# UPDATE: .env,.env.example
# UPDATE: tsconfig.json { types += "@adonisjs/mail" }
# UPDATE: .adonisrc.json { commands += "@adonisjs/mail/build/commands" }
# UPDATE: .adonisrc.json { providers += "@adonisjs/mail" }// 验证环境变量
/**
* 根据所使用的邮件驱动程序的不同
* 你必须验证它所需的环境变量。
*
* 下面是一个使用 Mailgun 的例子
*/
export default Env.rules({
MAILGUN_API_KEY: Env.schema.string(),
MAILGUN_DOMAIN: Env.schema.string(),
})-
支持多种驱动。SparkPost, SES, Mailgun 和 Smtp
-
能够在测试期间捕获电子邮件
-
使用Edge模板来定义电子邮件标记
-
在虚拟 SMTP 服务器上预览电子邮件
配置
邮件包的配置存储在 config/mail.ts 文件中。在此文件中,你可以使用相同或不同的驱动程序定义多个邮件驱动。
import { mailConfig } from '@adonisjs/mail/build/config'

export default mailConfig({
  mailer: 'mailgun',
  mailers: {
    mailgun: {
      driver: 'mailgun',
      baseUrl: 'https://api.mailgun.net/v3',
      key: Env.get('MAILGUN_API_KEY'),
      domain: Env.get('MAILGUN_DOMAIN'),
    },

    smtp: {
      driver: 'smtp',
      host: Env.get('SMTP_HOST') as string,
      port: Env.get('SMTP_PORT') as string,
    },
  },
})
mailer
mailer 属性定义用于发送电子邮件的默认邮件程序。
mailers
mailers 对象定义了您想要使用的邮件列表。每个邮件发送器必须指定它想要使用的驱动程序。
Mailgun 选项
mailgun 驱动可选择接受以下选项。
| 配置选项 | Mailgun 变种 |
|---|---|
oTags |
o\:tag |
oDeliverytime |
o\:deliverytime |
oTestMode |
o\:testmode |
oTracking |
o\:tracking |
oTrackingClick |
o\:tracking-clicks |
oTrackingOpens |
o\:tracking-opens |
oDkim |
o\:dkim |
headers |
h\:\ |
你也可以在 Mail.send 调用期间传递除 oDkim 之外的所有选项。
await Mail.use('mailgun').send((message) => {
  message.subject('Welcome Onboard!')
}, {
  oTags: ['signup'],
})
Sparkpost 选项
sparkpost 驱动可选地接受以下选项。
| 配置选项 | Sparkpost 变种 |
|---|---|
startTime |
start_time |
openTracking |
open_tracking |
clickTracking |
click_tracking |
transactional |
transactional |
sandbox |
sandbox |
skipSuppression |
skip_suppression |
ipPool |
ip_pool |
你也可以在 Mail.send 调用期间在运行时定义所有配置选项。
await Mail.use('sparkpost').send((message) => {
  message.subject('Welcome Onboard!')
}, {
  transaction: true,
  openTracking: false,
})
SMTP 身份验证选项
SMTP 连接的身份验证选项定义如下:
{
  smtp: {
    driver: 'smtp',
    auth: {
      type: 'login'
      user: 'username'
      pass: 'password'
    }
  }
}

// 使用 Oauth2
{
  smtp: {
    driver: 'smtp',
    auth: {
      type: 'OAuth2',
      user: 'username',
      clientId: 'clientId',
      clientSecret: 'clientSecret',
      refreshToken?: 'refreshToken',
      accessToken?: 'accessToken',
      expires?: 3600,
      accessUrl?: 'accessUrl'
    }
  }
}
配置新的邮件程序
您还可以在初始设置后使用 config stub 配置新的邮件程序。
此外,在定义其配置或使用它发送电子邮件之前,你必须在 contents/mail.ts 文件中定义邮件程序。合同文件是通知打字脚本静态编译器邮件程序存在的一种方式。
declare module '@ioc:Adonis/Addons/Mail' {
  import { MailDrivers } from '@ioc:Adonis/Addons/Mail'

  interface MailersList {
    smtp: MailDrivers['smtp'],
    ses: MailDrivers['ses'],
    mailgun: MailDrivers['mailgun'],
    sparkpost: MailDrivers['sparkpost'],
  }
}
MailersList 接口是一个由邮件名称和它使用的驱动程序组成的键值对。钥匙可以是任何东西。例如:
interface MailersList {
  transactional: MailDrivers['mailgun'],
  newsletter: MailDrivers['sparkpost'],
}
用法
完成设置后,你可以导入 Mail 模块并使用 Mail.send 方法发送电子邮件。它接受一个回调函数,让您配置传出消息。
在以下示例中,htmlView 方法接受 Edge 模板的路径以及您要传递给它的数据。
import Mail from '@ioc:Adonis/Addons/Mail'

class UsersController {
  public async store() {
    await Mail.send((message) => {
      message
        .from('info@example.com')
        .to('virk@adonisjs.com')
        .subject('Welcome Onboard!')
        .htmlView('emails/welcome', { name: 'Virk' })
    })
  }
}
延迟发送电子邮件
您可以使用 Mail.sendLater 方法将电子邮件推送到内存队列。这可确保电子邮件在后台发送,并且不会阻止正在进行的 HTTP 请求。例如:
class UsersController {
  public async store() {
    // 推送到内存队列
    await Mail.sendLater((message) => {
      message
        .from('info@example.com')
        .to('virk@adonisjs.com')
        .subject('Welcome Onboard!')
        .htmlView('emails/welcome', { name: 'Virk' })
    })
  }
}
电子邮件模板
你可以使用标准 Edge 模板来定义电子邮件内容。模板位于相同的 resources/views 目录中。为了更好地组织,你可以将它们移动到名为 emails 的子目录中。例如:
node ace make:view emails/welcome

# ✔  create    resources/views/emails/welcome.edge
打开新创建的模板文件并在其中粘贴以下内容。
<h1> Welcome {{ user.fullName }} </h1>
<p>
  <a href="{{ url }}">Click here</a> to verify your email address.
</p>
最后,你可以按如下方式引用模板。
await Mail.sendLater((message) => {
  message.htmlView('emails/welcome', {
    user: { fullName: 'Some Name' },
    url: 'https://your-app.com/verification-url',
  })
})
你还可以为纯文本和 Apple Watch 内容分配模板。
// title: Plain text
message.textView('emails/welcome.plain', {})
// title: Apple watch
message.watchView('emails/welcome.watch', {})使用 MJML 创建模板
这是一个截屏视频,展示了如何使用 MJML 作为电子邮件的标记语言。
:youtube{url="youtu.be/zehb-qUzRCM"}
附件
你可以使用 message.attach 方法发送附件。它需要附加文件的绝对路径。
import Mail from '@ioc:Adonis/Addons/Mail'
import Application from '@ioc:Adonis/Core/Application'

await Mail.sendLater((message) => {
  message.attach(Application.tmpPath('receipt.png'))
})
文件内容类型、编码和标题是从文件名派生的。但是,你可以通过显式定义它们来覆盖默认值。
message.attach(
  Application.tmpPath('receipt.png'),
  {
    filename: `${transaction.id}.png`,
    contentDisposition: 'attachment',
    contentType: 'image/png',
  }
)
流和缓冲区作为附件
你还可以使用 message.attachData 方法直接将缓冲区或流作为附件发送。
注:
- 确保在传递缓冲区或流时明确定义文件名。
- 你不能将
attachData方法与Mail.sendLater一起使用,因为流和缓冲区无法序列化为队列作业。
message.attachData(
  fs.createReadStream('file.txt'),
  {
    filename: 'file.txt'
  }
)
message.attachData(
Buffer.from('hello world'),
{
filename: 'file.txt'
}
)嵌入图像
有 multiple ways 在电子邮件正文中呈现图像。一个示例是将图像作为附件发送,然后使用其 Content-Id (CID) 将其添加到 HTML。
你可以使用 message.embed 方法并将文件的绝对路径以及唯一 id 作为第二个参数传递给它。
await Mail.sendLater((message) => {
  message.embed(
    Application.publicPath('receipt.png'),
    'a-unique-id-for-the-attachment',
  )
})
在 Edge 模板中,你可以使用之前定义的唯一 id 作为 img src。
// title: Email template
<img src="cid:a-unique-id-for-the-attachment" />
与 message.attachData 类似,你也可以使用 embedData 方法直接嵌入 Buffer 或流。
注:
你不能将embedData方法与Mail.sendLater一起使用,因为无法将流和缓冲区序列化为队列作业。
message.embedData(
  fs.createReadStream('file.txt'),
  'a-unique-id-for-the-attachment',
)
日历事件
你可以使用 message.icalEvent 方法附加日历事件(.ics 文件)。该方法接受邀请内容作为字符串或回调以编程方式生成内容。
message.icalEvent(eventContent, {
  method: 'PUBLISH',
  filename: 'invite.ics',
})
或者使用日历的 fluent API 生成内容。传递给回调的calendar对象是 ICalCalendar 包的 ical-generator 类的实例。
import { DateTime } from 'luxon'

message.icalEvent((calendar) => {
  calendar
    .createEvent({
      summary: 'Adding support for ALS',
      start: DateTime.local().plus({ minutes: 30 }),
      end: DateTime.local().plus({ minutes: 60 }),
    })
})
icalEventFromFile
你可以使用 message.icalEventFromFile 方法附加预先存在的 .ics 文件。第一个参数是文件的绝对路径。
message.icalEventFromFile(
  Application.resourcesPath('calendar-invites/invite.ics'),
  {
    filename: 'invite.ics',
    method: 'PUBLISH'
  }
)
icalEventFromUrl
你可以从返回邀请内容的 URL 附加事件。
message.icalEventFromUrl(
  'https://myapp.com/users/1/invite'
  {
    filename: 'invite.ics',
    method: 'PUBLISH'
  }
)
消息 API
以下是message对象的可用方法列表。
from
定义电子邮件的发件人。
message.from('admin@example.com')

// 在电子邮件旁边定义名称
message.from('admin@example.com', 'Admin')
to
定义电子邮件的收件人。多次调用此方法会将新收件人推送到列表中。同样,你可以调用 cc 和 bcc 方法来添加尊重收件人。
message.to('foo@bar.com')

// 在电子邮件旁边定义名称
message.to('foo@bar.com', 'Mr foo')
subject
定义电子邮件的主题。
message.subject('Verify email address')replyTo
将出现在Reply-To: 字段中的电子邮件地址。
message.replyTo('support@example.com')

// 在电子邮件旁边定义名称
message.replyTo('support@example.com', 'Support team')
messageId
可选的参数,如果不设置则随机生成。
message.messageId('Custom-message-id')inReplyTo
参数代表要回复的地址
message.replyTo('some-existing-message-id')references
参数是数组
message.references(['id-1', 'id-2'])envelope
如果自动生成的SMTP结构不合适,可以自定义。(具体见 [SMTP envelope](nodemailer.com/smtp/envelope/)
message.envelope({
  from: '',
  to: '',
  cc: '',
  bcc: '',
})
priority
设置邮件重要性标头,值是 high, normal (默认) or low 其中之一。
message.priority('high')encoding
为 text/html 字符指明编码(默认是utf-8,其他可选值是hex 或 base64)
message.encoding('utf-8')htmlView
用渲染一个Edge模板来定义邮件的内容,并且,模板还支持传递数据变量
message.htmlView('emails/verify-email', { user: user })可以使用 textView 方法来定义邮件的原始内容,并且 watchView 方法可以指定应用内容。
html
必须使用 html 或者 htmlView 方法来定义邮件的HTML内容
message.html(`<p> Welcome </p>`)可以使用 text 和 watch 方法来把原始字符串定义为邮件内容
header
定义邮件头
message.header('X-Key-Name', 'X-Value')preparedHeader
内部邮件节点使用编号和折叠头部的方式来满足原始ASCII消息(单行不超过78个字符)的要求
有时,不适合修改头部的值和直接使用它们,这个时候可以使用 preparedHeader 方法。
message.preparedHeader('X-Key-Name', 'X-Value')在运行时切换邮件程序
你可以使用 Mail.use() 方法在邮件程序之间切换。use 方法接受 config/mail.ts 文件中 mailers 对象下定义的邮件程序名称。
await Mail.use('mailgun').sendLater(() => {
})

await Mail.use('smtp').sendLater(() => {
})
邮件类
Mailer 类允许你将内联邮件配置提取到其专用类。邮件程序存储在 app/Mailers 目录中,你可以通过运行以下 Ace 命令来创建新邮件程序。
node ace make:mailer VerifyEmail

# CREATE: app/Emails/VerifyEmail.ts
每个邮件程序类都必须继承 BaseMailer 以继承发送电子邮件的功能。在大多数情况下,你将在 prepare 方法中工作来配置邮件消息。
import { BaseMailer, MessageContract } from '@ioc:Adonis/Addons/Mail'

export default class VerifyEmail extends BaseMailer {
  public prepare(message: MessageContract) {
    message
      .subject('The email subject')
      .from('admin@example.com')
      .to('user@example.com')
  }
}
现在,你可以将内联 Mail.send 方法调用替换为 Mailer 类。
import VerifyEmail from 'App/Mailers/VerifyEmail'

// Instantiate the class and send email
await new VerifyEmail().sendLater()
将数据传递给邮件程序
Mailer 可以使用构造函数参数接受数据。例如:
export default class VerifyEmail extends BaseMailer {
  constructor (private user: User) {
    super()
  }

  public prepare(message: MessageContract) {
    message
      .subject('The email subject')
      .from('admin@example.com')
      .to(this.user.email)
  }
}
这是在实例化类时如何传递 user 的方法。
const user = await User.find(1)
await new VerifyEmail(user).sendLater()
使用不同的邮件程序
邮件程序类使用在 config/mail.ts 文件中配置的默认邮件程序。但是,你可以通过在类实例上定义以下属性来使用不同的属性。
import Mail, { BaseMailer, MessageContract } from '@ioc:Adonis/Addons/Mail'

export default class VerifyEmail extends BaseMailer {
  public mailer = Mail.use('mailgun')

  public prepare(message: MessageContract) {
    message
      .subject('The email subject')
      .from('admin@example.com')
      .to('user@example.com')
  }
}
自定义邮件目录
你可以通过在 .adonisrc.json 文件中定义 namespaces.mailers 属性来更改用于存储邮件的命名空间。进行以下更改后,make:mailer Ace 命令将在配置的目录中创建新文件。
"namespaces": {
  "mailers": "App/Emails"
}
Mailer 类方法
BaseMailer 类公开了以下方法来发送或预览电子邮件。
// 发送邮件
await new VerifyEmail().send()

// 通过将电子邮件推送到内存队列来发送电子邮件
await new VerifyEmail().sendLater()

// 使用伪造的 SMTP 服务器预览电子邮件
await new VerifyEmail().preview()
预览电子邮件
你可以通过将电子邮件发送到 假 SMTP 服务器 来预览你的电子邮件。这使你可以在将电子邮件发送给实际用户之前检查电子邮件是否有任何损坏的链接或附件。
你需要做的就是将 sendLater 方法替换为 preview 方法。
await Mail.preview((message) => {
  message
    .from('info@example.com')
    .to('virk@adonisjs.com')
    .subject('Welcome Onboard!')
    .htmlView('emails/welcome', { name: 'Virk' })
})
使用邮件类时,你可以直接在类实例上调用 preview 方法。以下是通过 Ace REPL 预览电子邮件的演示。
监控邮件队列
使用 Mail.sendLater 方法发送的电子邮件被移动到内存队列中。你可以使用 Mail.monitorQueue 方法监控此队列。
如果你没有明确监控队列,邮件模块将使用 logger 记录错误。
你可以在 preload file 中编写以下代码。
// title: start/mail.ts
import Mail from '@ioc:Adonis/Addons/Mail'

Mail.monitorQueue((error, result) => {
  if (error) {
    console.log('Unable to send email')
    console.log(error.mail)
    return
  }

  console.log('Email sent')
  console.log(result.mail)
  console.log(result.response)
})
事件
邮件模块发出 mail:sent 事件来监听外发邮件。您可以将事件侦听器的代码放在 preload 文件中。
// title: start/events.ts
import Event from '@ioc:Adonis/Core/Event'

Event.on('mail:sent', ({ message, views, mailer, response }) => {
  console.log(message)
  console.log(views)
  console.log(mailer)
  console.log(response)
})
你可以使用 Mail.prettyPrint 方法在终端上打印外发电子邮件。
// title: start/events.ts

import Event from '@ioc:Adonis/Core/Event'
import Mail from '@ioc:Adonis/Addons/Mail'

Event.on('mail:sent', Mail.prettyPrint)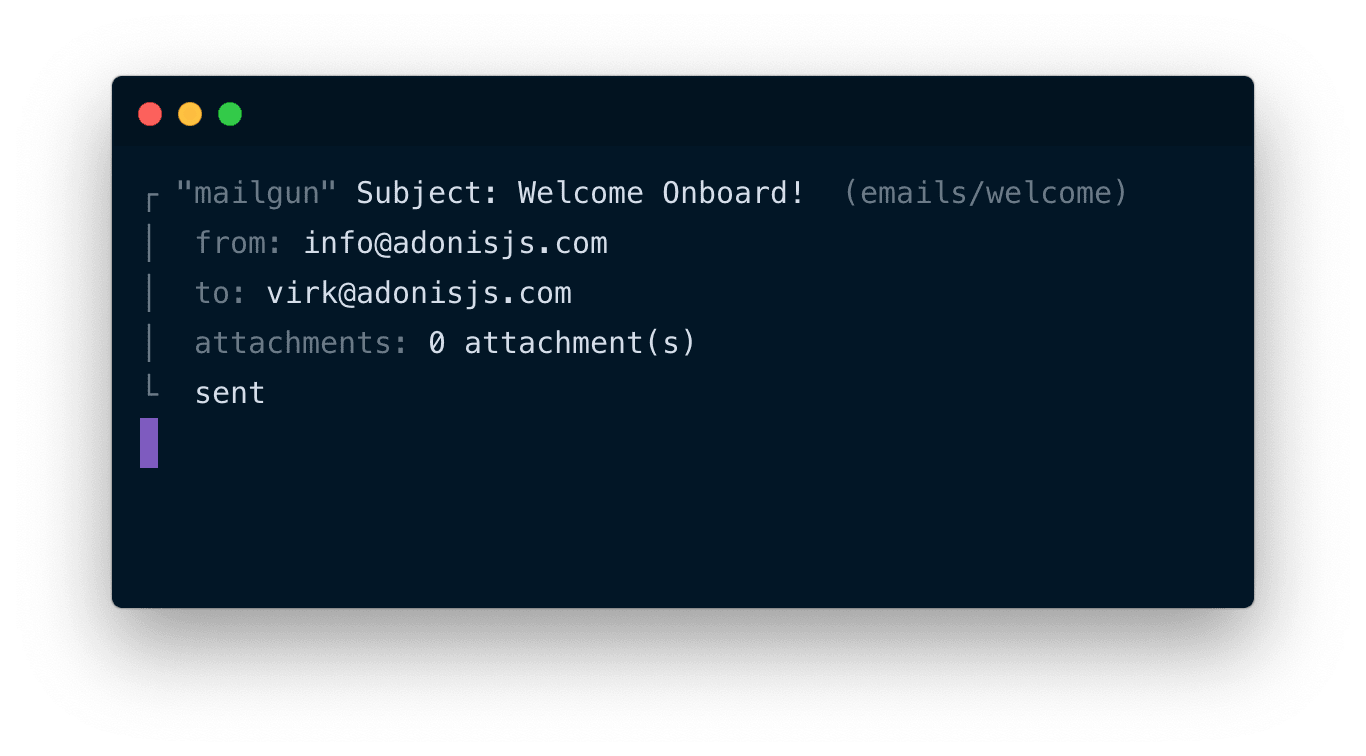
创建自定义邮件驱动程序
邮件包公开 API 以添加你的自定义驱动程序。每个驱动程序都必须遵守 MailDriverContract。
interface MailDriverContract {
  send(message: MessageNode, config?: any): Promise<any>
  close(): void | Promise<void>
}
send
send 方法负责发送电子邮件。它接收消息对象和可选的运行时配置(如果你的驱动程序可以接受它)。
close
close 方法应该清理它获得的所有资源。例如官方的【SES驱动】(https://github.com/adonisjs/mail/blob/develop/src/Drivers/Ses.ts#L54-L57)关闭了底层的nodemailer传输。
由外向内扩展
任何时候你都在扩展框架的核心。最好假设你无权访问应用程序代码及其依赖项。换句话说,像编写第三方包一样编写扩展,并使用依赖注入来依赖其他依赖。
出于演示目的,让我们创建一个包装现有 nodemailer 邮戳传输的邮件驱动程序。
mkdir providers/PostMarkDriver
touch providers/PostMarkDriver/index.ts
目录结构如下所示。
providers
└── PostMarkDriver
    └── index.ts
打开 PostMarkDriver/index.ts 文件并将以下内容粘贴到其中。
备注:
确保同时安装nodemailer和nodemailer-postmark-transport依赖项。
// 文件名: providers/PostMarkDriver/index.ts
import nodemailer from 'nodemailer'
import postMarkTransport from 'nodemailer-postmark-transport'
import { MailDriverContract, MessageNode } from '@ioc:Adonis/Addons/Mail'

/**
 * 驱动程序接受的配置
 */
export type PostMarkConfig = {
  driver: 'postmark',
  auth: {
    apiKey: string
  }
}

export class PostMarkDriver implements MailDriverContract {
  private transporter: any

  constructor(private config: PostMarkConfig) {
    /**
     * 实例化 nodemailer 传输
     */
    this.transporter = nodemailer.createTransport(
      postMarkTransport(this.config)
    )
  }

  /**
   * 使用底层传输发送电子邮件
   */
  public async send(message: MessageNode) {
    return this.transporter.sendMail(message)
  }

  /**
   * 清理资源
   */
  public close() {
    this.transporter.close()
    this.transporter = null
  }
}
接下来,你必须使用 AdonisJS 的Mail 模块注册驱动程序。你必须在服务提供者的 boot 方法中执行此操作。打开预先存在的 providers/AppProvider.ts 文件并将以下代码粘贴到其中。
import { ApplicationContract } from '@ioc:Adonis/Core/Application'

export default class AppProvider {
  constructor(protected app: ApplicationContract) {}

  public async boot() {
    const { PostMarkDriver } = await import('./PostMarkDriver')
    const Mail = this.app.container.use('Adonis/Addons/Mail')

    Mail.extend('postmark', (_mail, _mapping, config) => {
      return new PostMarkDriver(config)
    })
  }
}
驱动程序生命周期
邮件模块在内部创建驱动程序的单个实例并在应用程序的整个生命周期中使用它,除非有人决定手动关闭它。
通知 TypeScript 新驱动程序
在有人可以在 config/mail.ts 文件中引用此驱动程序之前。你必须告知 TypeScript 静态编译器它的存在。
如果你正在创建一个包,那么你可以在你的包主文件中编写以下代码,否则你可以将其编写在 contracts/mail.ts 文件中。
import { PostMarkConfig } from '../providers/PostMarkDriver'

declare module '@ioc:Adonis/Addons/Mail' {
  interface MailDrivers {
    postmark: {
      config: PostMarkConfig,
      implementation: MailDriverContract
    }
  }
}
使用驱动程序
好的,我们现在可以使用邮戳驱动程序了。让我们首先在 config/mail.ts 文件中定义新邮件程序的配置。
{
  mailers: {
    transactionalMailer: {
      driver: 'postmark',
      auth: {
        apiKey: 'your-api-key',
      }
    }
  }
}
并按如下方式使用它:
import Mail from '@ioc:Adonis/Core/Mail'

Mail.use('transactionalMailer').send((message) => {
})本译文仅用于学习和交流目的,转载请务必注明文章译者、出处、和本文链接
我们的翻译工作遵照 CC 协议,如果我们的工作有侵犯到您的权益,请及时联系我们。


 关于 LearnKu


