
 Buffalo中文文档
生成项目
这一章节中我们学习一下如何使用buffalo工具创建一个web应用。
创建一个应用
Buffalo的目标就是让我们能够在go语言中快速的创建一个简单好用的应用。
进入到你的源目录下
cd $GOPATH/src/github.com/$USER/确保你的$GOPATH/bin目录包含在你的环境变量PATH中,然后可以执行
$ buffalo new coke这就生成了一个叫coke的Buffalo应用,当然这个名称只是示例,实际项目中改为你项目的名称。new命令主要做了以下工作:
- Buffalo框架的基本的布局和一些默认的配置文件
- 所有必要的依赖以及自动安装
- 前端基于webpack的依赖也已经安装
-
和初始的git源
$ buffalo new coke
Buffalo version 0.14.7

  create  .buffalo.dev.yml
  create  assets/images/logo.svg
  create  assets/css/application.scss
  create  assets/images/favicon.ico
  create  assets/js/application.js
  create  .babelrc
  create  package.json
  create  public/assets/.keep
  create  webpack.config.js
     run  yarn install --no-progress --save
yarn install v0.27.5
info No lockfile found.
[1/4] Resolving packages...
[2/4] Fetching packages...
[3/4] Linking dependencies...
[4/4] Building fresh packages...
success Saved lockfile.
Done in 11.71s.
  create  models/models.go
  create  models/models_test.go
  create  grifts/db.go
     run  go get github.com/gobuffalo/pop/...
  create  ./database.yml
     run  goimports -w coke/grifts/db.go coke/models/models.go coke/models/models_test.go
  create  Dockerfile
  create  .dockerignore
     run  go get -u golang.org/x/tools/cmd/goimports
  create  README.md
  create  actions/actions_test.go
  create  actions/app.go
  create  actions/home.go
  create  actions/home_test.go
  create  actions/render.go
  create  .codeclimate.yml
  create  .env
  create  grifts/init.go
  create  inflections.json
  create  locales/all.en-us.yaml
  create  main.go
  create  public/robots.txt
  create  templates/_flash.html
  create  templates/application.html
  create  templates/index.html
     run  go get -t ./...
     run  goimports -w actions/actions_test.go actions/app.go actions/home.go actions/home_test.go actions/render.go grifts/db.go grifts/init.go main.go models/models.go models/models_test.go
  create  .gitignore
     run  git init
Initialized empty Git repository in /Users/markbates/Dropbox/development/gocode/src/github.com/markbates/coke/.git/
     run  git add .
     run  git commit -q -m Initial Commit
INFO[0055] Congratulations! Your application, coke, has been successfully built!
INFO[0055] You can find your new application at:
/Users/markbates/Dropbox/development/gocode/src/github.com/markbates/coke
INFO[0055]
Please read the README.md file in your new application for next steps on running your application.
创建一个自定义的app
默认的安装是强大的,但是也不一定适合你。Buffalo new命令行还提供了好几种选项。
你可以通过运行help来查看:$ buffalo help new Creates a new Buffalo application Usage: buffalo new [name] [flags] Flags: --api skip all front-end code and configure for an API server --bootstrap int specify version for Bootstrap [3, 4] (default 4) --ci-provider string specify the type of ci file you would like buffalo to generate [none, travis, gitlab-ci] (default "none") --config string config file (default is $HOME/.buffalo.yaml) --db-type string specify the type of database you want to use [cockroach, mysql, postgres, sqlite3] (default "postgres") --docker string specify the type of Docker file to generate [none, multi, standard] (default "multi") -f, --force delete and remake if the app already exists -h, --help help for new --skip-config skips using the config file --skip-pop skips adding pop/soda to your app --skip-webpack skips adding Webpack to your app --skip-yarn use npm instead of yarn for frontend dependencies management --vcs string specify the Version control system you would like to use [none, git, bzr] (default "git") -v, --verbose verbosely print out the go get commands --with-dep adds github.com/golang/dep to your app可以通过不同flag实现不同的定制化,比如api,就会省去很多前端的内容。比如指定数据库类型如mysql等,默认是postgres。
覆盖默认的配置
举个简单的例子,如果我们的数据库类型大部分都是mysql,那么我们每次创建app的时候都需要通过flag修改数据库类型也是很烦的。buffalo new命令行默认是从$HOME/.buffalo.yml读取配置的。可以通过 --config 来自定config文件的位置,也可以通过 --skip-config来指定不从配置文件加载配置项。
一个.buffalo.yml样例如下:skip-yarn: true db-type: mysql bootstrap: 4 with-dep: true在开发环境下运行app
由于go语言是编译型语言,所以正常情况下你每次修改完代码都需要重新build和运行才能看到改变。
$ buffalo devdev 命令将在默认情况下监控你app下的所有.go文件、.html和asset目录下的所有文件。如果这些文件有改动buffalo将自动rebuild和restart。
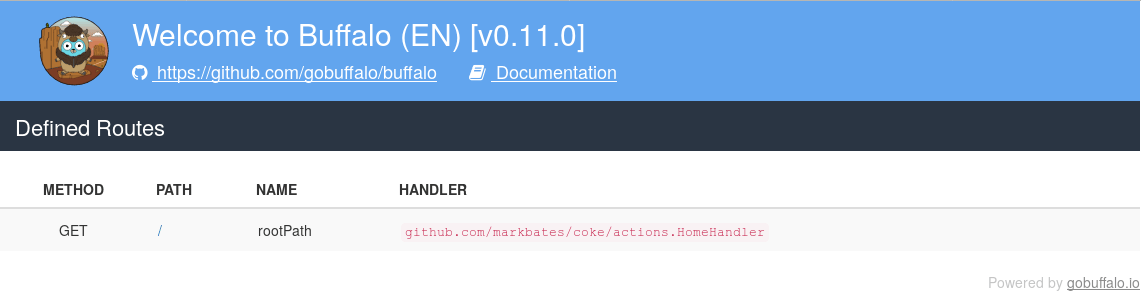
运行了buffalo dev,你可以用浏览器打开 localhost:3000/ 查看
自定义dev运行端口
你可以通过设置环境变量来改变dev运行的端口
$ PORT=3001 buffalo dev


 关于 LearnKu


推荐文章: