为 nginx 添加免费的 ssl(Let's Encrypt)
什么是 Let's Encrypt ?
Let’s Encrypt CA项目由Mozilla、思科、Akamai、IdenTrust和EFF等组织发起,向网站自动签发和管理免费证书,加速将Web从HTTP过渡到HTTPS。ISRG则是开发Let’s Encrypt CA的非营利组织。
安装letsencrypt
apt install letsencrypt使用letsencrypt生成ssl所需证书文件
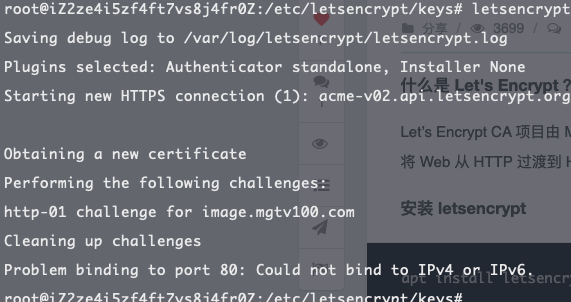
letsencrypt certonly --standalone --email your@mail.com -d domain.com -d domain2.com如果生成成功的话,会看到:
IMPORTANT NOTES:
- Congratulations! Your certificate and chain have been saved at
/etc/letsencrypt/live/xxx/fullchain.pem. Your cert
will expire on 2017-05-13. To obtain a new version of the
certificate in the future, simply run Let's Encrypt again.
- If you like Let's Encrypt, please consider supporting our work by:
Donating to ISRG / Let's Encrypt:   https://letsencrypt.org/donate
Donating to EFF:                    https://eff.org/donate-le
证书有效期只有90天,免费续期的命令如下
letsencrypt certonly --renew-by-default --email your@mail.com -d domain.com -d domain2.com配置crontab任务,自动续期
crontab格式
- 第1列分钟1~59
- 第2列小时1~23(0表示子夜)
- 第3列日1~31
- 第4列月1~12
- 第5列星期0~6(0表示星期天)
- 第6列要运行的命令
例子:
* * * * * /realpath/command1.创建自动续期脚本,updateCert.sh
sudo service nginx stop

/usr/bin/letsencrypt certonly --renew-by-default --email your@mail.com -d domain.com -d domain2.com

sudo service nginx start
2.添加crontab条目
crontab -e

* * 1 * * /realpath/upadteCert.sh
修改nginx.conf,添加https支持
listen 443 ssl http2;
#listen [::]:443 ssl http2;
server_name cdn.loldata.cn;
index index.html index.htm index.php default.html default.htm default.php;
root  /home/wwwroot/op-gg-spider/storage;
ssl on;
ssl_certificate /etc/letsencrypt/live/www.loldata.cn-0001/fullchain.pem;
ssl_certificate_key /etc/letsencrypt/live/www.loldata.cn-0001/privkey.pem;
ssl_session_timeout 5m;
ssl_protocols TLSv1 TLSv1.1 TLSv1.2;
ssl_prefer_server_ciphers on;
ssl_ciphers AES256+EECDH:AES256+EDH:!aNULL;
ssl_session_cache builtin:1000 shared:SSL:10m;
修改nginx.conf,使http自动跳转https
server
        {
        listen          80;
        server_name loldata.cn www.loldata.cn;
        return 301 https://www.loldata.cn$request_uri;
}
本帖已被设为精华帖!
本帖由系统于 7年前 自动加精


 关于 LearnKu


推荐文章: