
[转][寓教于乐]从英雄联盟来学pixi.js
好久没转好文了,今天查资(mo)料(yu) 的时候看到了这么一篇有意思的文章,讲的是 pixi.js 一个 canvas 引擎,可用于 canvas 小游戏、活动页开发等等,有基本的场景、镜头、精灵等功能,挺有意思的。
原文:juejin.cn/post/6937862827499749406
作者:阿隆_趣编程
前言
首先回顾一下上期文章 从表情包来学canvas, 初步认识了canvas的基本用法,并且通过案例来实现了常见的2D图形类的写法。 本期进步深入canvas,认识canvas的绘图库,并且制作一款简易的lol走位小游戏(点击试玩)。如果你觉得碰撞单位有点丑,其实我是故意的,学会他,改成你想要的图片,岂不美哉。
什么是pixi
先看看官网的解释: Create beautiful digital content with the fastest, most flexible 2D WebGL renderer。 最快而且最灵活的2D 渲染库。 是的你没看错,就是这么膨胀,并且内部实现默认使用webgl。
pixi.js是一个强大的canvas引擎,支持PC、移动端事件交互, 并且能根据用户设备来选择从webgl2到canvas的渲染方式,让妈妈在也不用担心我们不懂wegbl了,我们可以通过pixi来享用webgl带来的硬件加速体验。 在开发中,常在的H5活动页、小游戏等场景使用。 
基本用法
首先下载 npm install pixi.js -S 目前pixi已经到5.3版本了。 在V5之后开始用ts重构了,对与ts掌握不好的朋友如果想看源码的话可以看看V4版本的。
1. Application
import { Application } from 'pixi.js'
const app = new Application({
  width: 800,
  height: 800,
  antialias: true,    // default: false 反锯齿
  transparent: false, // default: false 透明度
  resolution: 1       // default: 1 分辨率
})
document.body.appendChild(app.view)
可以看出来pixi是通过Application类来创建应用的,返回一个app的实例,在app中app.view是一个canvas的dom元素,接下来对app类的操作也会在app.view这个canvas里显示出来。开发过移动端的朋友应该看的出来初始化的时候resolution属性是用来做dpi适配的,在pc端通常使用1。 在app创建完后,app上也会有app.stage和app.render两个重要的属性。 app.stage是画布的最底层,所有的图层都要添加到stage才能显示出来。
2. Container
container(容器)类是用来创建每个新的图层,简单的来说就是HTML里最常见的div的概念,上面提到的app.stage其实也是一个container,相信看到这里,你也明白了app.stage其实HTML中body的概念。
// 在continer1中创建一个起点(0,0),宽高100*100的矩形
const container1 = new Container()
const rectangle = new Graphics()
rectangle.beginFill(0x66CCFF)
rectangle.drawRect(0,0,100, 100);
container1.position.set(100, 100)
container1.addChild(rectangle)
app.stage.addChild(container1)
// 在container2中创建文本, 通过container.x / y 或者container.position来控制坐标
container1.position.set(100, 100)
const style = new TextStyle({
 fontSize: 36,
 fill: "white",
 stroke: '#ff3300',
 strokeThickness: 4,
 dropShadow: true,
})
const message = new Text("你好 Pixi", style)
container2.position.set(300, 100)
container2.addChild(message)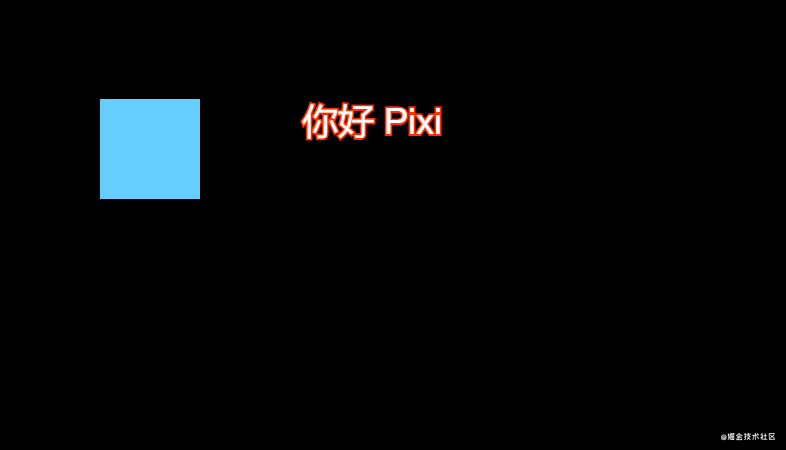
3. Sprite
Sprite(精灵),是用来处理图片的对象。
// 加载一张背景图
const bg = Sprite.from(images/lol-bg.jpg)
app.stage.addChild(bg)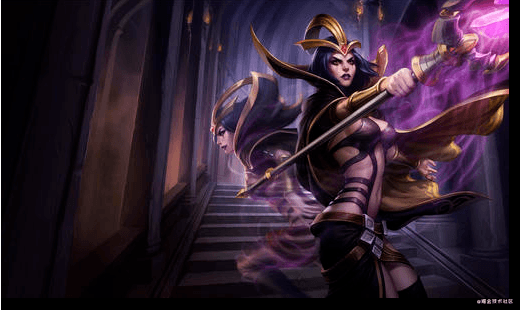
4. Loader
Loader(加载器), 通过加载器,可以一次加载批量的图片
const IMAGES = [{
  name: '1',
  url: 'images/1.png'
}, {
  name: '2',
  url: 'images/2.png'
}, {
  name: '3',
  url: 'images/lol-bg.jpg'
}]
app.loader.add(IMAGES).load(() => {
    console.log('加载完成')
})
做一个英雄联盟的走位小游戏
梦回S8,IG夺冠,那会很喜欢lol这款游戏,遥想当年驰骋沙场,如今已经代码工具人。我是一位lol的老玩家了,虽心有余却力不足,妄想策马再赴超神路,手速早已跟不上,手速早已跟不上,现在也只有周末偶尔才玩上几把,目前止步艾欧尼亚黄金1。之前看见网友在玩一款亚索的走位小游戏,心血来潮试了一下,没有找到找到亚索的图片资源素材,我们用一个丑陋的妖姬来代替。
初始化代码
- 写好配置项
// 新建一个confjg.js
export const WIDTH = 1000
export const HEIGHT = 600
export const IMAGES = [{
  name: 'player',
  url: 'images/1.png'
}, {
  name: 'background',
  url: 'images/2.png'
}, {
  name: 'starBackground',
  url: 'images/lol-bg.jpg'
}]

export const PLAYER_OPTIONS = {
  x: WIDTH / 2,
  y: HEIGHT / 2,
  scale: 0.3,
  width: 356,
  height: 220,
  speed: 3
}- 构建app
// 创建一个返回app实例的app.js文件
import { Application } from 'pixi.js'
import { WIDTH, HEIGHT } from './config'
export function appFactory() {
const app = new Application({
width: WIDTH,
height: HEIGHT,
antialias: true, // default: false 反锯齿
transparent: false, // default: false 透明度
resolution: 1 // default: 1 分辨率
})
document.body.appendChild(app.view)
app.view.oncontextmenu = (e) => { e.preventDefault()}
return app
}- 编写主代码
// 新建index.js 通过前面两步, 精简主代码, 所有的游戏逻辑都在加载完图片之后开始
import { WIDTH, HEIGHT, IMAGES } from './config'
import { appFactory } from './app'
const app = appFactory()
app.loader.add(IMAGES).load(setup)
function setup() {
    // todo 加载完图片后
    initScene()
    app.ticker.add(() => {
        // todo 场景更新、动画和碰撞检测
    })
}
function initScene() {
    // todo 初始化3个场景(开始场景、游戏场景、结束场景)
    startScene = new Container()
    startScene.name = 'start'
    playScene = new Container()
    playScene.name = 'play'
    overScene = new Container()
    overScene.name = 'over'
    app.stage.addChild(startScene)
    app.stage.addChild(playScene)
    app.stage.addChild(overScene)
}
// 切换场景
function changeScene(sceneName) {
const scenes = [startScene, playScene, overScene ]
  scenes.forEach((scene) => {
    currentScene = sceneName
    if (sceneName === scene.name) {
      scene.visible = true
     }
    })
}
开始场景
 先分析一下开始场景, 开始场景比较简单, 由2个按钮、一张背景图和一个镜头动画组成。
- 创建按钮
// 新建buttun.js 抽离出来精简index.js
import { Graphics, Text } from 'pixi.js'
export function getButton(text) {
  const button = new Graphics()
  button.lineStyle(2, 0x000, 0.3)
  button.beginFill(0xF5E817)
  button.drawPolygon([
    0, 0,
    180, 0,
    150, 48,
    0, 48,
  ])
  button.endFill();
  button.interactive = true;
  if(text) {
    const message = new Text(text)
    message.x = 28
    message.y = 12
    message.style = { fill: "black", fontSize: 24 }
    button.addChild(message)
    button.on('mouseover', () => {
      message.style.fill = 'white'
    })
    button.on('mouseout', () => {
      message.style.fill = 'black'
    })
  }
  return button
}
- 添加背景图,并且把按钮加入进来
  // 添加按钮
  startScene = new Container()
  startScene.name = 'start'
  const backgroundImage = new Sprite(app.loader.resources['starBackground'].texture)
  backgroundImage.name = 'background'
  const scareX = WIDTH / backgroundImage.width
  const scareY = HEIGHT / backgroundImage.height
  backgroundImage.scale.set(scareX, scareY)
  startScene.addChild(backgroundImage)
  // 添加按钮
  const startButton = getButton('开始游戏')
  startButton.position.set(24, 240)
  startScene.addChild(startButton)
  startButton.on('click', () => {
    changeScene('play')
  })
  const otherButton = getButton('其他功能')
  otherButton.position.set(24, 320)
  startScene.addChild(otherButton)
  app.stage.addChild(startScene)
  startScene.visible = true
3. 添加镜头移动动画 镜头移动动画从视觉上来看是圆圈移动,并且慢慢放大的过程。这样的画要分成2步骤, 于是乎我想到了直接修改镜头圆圈的放大倍数就可以实现移动以及放大两个组合效果了,如果你不能理解,看下面代码的实现操作一下应该能明白。
    // 圆的内半径
   const radius = 100;
   // 模糊量
   const blurSize = 32;
   const circle = new Graphics()
     .beginFill(0xFF0000)
     .drawCircle(radius + blurSize, radius + blurSize, radius)
     .endFill()
   circle.filters = [new filters.BlurFilter(blurSize)];
   const bounds = new Rectangle(0, 0, WIDTH, HEIGHT);
   const texture = app.renderer.generateTexture(circle, SCALE_MODES.NEAREST, 1, bounds);
   const focus = new Sprite(texture);
   app.stage.addChild(focus);
   const backgroundImage = startScene.getChildByName('background')
   backgroundImage.mask = focus
   let animateTimer = null
   const tween = new Tween(focus.scale).to({
     x: 5,
     y: 5,
   }, 1500).easing(Easing.Quadratic.In).onComplete((() => {
     if(animateTimer) {
       cancelAnimationFrame(animateTimer)
       animateTimer = null
     }
   })).start()

   function animate() {
     animateTimer = requestAnimationFrame(animate)
     tween.update()
   }
   requestAnimationFrame(animate)
利用tween来做补间动画, 把遮罩和圆圈从1倍放大到5倍。 现在开始场景就已经实现完毕了。
游戏场景
- 背景布置
  playScene = new Container()
  playScene.name = 'play'
  const mapTexture = app.loader.resources['background'].texture
  const rectangle = new Rectangle(0, 1080, 1550, 900)
  mapTexture.frame = rectangle
  const map = new Sprite(mapTexture)
  map.name = 'map'
  const mapScareX = WIDTH / map.width
  const mapScareY = HEIGHT / map.height
  map.scale.set(mapScareX, mapScareY)
playScene.addChild(map)- 编写妖姬类
// player.js
export class Player extends AnimatedSprite{

  constructor(frames, options) {
    super(frames)
    this.options = {}
    Object.assign(this.options, options, PLAYER_OPTIONS)
    this.radian = 0
    this.anchor.set(0.5, 0.5)
    this.targetX = this.options.x
    this.targetY = this.options.y
    this.position.set(this.options.x, this.options.y)
    this.animationSpeed = this.options.animationSpeed
    this.scale.set(this.options.scale, this.options.scale)
  }

  goto(x , y) {
    this.targetX = x
    this.targetY = y
    this.radian = Math.atan2((y - this.y), (x - this.x))
    this.rotation = this.radian
  }

  walk() {
    if(this.targetX === this.x && this.targetY === this.y) return
    const dx = this.x - this.targetX
    const dy = this.y - this.targetY
    const distance = Math.sqrt(Math.pow(dx, 2) + Math.pow(dy, 2))
    if(distance < this.options.speed) { // 距离小于一帧直接赋值
        this.x = this.targetX
        this.y = this.targetY
    } else {
      this.x = this.x + this.options.speed * Math.cos(this.radian)
      this.y = this.y + this.options.speed * Math.sin(this.radian)
    }
  }

  reset() {
    this.radian = 0
    this.x = this.options.x
    this.y = this.options.y
    this.targetX = this.options.x
    this.targetY = this.options.y
  }
}
讲解一下goto和walk函数
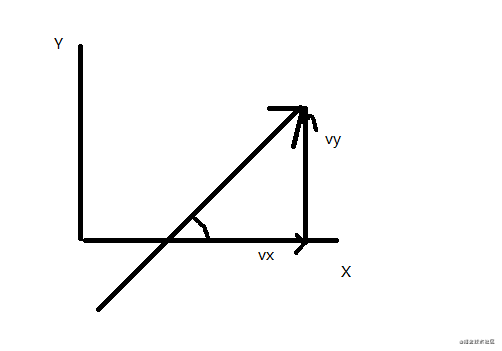
- 当鼠标点击画图的时候,我们能得到鼠标的位置, Math.atan2(dx, dy)可以得到两个点位之间形成的线段和x轴的夹角弧度
- 把单位的移动速度拆分成在x、y轴上的分量vx = speed * cos(Θ), vy = speed * sin(Θ)
 3. 编写碰撞单位类 这里代码walk直接复制了, walk可以和妖姬抽象到父类优化
export class Monster extends Graphics {
  constructor(options) {
    super()
    this.beginFill(0x9966FF)
    this.drawCircle(0,0, options.size || 32);
    this.endFill();
    this.x = options.x
    this.y = options.y
  }

  goto(x , y) {
    this.targetX = x
    this.targetY = y
    this.radian = Math.atan2((y - this.y), (x - this.x))
    this.rotation = this.radian
  }

  walk() {
    this.x = this.x + 3 * Math.cos(this.radian)
    this.y = this.y + 3 * Math.sin(this.radian)
  }
}- 产生随机的碰撞单位
export function monsterFactory(scene, target ,number, time = 300) {
  const boundary = [
    [0, WIDTH, 0, 0],
    [0, 0, 0, HEIGHT],
    [WIDTH, WIDTH, 0, HEIGHT],
    [0, WIDTH, HEIGHT, HEIGHT]
  ]
  const timer = setInterval(() => {
    for(let i = 0; i < number; i++) {
      const randomRange = boundary[getRadom(number, 0)]
      const x = getRadom(randomRange[1], randomRange[0])
      const y = getRadom(randomRange[3], randomRange[2])
      const monster = new Monster({
        x,
        y
      })
      monster.goto(target.x, target.y)
      scene.addChild(monster)
    }
  }, time);
  return timer
}
monsterFactory函数用来生成随机的碰撞单位。 定义了一个长度为4的boundary数组,从四个边界随机产生单位,并且可以通过time来控制多久生成一次单位,一次生成出多少个单位, 这里尝试把入参调大一些。
monsterFactory(playScene, yaoji, 5, 800) //每隔0.8秒产生5个肉眼可以,一下子蹦出了很多碰撞单位。 
结束场景
  overScene = new Container()
  overScene.name = 'over'
  const playButton = getButton('重新开始')
  playButton.position.set(24, 320)
  playButton.on('click', () => {
    changeScene('start')
  })
  overScene.addChild(playButton)
  const overText = new Text('加油,再来一次,你是下一个Faker')
  overText.x = 300
  overText.y = HEIGHT / 2
  overText.align = 'center'
  overText.style = { fill: "white", fontSize: 32 }
  overScene.visible = false
  overScene.addChild(overText)
  score = 0
  scoreText = new Text(`${score}`)
  scoreText.style = { fill: "red", fontSize: 32 }
  scoreText.position.set(WIDTH / 2, HEIGHT / 3)
结束场景相对前面就简单一些,代码复用了之前的按钮。
碰撞检测与计分
  app.ticker.add(() => {
    if (currentScene === 'play') {
      for(let i = 0; i < playScene.children.length; i++) {
        let c = playScene.children[i]
        if (c.name !== 'yaoji' && c.name !== 'map') {
          if(hit(yaoji, c)) { // 碰撞检测
            changeScene('over')
            return
          }
        }
      }
      scoreText.text  = `${++score}`  // 更新得分
      yaoji.walk()
      playScene.children.forEach(c => {
        if (c.name !== 'yaoji' && c.name !== 'map') {
          c.walk()
        }
      })
    }
  })

function hit(obj1, obj2) {
  let isHit = false
  const dx = obj1.x - obj2.x
  const dy = obj1.y - obj2.y
  const combinedHalfWidths = (obj1.width + obj2.width) / 2
  const combinedHalfHeights = (obj1.height + obj2.height) / 2
  if (Math.abs(dx) < combinedHalfWidths) {
    if (Math.abs(dy) < combinedHalfHeights) {
      isHit = true;
    }
  }
  return isHit
}
在帧动画的回调函数中加入碰撞检测,实际上本次采用的碰撞检测,对于这个案例有些误差,但是比较通用的方案。如果你想精确的做碰撞检测,可以参考一下各种形状距离的计算方式,不规则的形状也有射线投影的一些检测方案。
再上一层楼 - ticker函数的原理
文章相对于上一次难度增加了不少,如果已经看到这里,那再深入一下pixi吧。  上面的代码是app.ticker的构造函数,当创建app后内部时钟就开始tick,可以看出tick和我们平常写的动画一样,是使用requestAnimationFrame, 有意思的是内部维护了一个回调函数链表,很多人说面试造火箭,数据结构都没用上,看着源码正是用上了。why not 数组? 接口只需要暴新增和删除,没必须要下表访问,链式更好, 新增和删除的复杂的更低。
也许你可以尝试
代码介绍到这里就结束了,案例上还有不少问题,如果你感兴趣可以自己优化一下
- 开始场景只有开始按钮有效,可以扩展功能
- 碰撞粒子比较丑可以换成你喜欢的图片
- 碰撞检测可以根据你换成的图片形状优化
- 鼠标手势也没做,没找到喜欢的图片 - -
- 增加图片加载进度, 我只加载了3张图感觉不太需要(懒)
最后
这两期关于canvas 2d的基础玩法基本介绍完毕了, 通过pixi + tween + 高中数学、物理公式,对于市面上常见的活动页面效果已经能够应付了,如果2d的英雄联盟还觉得不够,那等以3d的部分再见,还你一个召唤兽峡谷。


 关于 LearnKu


有、意思
![file](cdn.learnku.com/uploads/images/202...~