
Laravel 项目:使用 TDD 构建论坛 Chapter 1
20 / 4 / 创建于 8年前 /
 洛未必达 的个人博客
0.写在前面
- 本系列文章为
laracasts.com的系列视频教程——Let's Build A Forum with Laravel and TDD 的学习笔记。若喜欢该系列视频,可去该网站订阅后下载该系列视频, 支持正版 。 - 视频源码地址:https://github.com/laracasts/Lets-Build-a-Forum-in-Laravel
- 本项目为一个 forum(论坛)项目,与本站的第二本实战教程 Laravel 教程 - Web 开发实战进阶 ( Laravel 5.5 ) 类似,可互相参照
- 项目开发模式为
TDD开发,教程简介为:A forum is a deceptively complex thing. Sure, it's made up of threads and replies, but what else might exist as part of a forum? What about profiles, or thread subscriptions, or filtering, or real-time notifications? As it turns out, a forum is the perfect project to stretch your programming muscles. In this series, we'll work together to build one with tests from A to Z.
- 项目版本为
laravel 5.4,教程后面会进行升级到laravel 5.5的教学 - 视频教程共计 102 个小节,笔记章节与视频教程一一对应
1.本节说明
- 对应视频教程第 1 小节:Initial Database Setup With Seeding
2.本节内容
开发环境
- 开发环境与本站推荐开发环境统一,详见:Laravel 开发环境部署
- 编辑器选用 PHP storm
新建项目
首先开启虚拟机:
> cd ~/Homestead && vagrant up
> vagrant ssh
新建一个名为 forum 的项目:
$ cd ~/Code
$ composer create-project laravel/laravel forum --prefer-dist "5.4.*"
构建模型
在本项目中,最基本的模型为 Thread , Reply , User :
# forum

1.Thread
2.Reply
3.User

A.Thread is created by a user
B.A reply belongs to a thread,and belongs to a user.建立Thread模型、迁移文件与控制器:
$ php artisan make:model Thread -mr会同时生成app\Thread.php模型文件,app\Http\Controllers\ThreadController.php控制器,database\migrations\{timestamp}_create_threads_table.php迁移。
注:该命令生成控制器时,应修改为复数形式,如 app\Http\Controllers\ThreadsController.php修改app\Thread.php文件:
.
.
class Thread extends Model
{
    protected $guarded = []; // 意味所有属性均可更新,后期会修复此安全隐患
.
.修改database\migrations\{timestamp}_create_threads_table.php文件:
.
.
public function up()
{
    Schema::create('threads', function (Blueprint $table) {
        $table->increments('id');
        $table->integer('user_id');
        $table->string('title');
        $table->text('body');
        $table->timestamps();
    });
}
.
.修改.env文件:
APP_NAME=forum
.
.
APP_URL=http://forum.test
.
.
DB_DATABASE=forum
.
.建立forum数据库,并运行迁移:
$ php artisan migrate建立Reply模型、迁移文件与控制器:
$ php artisan make:model Reply -mr修改app\Reply.php文件:
.
.
class Reply extends Model
{
    protected $guarded = [];
.
.修改database\migrations\{timestamp}_create_replies_table.php文件
.
.
public function up()
{
    Schema::create('replies', function (Blueprint $table) {
        $table->increments('id');
        $table->integer('thread_id');
        $table->integer('user_id');
        $table->text('body');
        $table->timestamps();
    });
}
.
.
再次运行迁移:
$ php artisan migrate模型工厂
修改database\factories\ModelFactory.php如下:
<?php
/*
|--------------------------------------------------------------------------
| Model Factories
|--------------------------------------------------------------------------
|
| Here you may define all of your model factories. Model factories give
| you a convenient way to create models for testing and seeding your
| database. Just tell the factory how a default model should look.
|
*/
/** @var \Illuminate\Database\Eloquent\Factory $factory */
$factory->define(App\User::class, function (Faker\Generator $faker) {
static $password;
return [
'name' => $faker->name,
'email' => $faker->unique()->safeEmail,
'password' => $password ?: $password = bcrypt('123456'),
'remember_token' => str_random(10),
];
});
$factory->define(App\Thread::class,function ($faker){
return [
'user_id' => function () {
return factory('App\User')->create()->id;
},
'title' => $faker->sentence,
'body' => $faker->paragraph,
];
});
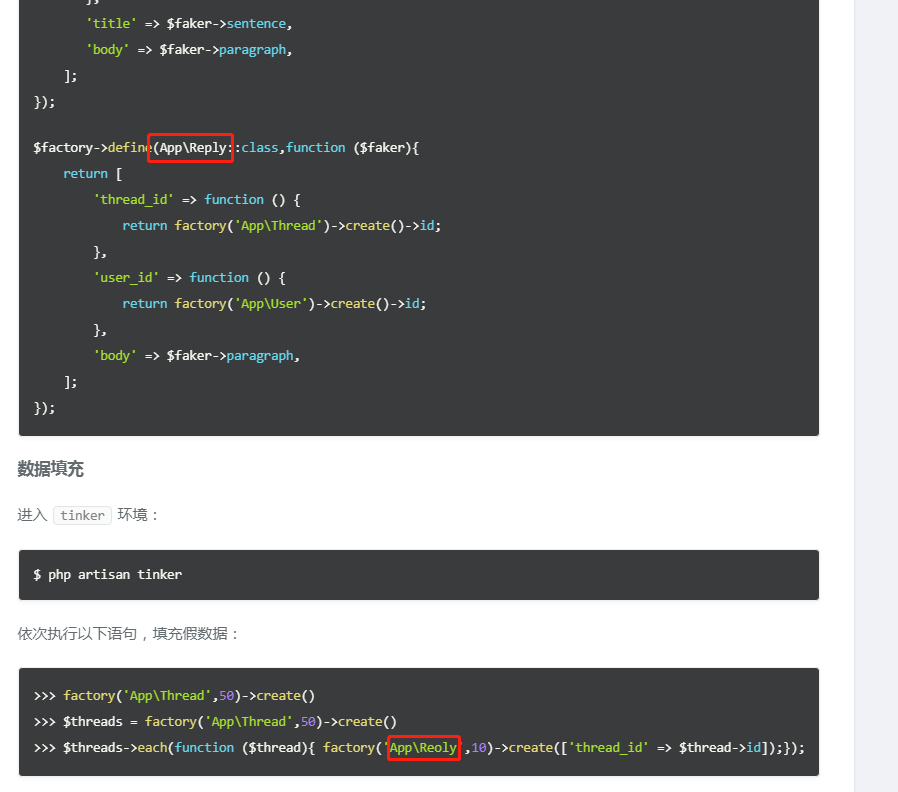
$factory->define(App\Reply::class,function ($faker){
return [
'thread_id' => function () {
return factory('App\Thread')->create()->id;
},
'user_id' => function () {
return factory('App\User')->create()->id;
},
'body' => $faker->paragraph,
];
});
数据填充
进入tinker环境:
$ php artisan tinker依次执行以下语句,填充假数据:
>>> factory('App\Thread',50)->create()
>>> $threads = factory('App\Thread',50)->create()
>>> $threads->each(function ($thread){ factory('App\Reoly',10)->create(['thread_id' => $thread->id]);});
3.笔记心得
- Git 相关操作略去不表
- 自己动手写笔记才更体会到本站实战教程撰写的用心,给编者大大们大大的赞!
4.写在后面
- 如有建议或意见,欢迎指出~
- 如果觉得文章写的不错,请点赞鼓励下哈,你的鼓励将是我的动力!
本作品采用《CC 协议》,转载必须注明作者和本文链接


 关于 LearnKu


推荐文章: