
Laravel+easywechat 开发微信公众号
17 / 10 / 创建于 7年前 /
 JasonZhang 的个人博客
1.在laravel中使用easywechat
composer require "overtrue/laravel-wechat:~4.0"2.创建配置文件:
php artisan vendor:publish --provider="Overtrue\LaravelWeChat\ServiceProvider"3.修改应用根目录下的 config/wechat.php
 /*
     * 公众号
     */
    'official_account' => [
        'default' => [
            'app_id' => env('WECHAT_OFFICIAL_ACCOUNT_APPID', 'your-app-id'),         // AppID
            'secret' => env('WECHAT_OFFICIAL_ACCOUNT_SECRET', 'your-app-secret'),    // AppSecret
            'token' => env('WECHAT_OFFICIAL_ACCOUNT_TOKEN', 'token'),           // Token
            'aes_key' => env('WECHAT_OFFICIAL_ACCOUNT_AES_KEY', ''),                 // EncodingAESKey

            /*
             * OAuth 配置
             *
             * scopes:公众平台(snsapi_userinfo / snsapi_base),开放平台:snsapi_login
             * callback:OAuth授权完成后的回调页地址(如果使用中间件,则随便填写。。。)
             */
            // 'oauth' => [
            //     'scopes'   => array_map('trim', explode(',', env('WECHAT_OFFICIAL_ACCOUNT_OAUTH_SCOPES', 'snsapi_userinfo'))),
            //     'callback' => env('WECHAT_OFFICIAL_ACCOUNT_OAUTH_CALLBACK', '/examples/oauth_callback.php'),
            // ],
        ],
    ],
4.定义路由
Route::any('/wechat', 'WeChatController@serve');一定是 Route::any, 因为微信服务端认证的时候是 GET, 接收用户消息时是 POST !
5.创建控制器 WechatController
namespace App\Http\Controllers;
use Log;

class WeChatController extends Controller
{

    /**
     * 处理微信的请求消息
     *
     * @return string
     */
    public function serve()
    {
        Log::info('request arrived.'); # 注意:Log 为 Laravel 组件,所以它记的日志去 Laravel 日志看,而不是 EasyWeChat 日志

        $app = app('wechat.official_account');
        $app->server->push(function($message){
            return "欢迎关注 overtrue!";
        });

        return $app->server->serve();
    }
}
6.在中间件 App\Http\Middleware\VerifyCsrfToken排除微信相关的路由
namespace App\Http\Middleware;

use Illuminate\Foundation\Http\Middleware\VerifyCsrfToken as Middleware;

class VerifyCsrfToken extends Middleware
{
    /**
     * Indicates whether the XSRF-TOKEN cookie should be set on the response.
     *
     * @var bool
     */
    protected $addHttpCookie = true;

    /**
     * The URIs that should be excluded from CSRF verification.
     *
     * @var array
     */
    protected $except = [
        // 跳过csrf
        'wechat',
    ];
}
然后将这个代码上传到云服务器(注:服务器一定要在公网中(或通过某种工具使自己的电脑映射到公网上),否则微信无法验证)
默认配置好虚拟主机,(必须用80端口(http://)/443端口(https://)),指向:项目名/public
7.在公众号后台修改配置信息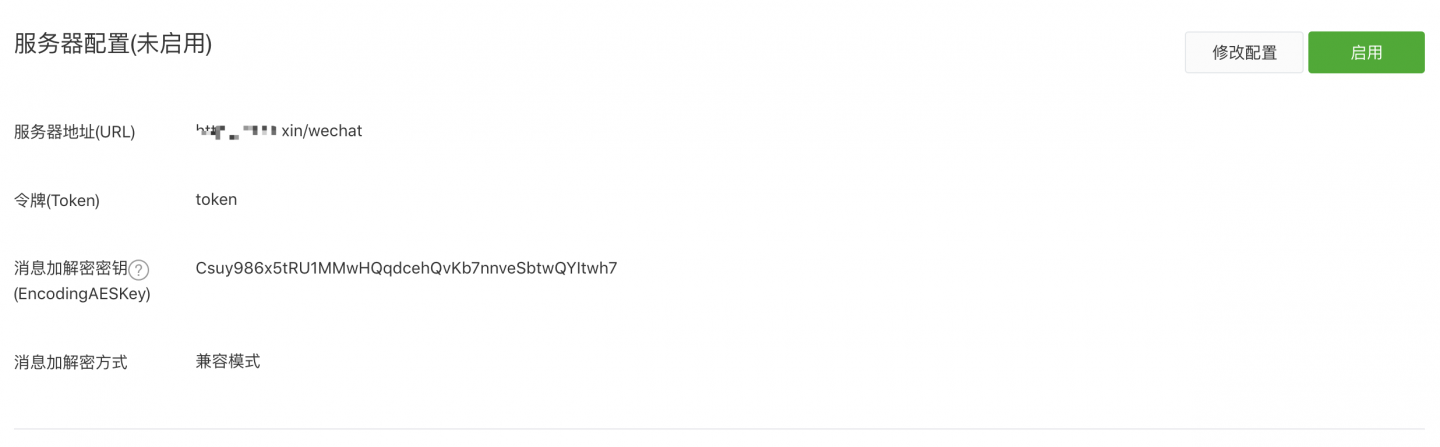
Token必须和我们配置文件中写的token一致,EncodingAESKey是可选参数(兼容模式下必填),配置我们点击启用就基本配置完成了
本作品采用《CC 协议》,转载必须注明作者和本文链接


 关于 LearnKu


推荐文章: