
Mac os 使用 (homebrew) 从零搭建 PHP,nginx,MySQL,Redis (LNMP) 开发环境
2 / 16 / 创建于 7年前 /
 Walking 的个人博客
brew
brew是mac os 的软件包的管理器,安装homebrew方法, 具体安装方法请查阅官方网站: http://brew.sh 。
安装php (以php7.1为例)
brew update                        #更新brew可安装包,建议每次执行一下
brew search php71                  #搜索php7.1
brew tap josegonzalez/php          #安装扩展<gihhub_user/repo>
brew tap                           #查看安装的扩展列表
brew install php71                 #安装php7.1
brew remove  php71                 #卸载php7.1
brew upgrade php71                 #升级php7.1
brew options php71                 #查看php7.1安装选项
brew info    php71                 #查看php7.1相关信息
brew home    php71                 #访问php7.1官方网站
brew services list                 #查看系统通过 brew 安装的服务
brew services cleanup              #清除已卸载无用的启动配置文件
brew services restart php71        #重启php-fpm
安装 homebrew-cask
homebrew cask 是 homebrew 的扩展,借助它可以方便地在 mac as 上安装图形界面程序,即我们常用的各类应用。
brew tap phinze/homebrew-cask && brew install brew-cask cask 常用命令
brew cask search        #列出所有可以被安装的软件
brew cask search php    #查找所有和php相关的应用
brew cask list          #列出所有通过cask安装的软件
brew cask info phpstorm #查看 phpstorm 的信息
brew cask uninstall firefox  #卸载火狐
安装msyql
brew install mysqlmysql 开机启动:
ln -sfv /usr/local/opt/mysql/*.plist ~/Library/LaunchAgents
launchctl load ~/Library/LaunchAgents/homebrew.mxcl.mysql.plist
安装完成之后开启MySQL安全机制:
/usr/local/opt/mysql/bin/mysql_secure_installation根据终端提示,输入root密码, 然后依次确认一些安全选项。
当然brew下载的默认是最新版的mysql8.0+,在brew search mysql 选择你要安装的。因为mysql8.0+和mysql5.7的区别还是有点大,目前还是用5.7的版本。
➜  ~ brew search mysql
==> Formulae
automysqlbackup       mysql-client          mysql-connector-c++   mysql-utilities       mysql@5.7 ✔
mysql                 mysql-cluster         mysql-sandbox         mysql@5.5             mysqltuner
mysql++               mysql-connector-c     mysql-search-replace  mysql@5.6

==> Casks
mysql-connector-python      mysql-shell                 mysqlworkbench              navicat-for-mysql
mysql-connector-python      mysql-utilities             mysqlworkbench              sqlpro-for-mysql
mysql-shell                 mysql-utilities             navicat-for-mysql           sqlpro-for-mysql
#查看一下mysql运行情况
walking 63407 0.0 0.0 4287208 872 s004 S+ 6:02下午 0:00.00 grep --color=auto --exclude-dir=.bzr --exclude-dir=CVS --exclude-dir=.git --exclude-dir=.hg --exclude-dir=.svn mysql
_mysql 93 0.0 0.1 4696448 10016 ?? Ss 一09上午 1:09.50 /usr/local/mysql/bin/mysqld --user=_mysql --basedir=/usr/local/mysql --datadir=/usr/local/mysql/data --plugin-dir=/usr/local/mysql/lib/plugin --log-error=/usr/local/mysql/data/mysqld.local.err --pid-file=/usr/local/mysql/data/mysqld.local.pid --keyring-file-data=/usr/local/mysql/keyring/keyring --early-plugin-load=keyring_file=keyring_file.so
#连接数据库mysql
➜ ~ mysql -u root -p
Enter password:
Welcome to the MySQL monitor. Commands end with ; or \g.
Your MySQL connection id is 2808
Server version: 5.7.24 MySQL Community Server (GPL)
Copyright (c) 2000, 2019, Oracle and/or its affiliates. All rights reserved.
Oracle is a registered trademark of Oracle Corporation and/or its
affiliates. Other names may be trademarks of their respective
owners.
Type 'help;' or '\h' for help. Type '\c' to clear the current input statement.
mysql>安装phpmyadmin
brew install phpmyadmin安装php扩展
通过brew安装的PHP版本中自带了pecl,可以直接使用
pecl version 查看版本信息
pecl help 可以查看命令帮助
pecl search xdebug  搜索可以安装的扩展信息
pecl install xdebug 安装扩展
也可以使用brew options php71命令来查看安装php7.1的选项,这里我用下面的选项安装
brew install php71 --with-fpm --with-gmp --with-imap --with-tidy --with-debug --with-mysql --with-libmysql等待PHP编译完成,开始安装PHP常用扩展,扩展安装过程中brew会自动安装依赖包,例如php71-pdo-pgsql 会自动装上postgresql,这里我安装以下PHP扩展:
brew install php71-apcu\
 php71-gearman\
 php71-geoip\
 php71-gmagick\
 php71-imagick\
 php71-intl\
 php71-mcrypt\
 php71-memcache\
 php71-memcached\
 php71-mongo\
 php71-opcache\
 php71-pdo-pgsql\
 php71-phalcon\
 php71-redis\
 php71-sphinx\
 php71-swoole\
 php71-uuid\
 php71-xdebug;
由于Mac自带了php和php-fpm,因此需要添加系统环境变量PATH来替代自带PHP版本。
echo 'export PATH="$(brew --prefix php71)/bin:$PATH"' >> ~/.bash_profile  #for php
echo 'export PATH="$(brew --prefix php71)/sbin:$PATH"' >> ~/.bash_profile  #for php-fpm
echo 'export PATH="/usr/local/bin:/usr/local/sbib:$PATH"' >> ~/.bash_profile #for other brew install soft
source ~/.bash_profile
修改php-fpm配置文件,vim /usr/local/etc/php/7.1/php-fpm.conf,找到pid相关大概在25行,去掉注释 pid = run/php-fpm.pid, 那么php-fpm的pid文件就会自动产生在/usr/local/var/run/php-fpm.pid,下面要安装的Nginx pid文件也放在这里。
#测试php-fpm配置
php-fpm -t
php-fpm -c /usr/local/etc/php/7.1/php.ini -y /usr/local/etc/php/7.1/php-fpm.conf -t

#启动php-fpm
php-fpm -D
php-fpm -c /usr/local/etc/php/7.1/php.ini -y /usr/local/etc/php/7.1/php-fpm.conf -D

#关闭php-fpm
kill -INT `cat /usr/local/var/run/php-fpm.pid`

#重启php-fpm
kill -USR2 `cat /usr/local/var/run/php-fpm.pid`
启动php-fpm之后,确保它正常运行监听9000端口:
➜  ~ lsof -Pni4 | grep LISTEN | grep php
php-fpm     513 walking    7u  IPv4 0x29d33d013e0238b5      0t0  TCP 127.0.0.1:9000 (LISTEN)
php-fpm     665 walking    8u  IPv4 0x29d33d013e0238b5      0t0  TCP 127.0.0.1:9000 (LISTEN)
php-fpm     666 walking    8u  IPv4 0x29d33d013e0238b5      0t0  TCP 127.0.0.1:9000 (LISTEN)
php-fpm   36395 walking    8u  IPv4 0x29d33d013e0238b5      0t0  TCP 127.0.0.1:9000 (LISTEN)
phpstorm  73490 walking  155u  IPv4 0x29d33d013fd005f5      0t0  TCP 127.0.0.1:6942 (LISTEN)
phpstorm  73490 walking  347u  IPv4 0x29d33d0152921f55      0t0  TCP 127.0.0.1:63342 (LISTEN)
PHP-FPM开机启动:
ln -sfv /usr/local/opt/php71/*.plist ~/Library/LaunchAgents
launchctl load ~/Library/LaunchAgents/homebrew.mxcl.php71.plist
安装composer
brew install composer
#检查一下情况
➜  ~ composer -VVV
Composer version 1.8.6 2019-06-11 15:03:05
安装nginx
brew install nginxnginx 基本操作
#测试配置是否有语法错误
nginx -t

#打开 nginx
sudo nginx

#重新加载配置|重启|停止|退出 nginx
nginx -s reload|reopen|stop|quit

#也可以使用Mac的launchctl来启动|停止
launchctl unload ~/Library/LaunchAgents/homebrew.mxcl.nginx.plist
launchctl load -w ~/Library/LaunchAgents/homebrew.mxcl.nginx.plist
nginx监听80端口需要root权限执行
sudo chown root:wheel /usr/local/Cellar/nginx/1.17.0/bin/nginx
sudo chmod u+s /usr/local/Cellar/nginx/1.17.0/bin/nginx
配置nginx.conf
创建需要用到的目录:
mkdir -p /usr/local/var/logs/nginx
mkdir -p /usr/local/etc/nginx/conf.d
mkdir -p /usr/local/etc/nginx/ssl
sudo mkdir -p /var/www
sudo chown :staff /var/www
sudo chmod 775 /var/www
vim /usr/local/etc/nginx/nginx.conf 输入以下内容:
worker_processes  1;

error_log   /usr/local/var/logs/nginx/error.log debug;

pid        /usr/local/var/run/nginx.pid;

events {
    worker_connections  256;
}

http {
    include       mime.types;
    default_type  application/octet-stream;

    log_format  main  '$remote_addr - $remote_user [$time_local] "$request" '
                      '$status $body_bytes_sent "$http_referer" '
                      '"$http_user_agent" "$http_x_forwarded_for"';

    access_log  /usr/local/var/logs/access.log  main;

    sendfile        on;
    keepalive_timeout  65;
    port_in_redirect off;

    include /usr/local/etc/nginx/servers/*;
}
设置nginx php-fpm配置文件
vim /usr/local/etc/nginx/conf.d/php-fpm
#proxy the php scripts to php-fpm
location ~ \.php$ {
    try_files                   $uri = 404;
    fastcgi_pass                127.0.0.1:9000;
    fastcgi_index               index.php;
    fastcgi_intercept_errors    on;
    include /usr/local/etc/nginx/fastcgi.conf;
}
nginx虚拟主机准备工作
#创建 info.php index.html 404.html 403.html文件到 /var/www 下面
vi /var/www/info.php
vi /var/www/index.html
vi /var/www/403.html
vi /var/www/404.html
创建默认虚拟主机default
vim /usr/local/etc/nginx/servers/default输入:
server {
    listen       80;
    server_name  localhost;
    root         /var/www/;

    access_log  /usr/local/var/logs/nginx/default.access.log  main;

    location / {
        index  index.html index.htm index.php;
        autoindex   on;
        include     /usr/local/etc/nginx/conf.d/php-fpm;
    }

    location = /info {
        allow   127.0.0.1;
        deny    all;
        rewrite (.*) /.info.php;
    }

    error_page  404     /404.html;
    error_page  403     /403.html;
}
创建ssl默认虚拟主机default-ssl
vim /usr/local/etc/nginx/servers/default-ssl输入:
server {
    listen       443;
    server_name  localhost;
    root       /var/www/;

    access_log  /usr/local/var/logs/nginx/default-ssl.access.log  main;

    ssl                  on;
    ssl_certificate      ssl/localhost.crt;
    ssl_certificate_key  ssl/localhost.key;

    ssl_session_timeout  5m;

    ssl_protocols  SSLv2 SSLv3 TLSv1;
    ssl_ciphers  HIGH:!aNULL:!MD5;
    ssl_prefer_server_ciphers   on;

    location / {
        include   /usr/local/etc/nginx/conf.d/php-fpm;
    }

    location = /info {
        allow   127.0.0.1;
        deny    all;
        rewrite (.*) /.info.php;
    }

    error_page  404     /404.html;
    error_page  403     /403.html;
}
创建phpmyadmin虚拟主机
# vim /usr/local/etc/nginx/servers/phpmyadmin.local #输入以下配置
server {
listen 80;
server_name phpmyadmin.local;
root /usr/local/share/phpmyadmin;
error_log /usr/local/var/logs/nginx/phpmyadmin.error.log;
access_log /usr/local/var/logs/nginx/phpmyadmin.access.log main;
#ssl on;
ssl_certificate ssl/phpmyadmin.crt;
ssl_certificate_key ssl/phpmyadmin.key;
ssl_session_timeout 5m;
ssl_protocols SSLv2 SSLv3 TLSv1;
ssl_ciphers HIGH:!aNULL:!MD5;
ssl_prefer_server_ciphers on;
location / {
index index.html index.htm index.php;
include /usr/local/etc/nginx/conf.d/php-fpm;
}
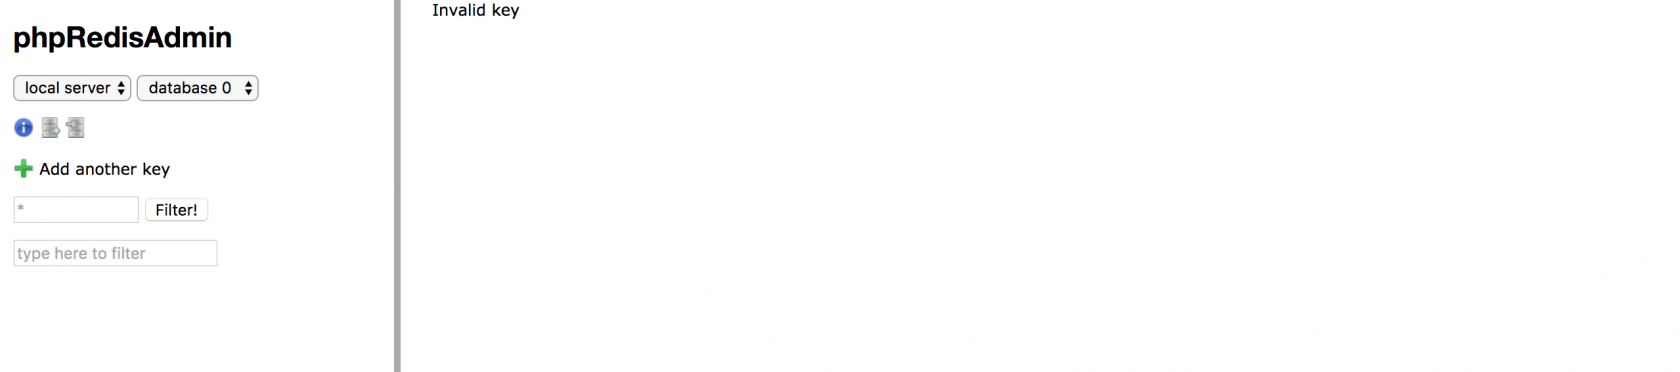
}安装 phpRedisAdmin 视图化界面
https://github.com/erikdubbelboer/phpRedisAdmin.git git克隆phpredisadmin项目。可以查reids的信息
# vim /usr/local/etc/nginx/servers/phpmyredis.local
server {
    listen       80;
    server_name  phpmyredis.local;
    # 我克隆到本地的目录
    root    /usr/local/share/phpRedisAdmin;

    error_log   /usr/local/var/logs/nginx/phpmyadmin.error.log;
    access_log  /usr/local/var/logs/nginx/phpmyadmin.access.log main;

    #ssl                  on;
    ssl_certificate      ssl/phpmyadmin.crt;
    ssl_certificate_key  ssl/phpmyadmin.key;

    ssl_session_timeout  5m;

    ssl_protocols  SSLv2 SSLv3 TLSv1;
    ssl_ciphers  HIGH:!aNULL:!MD5;
    ssl_prefer_server_ciphers   on;

    location / {
        index  index.html index.htm index.php;
        include   /usr/local/etc/nginx/conf.d/php-fpm;
    }
}
设置SSL
mkdir -p /usr/local/etc/nginx/ssl
openssl req -new -newkey rsa:4096 -days 365 -nodes -x509 -subj "/C=US/ST=State/L=Town/O=Office/CN=localhost" -keyout /usr/local/etc/nginx/ssl/localhost.key -out /usr/local/etc/nginx/ssl/localhost.crt
openssl req -new -newkey rsa:4096 -days 365 -nodes -x509 -subj "/C=US/ST=State/L=Town/O=Office/CN=phpmyadmin" -keyout /usr/local/etc/nginx/ssl/phpmyadmin.key -out /usr/local/etc/nginx/ssl/phpmyadmin.crt
启动|停止Nginx
launchctl load -w ~/Library/LaunchAgents/homebrew.mxcl.nginx.plist
launchctl unload -w ~/Library/LaunchAgents/homebrew.mxcl.nginx.plist
访问连接测试是否已经搭建起来环境
http://localhost/index.php如果访问成功恭喜你已经顺利成功搭建好开发环境,可以愉快的开发了。
在网上看了很多博客,网上各种搜索。
本作品采用《CC 协议》,转载必须注明作者和本文链接


 关于 LearnKu


推荐文章: