
基于 Taro+react 多端仿微信聊天室|taro 聊天实例分享
1 / 2 / 创建于 6年前
 xiaoyan2015 的个人博客

项目简介:
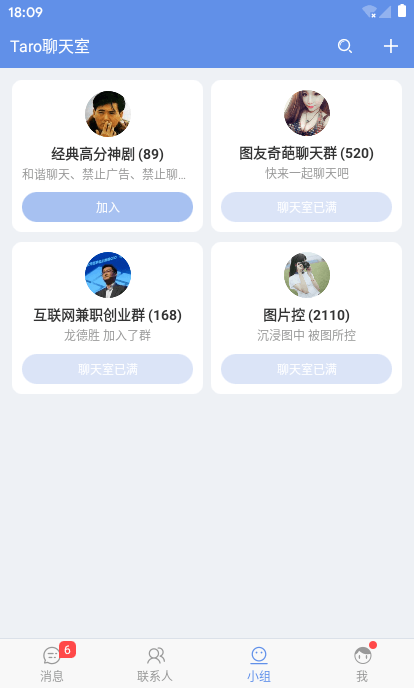
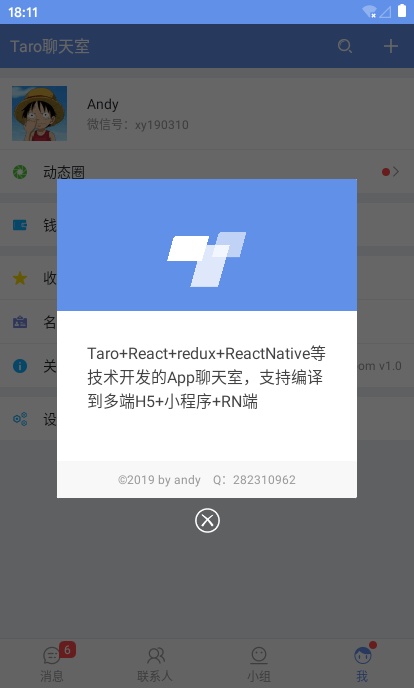
TaroChatroom多端聊天室是基于taro+react+redux+reactNative+taroPop等技术开发的仿微信App聊天室实例,支持编译到多端(h5+小程序+RN端)。
这是第二个多端实践项目,不过这次使用的是react技术,上次分享的uniapp+vue仿抖音短视频/陌陌直播聊天室是基于vue技术开发的多端项目。
基于vue+uniapp直播项目|uni-app仿抖音/陌陌直播室
技术实现:
- 编码器/技术:Vscode + react/taro/redux/react-native
- 字体图标:阿里iconfont字体图标库
- 自定义导航栏 + 底部Tabbar
- 弹窗组件:taroPop(Taro封装自定义Modal框)
- 支持编译:H5端 + 小程序 + app端


配置入口页面路径、公共样式
/**
* @desc Taro入口页面 app.jsx
*/
import Taro, { Component } from '@tarojs/taro'
import Index from './pages/index'
// 引入状态管理redux
import { Provider } from '@tarojs/redux'
import { store } from './store'
// 引入样式
import './app.scss'
import './styles/fonts/iconfont.css'
import './styles/reset.scss'
class App extends Component {
config = {
pages: [
'pages/auth/login/index',
'pages/auth/register/index',
'pages/index/index',
...
],
window: {
backgroundTextStyle: 'light',
navigationBarBackgroundColor: '#fff',
navigationBarTitleText: 'TaroChat',
navigationBarTextStyle: 'black',
navigationStyle: 'custom'
}
}
// 在 App 类中的 render() 函数没有实际作用
// 请勿修改此函数
render () {
return (
<Provider store={store}>
<Index />
</Provider>
)
}
}
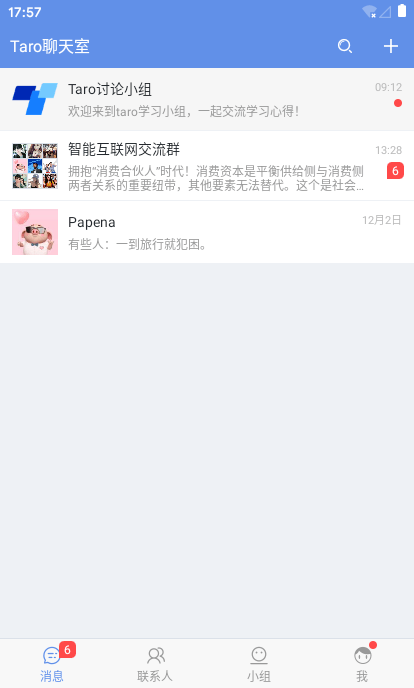
Taro.render(<App />, document.getElementById('app'))taro自定义导航栏+tabbar
项目中为了三端统一效果,顶部导航条及底部tabbar均采用自定义组件模式,由于之前有分享文章,这里不详细介绍了。
Taro自定义Modal对话框组件|taro仿微信、android弹窗
taro表单验证|redux状态管理|本地存储
在taro中获取多个表单值,方法还是比较简单的,像下面的方法就能简单获取多个input值了
<Input placeholder="请输入手机号/昵称" onInput={this.handleInput.bind(this, 'tel')} />
<Input placeholder="请输入密码" password onInput={this.handleInput.bind(this, 'pwd')} />

this.state = {
    tel: '',
    pwd: '',
}

handleInput = (key, e) => {
    this.setState({ [key]: e.detail.value })
}
下面就详细展示如何获取表单并验证、本地存储处理
return (
<View className="taro__container flexDC bg-eef1f5">
<Navigation background='#eef1f5' fixed />
<ScrollView className="taro__scrollview flex1" scrollY>
<View className="auth-lgreg">
{/* logo */}
<View className="auth-lgreg__slogan">
<View className="auth-lgreg__slogan-logo">
<Image className="auth-lgreg__slogan-logo__img" src={require('../../../assets/taro.png')} mode="aspectFit" />
</View>
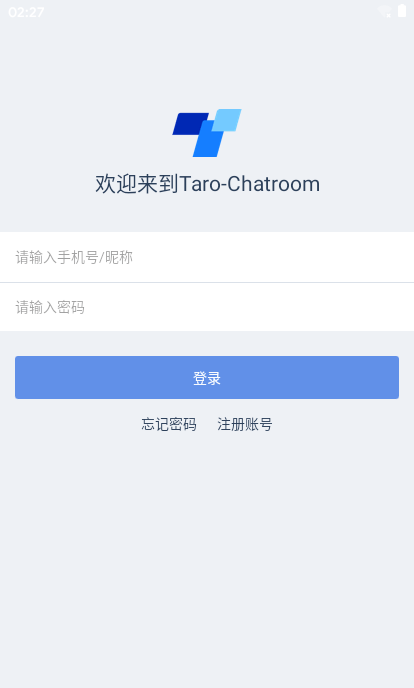
<Text className="auth-lgreg__slogan-text">欢迎来到Taro-Chatroom</Text>
</View>
{/* 表单 */}
<View className="auth-lgreg__forms">
<View className="auth-lgreg__forms-wrap">
<View className="auth-lgreg__forms-item">
<Input className="auth-lgreg__forms-iptxt flex1" placeholder="请输入手机号/昵称" onInput={this.handleInput.bind(this, 'tel')} />
</View>
<View className="auth-lgreg__forms-item">
<Input className="auth-lgreg__forms-iptxt flex1" placeholder="请输入密码" password onInput={this.handleInput.bind(this, 'pwd')} />
</View>
</View>
<View className="auth-lgreg__forms-action">
<TouchView onClick={this.handleSubmit}><Text className="auth-lgreg__forms-action__btn">登录</Text></TouchView>
</View>
<View className="auth-lgreg__forms-link">
<Text className="auth-lgreg__forms-link__nav">忘记密码</Text>
<Text className="auth-lgreg__forms-link__nav" onClick={this.GoToRegister}>注册账号</Text>
</View>
</View>
</View>
</ScrollView>
<TaroPop ref="taroPop" />
</View>
)/**
* @tpl 登录模块
*/
import Taro from '@tarojs/taro'
import { View, Text, ScrollView, Image, Input, Button } from '@tarojs/components'
import './index.scss'
import { connect } from '@tarojs/redux'
import * as actions from '../../../store/action'...
class Login extends Taro.Component {
config = {
navigationBarTitleText: '登录'
}
constructor(props) {
super(props)
this.state = {
tel: '',
pwd: '',
}
}
componentWillMount() {
// 判断是否登录
storage.get('hasLogin').then(res => {
if(res && res.hasLogin) {
Taro.navigateTo({url: '/pages/index/index'})
}
})
}
// 提交表单
handleSubmit = () => {
let taroPop = this.refs.taroPop
let { tel, pwd } = this.state
if(!tel) {
taroPop.show({content: '手机号不能为空', time: 2})
}else if(!util.checkTel(tel)) {
taroPop.show({content: '手机号格式有误', time: 2})
}else if(!pwd) {
taroPop.show({content: '密码不能为空', time: 2})
}else {
// ...接口数据
...
storage.set('hasLogin', { hasLogin: true })
storage.set('user', { username: tel })
storage.set('token', { token: util.setToken() })
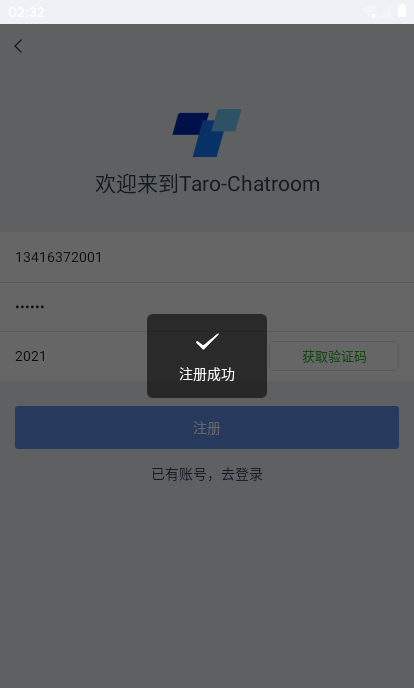
taroPop.show({
skin: 'toast',
content: '登录成功',
icon: 'success',
time: 2
})
...
}
}
render () {
...
}
}
const mapStateToProps = (state) => {
return {...state.auth}
}
export default connect(mapStateToProps, {
...actions
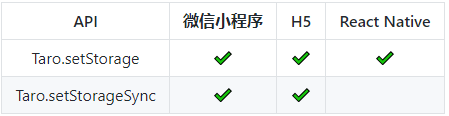
})(Login)在开发中需要注意官网提供的api支持性,由于taro中rn端不支持同步存储,只能改为setStorageSync异步存储
/**
 * @desc Taro本地存储
 */

import Taro from '@tarojs/taro'

export default class Storage {
    static get(key) {
        return Taro.getStorage({ key }).then(res => res.data).catch(() => '')
    }

    static set(key, data){
        return Taro.setStorage({key: key, data: data}).then(res => res)
    }

    static del(key){
        Taro.removeStorage({key: key}).then(res => res)
    }

    static clear(){
        Taro.clearStorage()
    }
}
taro样式兼容处理
在开发中对于一些不兼容rn端样式,不希望编译到rn端,则可通过如下代码包裹即可
/*postcss-pxtransform rn eject enable*/
/*postcss-pxtransform rn eject disable*/
下面整理了一些rn端兼容样式处理,对于不兼容样式,可通过@mixins统一处理下
/**
 * RN 不支持针对某一边设置 style,即 border-bottom-style 会报错
 * 那么 border-bottom: 1px 就需要写成如下形式: border: 0 style color; border-bottom-width: 1px;
 */
@mixin border($dir, $width, $style, $color) {
    border: 0 $style $color;
    @each $d in $dir {
        #{border-#{$d}-width}: $width;
    }
}

/**
 * NOTE RN 无法通过 text-overflow 实现省略号,这些代码不会编译到 RN 中
 */
@mixin ellipsis {
    /*postcss-pxtransform rn eject enable*/
    overflow: hidden; white-space: nowrap; text-overflow: ellipsis;
    /*postcss-pxtransform rn eject disable*/
}

/**
 * NOTE 实现多行文本省略,RN 用 Text 标签的 numberOfLines={2},H5/小程序用 -webkit-line-clamp
 */
@mixin clamp($line) {
    /*postcss-pxtransform rn eject enable*/
    display: -webkit-box;
    overflow: hidden;
    -webkit-line-clamp:$line;
    /* autoprefixer: ignore next */
    -webkit-box-orient: vertical;
    /*postcss-pxtransform rn eject disable*/
}

/**
 * 对于不能打包到 RN 的样式,可以用 postcss 方式引入
 */
 @mixin eject($attr, $value) {
    /*postcss-pxtransform rn eject enable*/
    #{$attr}: $value;
    /*postcss-pxtransform rn eject disable*/
}
taro滚动至聊天底部
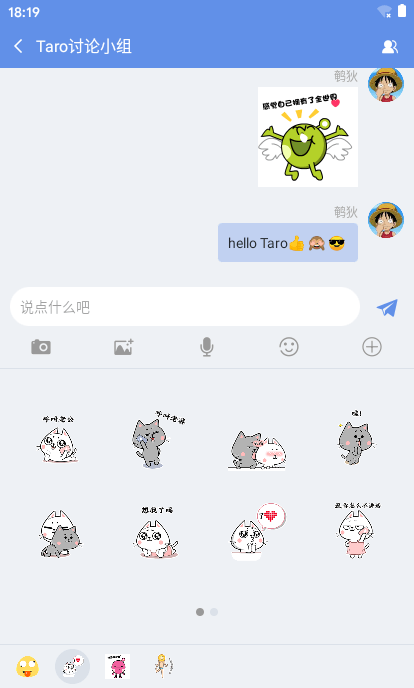
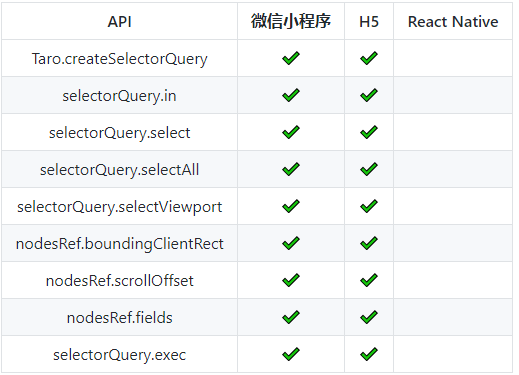
在taro中实现聊天信息滚动到最底部,在H5/小程序端则可通过获取createSelectorQuery 来实现滚动到聊天底部,由于RN端不支持createSelectorQuery,则只能另外兼容处理
// 滚动聊天底部
scrollMsgBottom = () => {
    let query = Taro.createSelectorQuery()
    query.select('#scrollview').boundingClientRect()
    query.select('#msglistview').boundingClientRect()
    query.exec((res) => {
        // console.log(res)
        if(res[1].height > res[0].height) {
            this.setState({ scrollTop: res[1].height - res[0].height })
        }
    })
}
scrollMsgBottomRN = (t) => {
    let that = this
    this._timer = setTimeout(() => {
        that.refs.ScrollViewRN.scrollToEnd({animated: false})
    }, t ? 16 : 0)
}
componentDidMount() {
if(process.env.TARO_ENV === 'rn') {
this.scrollMsgBottomRN()
}else {
this.scrollMsgBottom()
}
}另外在开发中需要特别注意rn端flex布局和h5、小程序端差异。。
constructor(props) {
super(props)
this.state = {
scrollTop: 0,
showFootToolbar: false,
showFootViewIndex: 0,
editorText: '',
editorLastCursor: 0,
// 消息记录
msgJson: msgList,
// 表情json
emotionJson: emotionList,
// 预览图片数组
previewImgArray: [],
}
}
componentDidMount() {
    if(process.env.TARO_ENV === 'rn') {
        this.scrollMsgBottomRN()
    }else {
        this.scrollMsgBottom()
    }
}
...
// 点击聊天消息区域
msgPanelClicked = () => {
if(!this.state.showFootToolbar) return
this.setState({ showFootToolbar: false })
}
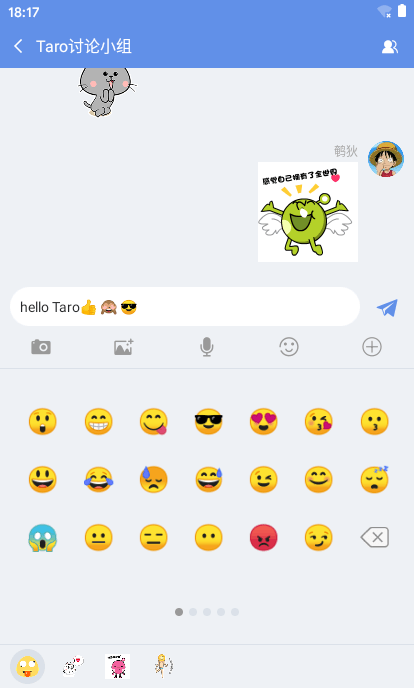
// 表情、选择区切换
swtEmojChooseView = (index) => {
this.setState({ showFootToolbar: true, showFootViewIndex: index })
}
// 底部表情tab切换
swtEmojTab = (index) => {
let lists = this.state.emotionJson
for(var i = 0, len = lists.length; i < len; i++) {
lists[i].selected = false
}
lists[index].selected = true
this.setState({ emotionJson: lists })
}
bindEditorInput = (e) => {
this.setState({
editorText: e.detail.value,
editorLastCursor: e.detail.cursor
})
}
bindEditorFocus = (e) => {
this.setState({ editorLastCursor: e.detail.cursor })
}
bindEditorBlur = (e) => {
this.setState({ editorLastCursor: e.detail.cursor })
}
handleEmotionTaped = (emoj) => {
if(emoj == 'del') return
// 在光标处插入表情
let { editorText, editorLastCursor } = this.state
let lastCursor = editorLastCursor ? editorLastCursor : editorText.length
let startStr = editorText.substr(0, lastCursor)
let endStr = editorText.substr(lastCursor)
this.setState({
editorText: startStr + `${emoj} ` + endStr
})
}好了,以上就是taro+react开发聊天室实例分享介绍,希望能有点点帮助~~😶😶
最后分享两个最近实例项目,希望能喜欢。
react-native聊天室|RN版聊天App仿微信实例|RN仿微信界面
vue仿微信网页版|vue+web端聊天室|仿微信客户端vue版

本作品采用《CC 协议》,转载必须注明作者和本文链接


 关于 LearnKu


卧槽,牛逼
这个真不错,我学习了!