
Nginx 高级篇(八)ab 压力测试即 nginx 的性能统计模块
0 / 2 / 创建于 6年前
 huxiaobai_001 的个人博客
我们总得要对自己的网站或者接口做压力测试的,总不能写好了代码不做测试就上线啊,谁知道你的网站或者接口能承受多少的并发和访问量,压力测试我们可以使用apache的ab小工具来搞或者使用github上提供了一版本hey 这里我们只讲ab小工具哈 hey也很简单 linux上下载下来直接使用即可!
ab,即Apache Benchmark,只要我们安装了Apache,就能够在Apache的安装目录中找到它。它的居住地址是Apache安装目录/bin/ab.exe,我的是位于bin/ab.exe 现在,我们就来看看如何使用ab.exe来进行压力测试。
虽然ab可以配置的参数选项比较多,但是,一般情况下我们只需要使用形如ab -n 数字 -c 数字 url路径的命令即可。譬如,我们对位于本地Apache服务器上、URL为localhost/index.php的页面进行压力测试。测试总次数为1000,并发数为100(相当于100个用户同时访问,他们总共访问1000次)
输入命令:
ab -n 1000 -c 100 http://192.168.1.168/index/index参数介绍 自己看吧:
Benchmarking localhost (be patient)
Completed 100 requests
Completed 200 requests
Completed 300 requests
Completed 400 requests
Completed 500 requests
Completed 600 requests
Completed 700 requests
Completed 800 requests
Completed 900 requests
Completed 1000 requests
Finished 1000 requests

Server Software:        Apache/2.2.25 (服务器软件名称及版本信息)
Server Hostname:        localhost (服务器主机名)
Server Port:            80 (服务器端口)
Document Path:          /index.php (供测试的URL路径)
Document Length:        10 bytes (供测试的URL返回的文档大小)
Concurrency Level:      100 (并发数)
Time taken for tests:   0.247 seconds (压力测试消耗的总时间)
Complete requests:      1000 (压力测试的总次数)
Failed requests:        0 (失败的请求数)
Write errors:           0 (网络连接写入错误数)
Total transferred:      198000 bytes (传输的总数据量)
HTML transferred:       10000 bytes (HTML文档的总数据量)
Requests per second:    4048.34 [#/sec] (mean) (平均每秒的请求数)
Time per request:       24.701 [ms] (mean) (所有并发用户(这里是100)都请求一次的平均时间)
Time per request:       0.247 [ms] (mean, across all concurrent requests) (单个用户请求一次的平均时间)
Transfer rate:          782.78 [Kbytes/sec] received (传输速率,单位:KB/s)
Connection Times (ms)
              min  mean[+/-sd] median   max
Connect:        0    0   0.3      0       1
Processing:     6   23   4.2     24      30
Waiting:        5   20   5.3     21      29
Total:          6   23   4.2     24      30

Percentage of the requests served within a certain time (ms)
  50%     24
  66%     25
  75%     26
  80%     26
  90%     27
  95%     27
  98%     28
  99%     29
 100%     30 (longest request)
ab -n 20000 -c 10000 http://192.168.1.168/index/index如果请求量较大 linux客户端口会报错链接太多 只需要执行命令:
#这个数值可以调整的更大
ulimit -n 20000
ulimit是干哈滴 请自行百度!
除此之外 我们还需要Nginx的性能统计模块 这个你得需要编译安装哦
–with-http_stub_status_module 加上这个模块即可!
pkill -9 nginx;
cd /usr/local/src/nginx-1.16.1
make clean
#重新编译安装Nginx 不要忘记之前的参数
./configure --prefix=/usr/local/nginx --add-module=/usr/local/src/ngx_http_consistent_hash-master --with-http_stub_status_module --add-module=/usr/local/src/echo-nginx-module-0.62rc1
这还没完 你得能访问它啊
找到nginx.conf文件 先进一个location
 location /status {
            stub_status on;
            access_log off;
            #也可以限制ip  除了1.9的ip其他ip禁止访问 因为统计信息比较敏感
            allow 192.168.1.9
            deny all;
        }
然后你去访问
192.168.1.168/status
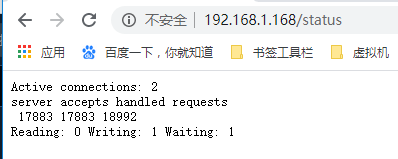
完事!
测压
并发10000 总请求量20000 你会看到 卧槽 我浏览器访问 咋卡死啦!还会发现ab的测试报告里面咋这么多失败的请求呢?
不卡死才怪呢!不失败才怪!
我们接下来讲讲如何优化Nginx!
本作品采用《CC 协议》,转载必须注明作者和本文链接


 关于 LearnKu


推荐文章: