
CentOS6 基于 Python 安装 Sentry
2 / 9 / 创建于 9年前 /
 jormin 的个人博客
概述
Sentry 是一款可用于Production环境的错误跟踪工具,可实时通知Production环境中用户由于一些不可预料行为(或者程序写的有问题)导致程序Crash或Exception,Sentry可以通过Integration如HipChat来发送通知,并且可以通过JIRA Integration来快速创建Issue,然后开发者可以根据这个Issue快速修复程序,并把这个已修复的Hotfix快速部署到生产环境,这样就快速开发快速修补。
Sentry 提供了两种使用方式:
- 厂商的服务,提供14天无限制免费服务,点击查看 官网价格服务 或 使用简介。
- 源码 自行搭建,包括
Docker和Python两种方式,Python安装方式Here,Docker安装方式Here。
安装依赖软件
安装Sentry需要以下满足以下条件:
- 基于UNIX的操作系统
- PostgreSQL:版本
9.5以上,推荐最新版本9.6 - Redis:最低版本
2.8.9, 推荐2.8.18,3.0 - Python 2.7 :点击查看安装方式
- Pip 8.1+
- 安装下列软件:python-setuptools, python-dev, libxslt1-dev, gcc, libffi-dev, libjpeg-dev, libxml2-dev, libxslt-dev, libyaml-dev, libpq-dev,推荐
yum安装。
实际安装过程中,最好预留1G的内存,我安装时因为预留内存不够折腾了好久,最后翻 github 的 issue 才意识到是内存的问题。
安装PostgreSQL
安装新版的yum源
我使用的是官方当前最新版本
9.6,其他版本详见官方文档,根据自己要安装的版本及操作系统选择下载rpm文件即可。
$ cd ~
$ wget https://download.postgresql.org/pub/repos/yum/9.6/redhat/rhel-6-x86_64/pgdg-redhat96-9.6-3.noarch.rpm
$ rpm -ivh ./pgdg-redhat96-9.6-3.noarch.rpm
移除之前的版本
$ rpm -qa | grep postgre
postgresql84-devel-8.4.3-2PGDG.rhel6.x86_64
postgresql84-libs-8.4.3-2PGDG.rhel6.x86_64
postgresql84-contrib-8.4.3-2PGDG.rhel6.x86_64
postgresql84-server-8.4.3-2PGDG.rhel6.x86_64
postgresql84-8.4.3-2PGDG.rhel6.x86_64

$ yum remove postgresql84 postgresql84-devel postgresql84-libs postgresql84-contrib postgresql84-server
查看安装新版 yum 源后可以安装的版本
$ yum list postgres* | grep 96
postgresql96.x86_64                        9.6.2-2PGDG.rhel6             @pgdg96
postgresql96-contrib.x86_64                9.6.2-2PGDG.rhel6             @pgdg96
postgresql96-devel.x86_64                  9.6.2-2PGDG.rhel6             @pgdg96
postgresql96-libs.x86_64                   9.6.2-2PGDG.rhel6             @pgdg96
postgresql96-server.x86_64                 9.6.2-2PGDG.rhel6             @pgdg96
postgresql-jdbc.noarch                     42.0.0-1.rhel6                pgdg96
postgresql-jdbc-javadoc.noarch             42.0.0-1.rhel6                pgdg96
postgresql-unit96.x86_64                   2.0-1.rhel6                   pgdg96
postgresql-unit96-debuginfo.x86_64         2.0-1.rhel6                   pgdg96
postgresql96-debuginfo.x86_64              9.6.2-2PGDG.rhel6             pgdg96
postgresql96-docs.x86_64                   9.6.2-2PGDG.rhel6             pgdg96
postgresql96-odbc.x86_64                   09.06.0100-1PGDG.rhel6        pgdg96
postgresql96-plperl.x86_64                 9.6.2-2PGDG.rhel6             pgdg96
postgresql96-plpython.x86_64               9.6.2-2PGDG.rhel6             pgdg96
postgresql96-pltcl.x86_64                  9.6.2-2PGDG.rhel6             pgdg96
postgresql96-tcl.x86_64                    2.1.1-1.rhel6                 pgdg96
postgresql96-tcl-debuginfo.x86_64          2.1.1-1.rhel6                 pgdg96
postgresql96-test.x86_64                   9.6.2-2PGDG.rhel6             pgdg96
从结果可以看出新版 yum 源可以安装很多依赖,但实际上我们只需要安装 postgresql96、postgresql96-devel、postgresql96-libs、postgresql96-server 四项即可。
$ yum install postgresql96 postgresql96-devel postgresql96-libs postgresql96-server
$ # 初始化数据库
$ /etc/init.d/postgresql-9.6 initdb
$ # 开启数据库
$ /etc/init.d/postgresql-9.6 start
至此,新版 PostgreSQL 就安装好了,接下来是做些连接配置:
$ vim /var/lib/pgsql/9.6/data/pg_hba.conf将相关连接的 Method 改为 trust:
# TYPE  DATABASE        USER            ADDRESS                 METHOD

# "local" is for Unix domain socket connections only
local           all                 all                                             trust
# IPv4 local connections:
host            all                 all             127.0.0.1/32            trust
# IPv6 local connections:
host            all                 all             ::1/128                     trust
# Allow replication connections from localhost, by a user with the
# replication privilege.
#local   replication     postgres                                peer
#host    replication     postgres        127.0.0.1/32            ident
#host    replication     postgres        ::1/128                 ident
安装Redis
安装redis相对简单,使用 yum 安装即可
$ yum install redis
$ # 开启redis
$ /etc/init.d/redis start
安装Sentry
安装软件
$ # 安装环境
$ pip install -U virtualenv
$ virtualenv /www/sentry/
$ source /www/sentry/bin/activate
$ # 安装sentry
$ pip install -U sentry
相关配置
初始化配置,如果不设置路径的话,默认会生成在 ~/.sentry 目录中,推荐使用默认路径。初始化配置包含两个文件,分别是 config.yml 和 sentry.conf.py。
$ sentry init邮件配置项保存在 config.yml 文件中,Sentry 收到异常时会给自己的邮箱发送邮件通知,所以需要配置下邮件,当然也可以不启用,但不建议这样做。
# 如果不想启用邮件通知,可以将 mail.backend 设置为 dummy
mail.backend: 'smtp'
mail.host: 'localhost'
mail.port: 25
mail.username: ''
mail.password: ''
mail.use-tls: false
mail.from: 'sentry@localhost'
数据库配置项保存在 sentry.conf.py 文件中,使用默认即可,只需要修改 HOST 和 PORT 项。
# ~/.sentry/sentry.conf.py

# for more information on DATABASES, see the Django configuration at:
# https://docs.djangoproject.com/en/1.6/ref/databases/
DATABASES = {
    'default': {
        'ENGINE': 'sentry.db.postgres',
        'NAME': 'sentry',
        'USER': 'postgres',
        'PASSWORD': '',
        'HOST': 'localhost',
        'PORT': '5432',
    }
}
Redis 项使用默认即可,另外一个需要注意的是 Web 使用的端口配置项 SENTRY_WEB_PORT,默认为 9000 ,实际安装时可以检测下端口是否已被占用,我安装时发现被占用,所以改用了 9999。
使用数据迁移初始化数据
创建数据库
$ createdb -U postgres -E utf-8 sentry执行数据更新,数据填充完成后会提示是否创建用户,可以选择不创建后续再创建,另外,这一步比较 耗内存,我就是在执行这一步的时候出了很多意外,比如进程被 killed,报很多异常等等。
$ sentry upgrade
$ # 如果没有使用默认目录的话,需要使用如下命令
$ # SENTRY_CONF=/path/to/sentry sentry upgrade
创建用户,需要填写邮箱和密码,创建好后会提示是否作为超级用户,根据自己情况选择即可。
$ sentry createuser
$ # 如果没有使用默认目录的话,需要使用如下命令
$ # SENTRY_CONF=/path/to/sentry sentry createuser
开启服务
开启 web 服务,开启后可以访问 http://[IP或域名]:[前面配置的端口] 进行访问。
$ sentry run web
$ # 如果没有使用默认目录的话,需要使用如下命令
$ # SENTRY_CONF=/path/to/sentry sentry run web
开启后台 worker 服务
$ sentry run worker
$ # 如果没有使用默认目录的话,需要使用如下命令
$ # SENTRY_CONF=/path/to/sentry sentry run worker
开启 cron 进程
$ sentry run cron
$ # 如果没有使用默认目录的话,需要使用如下命令
$ # SENTRY_CONF=/path/to/sentry sentry run cron
Laravel集成扩展包
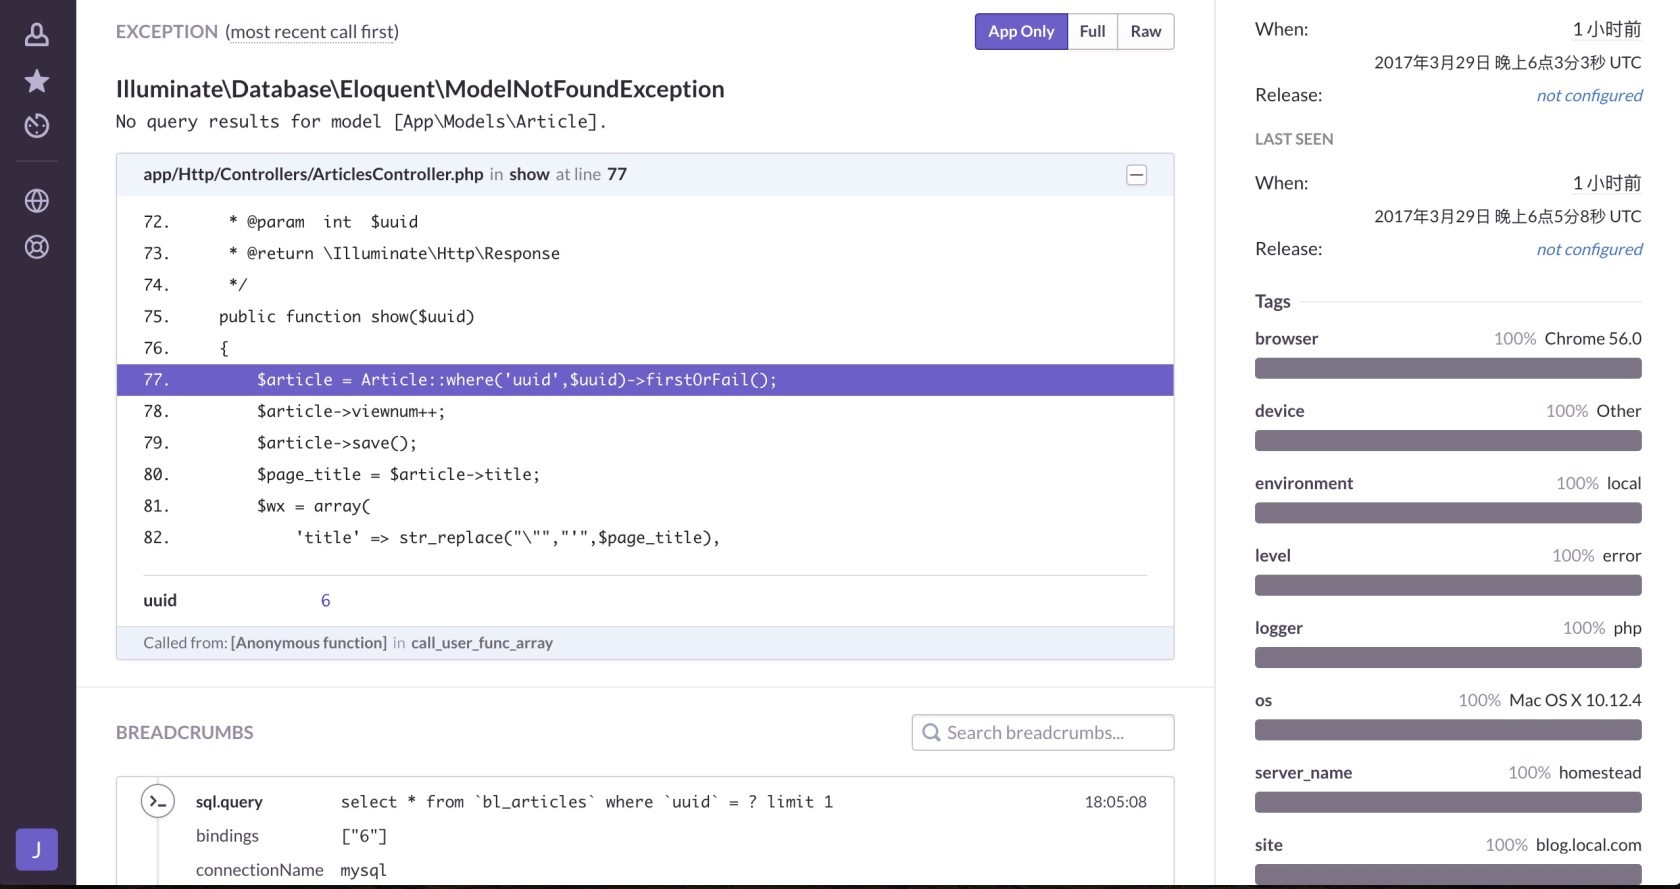
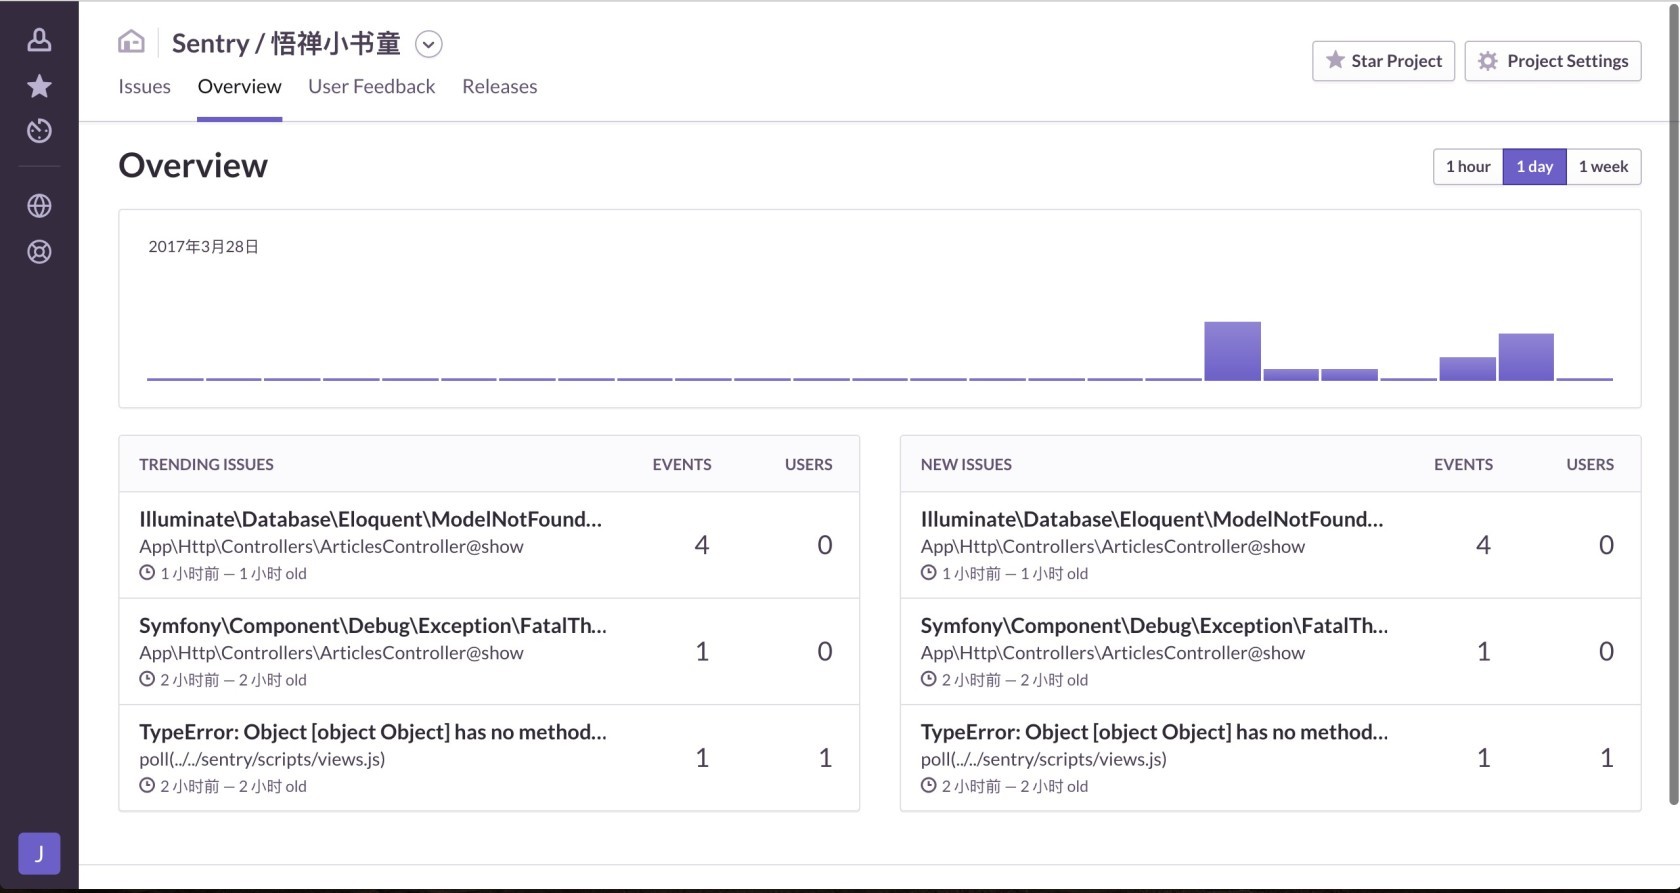
Sentry官方针对各种语言的不同框架都提供了相应的扩展包,当然也包括 laravel。
配置好后就可以在自己的项目中愉快的使用了,悟禅小书童 已经使用上了,参考图如下:


本作品采用《CC 协议》,转载必须注明作者和本文链接


 关于 LearnKu


推荐文章: