
dapr快速开始
1 / 0 / 创建于 5年前 /
 代码的坏味道 的个人博客
概述
Dapr 是一个可移植的、事件驱动的运行时,它使任何开发人员能够轻松构建出弹性的、无状态和有状态的应用程序,并可运行在云平台或边缘计算中,它同时也支持多种编程语言和开发框架。
dapr
安装
1.mac环境
2.HomeBrew下载安装Dapr CLI
brew install dapr/tap/dapr-cli
3.安装docker
4.初始化
dapr init5.验证dapr版本
dapr --version6.验证容器运行
docker ps验证如下,安装成功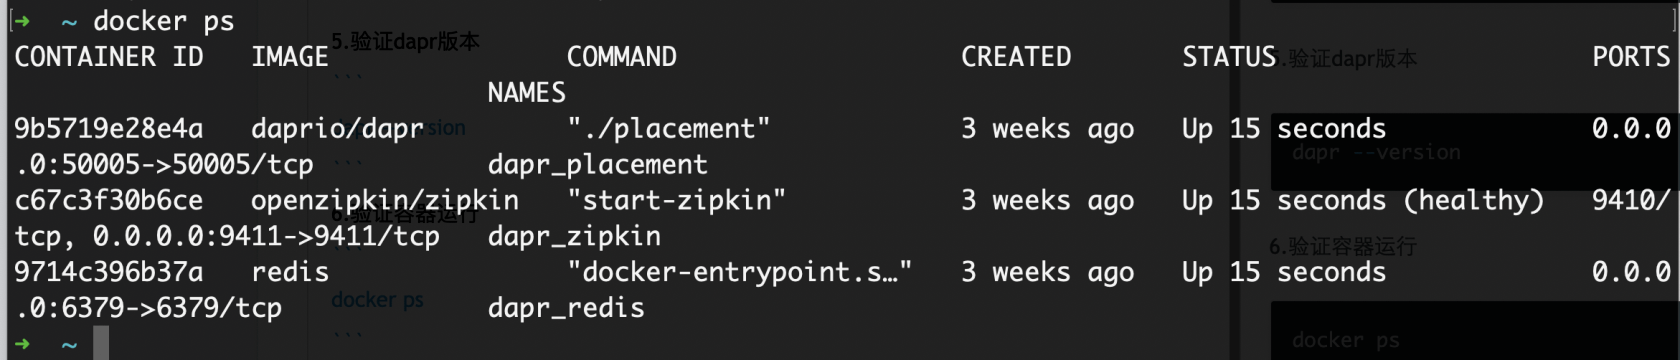
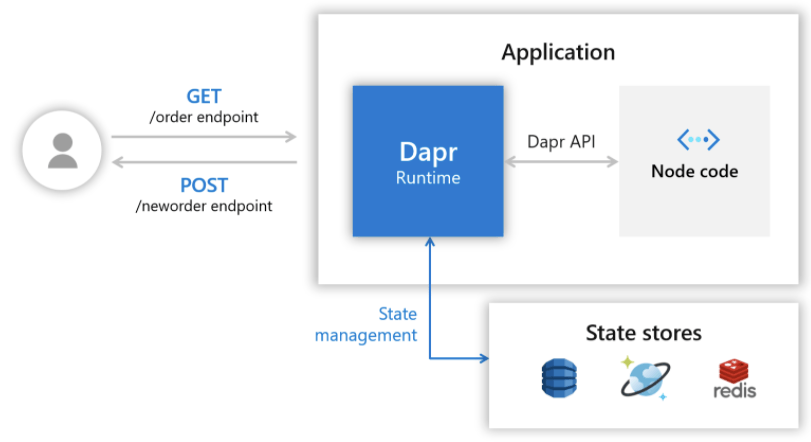
运行Hello World 程序
能够看到暴露两个 endpoint 是 HTTP 访问
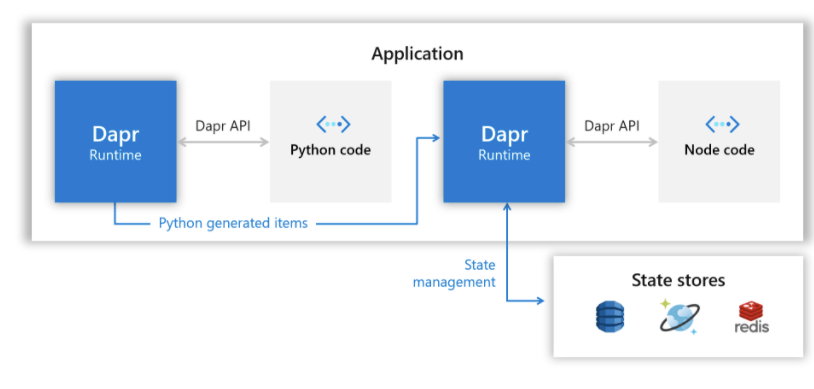
部署一个Python应用程序以充当发布者。 下面的架构图显示了新组件的添加:
需要以下准备环境:
- node.js版本8 或者更高
- python3.x
案例
1.下载
git clone https://github.com/dapr/quickstarts.git
cd quickstarts/hello-world
Dapr CLI为Dapr端口创建一个环境变量,默认为3500
stateUrl 是Dapr 提供的Url
stateStoreName是提供给状态存储的名称
const daprPort = process.env.DAPR_HTTP_PORT || 3500;
const stateStoreName = `statestore`;
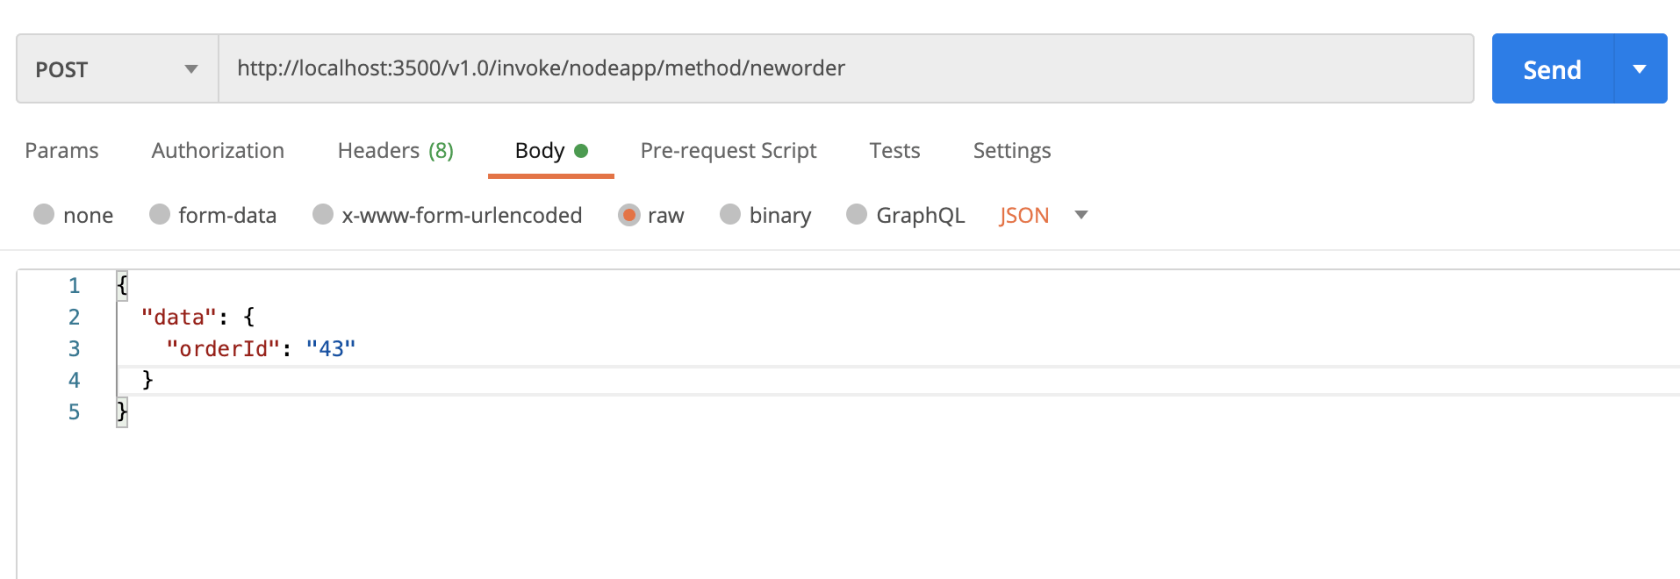
const stateUrl = `http://localhost:${daprPort}/v1.0/state/${stateStoreName}`;该接口可以接收和处理新订单消息的终结点。
它首先记录传入的消息,然后通过将状态数组发布到/ state / 端点来将订单ID持久化到Redis存储中。
app.post('/neworder', (req, res) => {
    const data = req.body.data;
    const orderId = data.orderId;
    console.log("Got a new order! Order ID: " + orderId);

    const state = [{
        key: "order",
        value: data
    }];

    fetch(stateUrl, {
        method: "POST",
        body: JSON.stringify(state),
        headers: {
            "Content-Type": "application/json"
        }
    }).then((response) => {
        if (!response.ok) {
            throw "Failed to persist state.";
        }

        console.log("Successfully persisted state.");
        res.status(200).send();
    }).catch((error) => {
        console.log(error);
        res.status(500).send({message: error});
    });
});
使用Dapr运行Node.js应用
1.下载npm依赖
npm install2.使用Dapr运行Node.js程序(node在指定的3000端口运行)
dapr run --app-id nodeapp --app-port 3000 --dapr-http-port 3500 node app.js显示如下,启动成功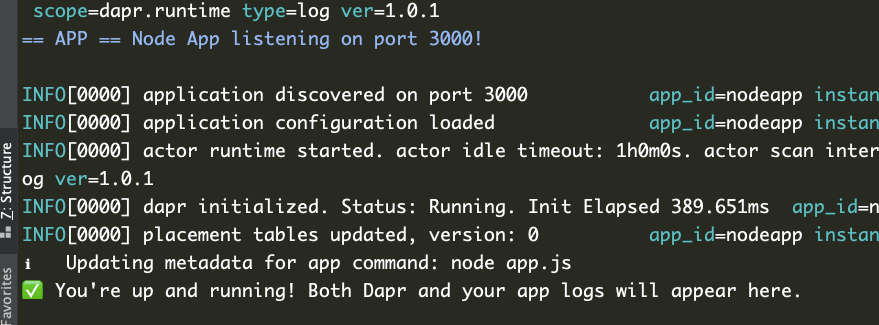
安装完成测试
此时控制台会显示如下

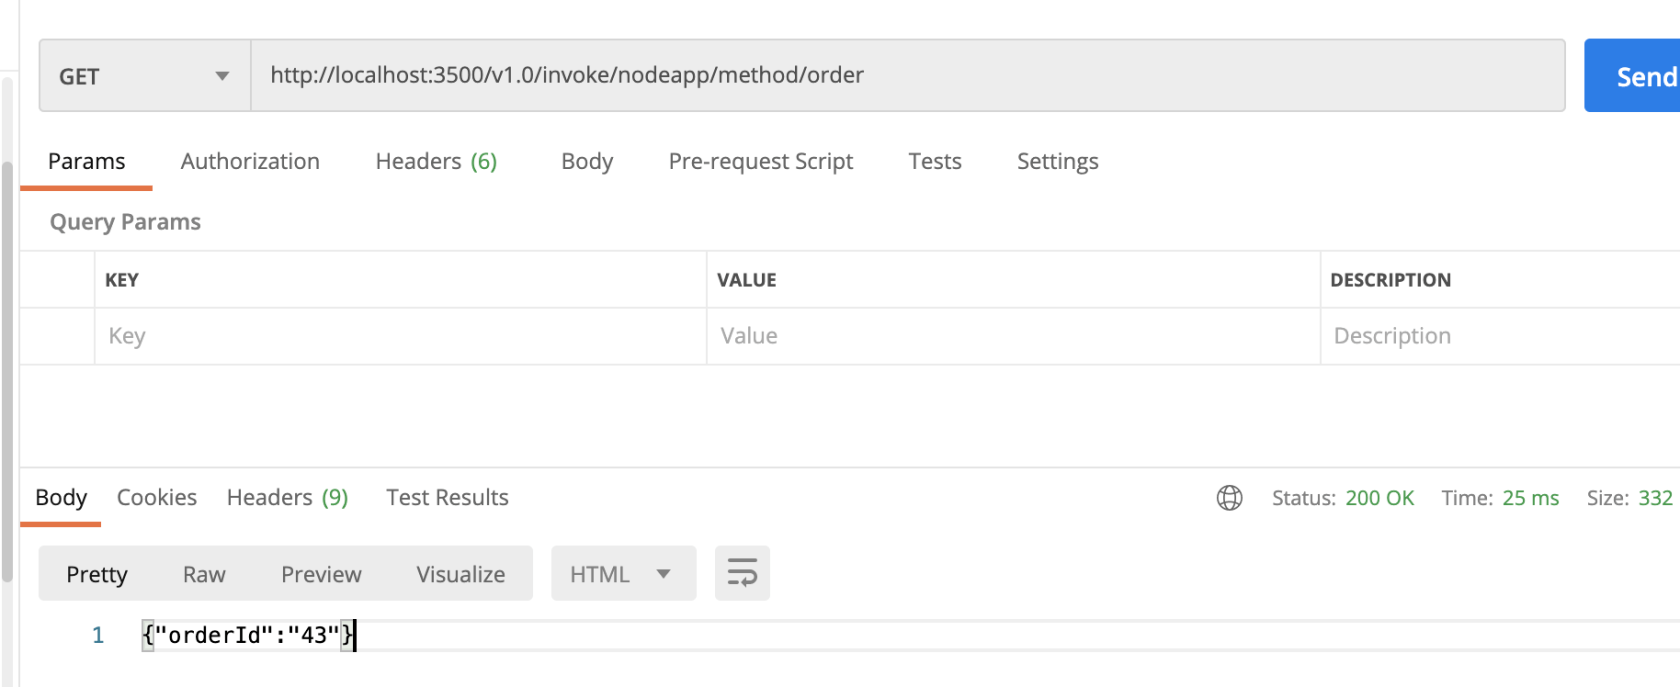
最后get测试获取
本作品采用《CC 协议》,转载必须注明作者和本文链接


 关于 LearnKu


推荐文章: