
《从0到1搭建一个IM项目》消息模块开发之消息体的设计
70 / 3 / 创建于 3年前 /
 iceymoss 的个人博客
[toc]
概况
经过前四篇文章的讲解,完成了用户模块的开发,下面就进入到了IM项目的核心模块,即信息模块,这部分内容我们主要介绍信息结构的设计,信息的发送接收。
经过用户模块的开发,项目目录结构如下:
HiChat
    ├── common    //放置公共文件
    |      |——md5.go
    |      |——resp.go
    │
    ├── config    //做配置文件
    │
    ├── dao//数据库crud
    │     |——user.go
    |     |——relation.go
    |     |——community.go
    |
    ├── global    //放置各种连接池,配置等
    │           |——global.go
    |
    ├── initialize  //项目初始化文件
    │              |——db.go
    |              |——logger.go
    |
    ├── middlewear  //放置web中间件
    |              |——jwt.go
    ├── models      //数据库表设计
    │           |——user_basic.go
    |           |——relation.go
    |           |——community.go
    |
    ├── router           //路由
    |       |——router.go
    │
    ├── service     //对外api
    |       |——user.go
    |       |——relation.go
    |       |——attach_upload.go
    │
    ├── test        //测试文件
    │
    ├── main.go     //项目入口
    ├── go.mod            //项目依赖管理
    ├── go.sum            //项目依赖管理
信息结构设计
每一个表都需要一个model来记录相应数据,在model下新建文件message.go
type Model struct {
    ID        uint `gorm:"primaryKey"`
    CreatedAt time.Time
    UpdatedAt time.Time
    DeletedAt gorm.DeletedAt `gorm:"index"`
}
消息体
信息发送者
信息接收者
聊天类型:单聊、群聊
信息类型:文字、表情包、图片、语音
信息内容
图片url
涉及文件
文件描述
文件大小
目前能只想到了这么多,后续有其他需求可以自行添加
信息结构体:
type Message struct {
    Model
    FormId   int64  `json:"userId"`   //信息发送者
    TargetId int64  `json:"targetId"` //信息接收者
    Type     int    //聊天类型:群聊 私聊 广播
    Media    int    //信息类型:文字 图片 音频
    Content  string //消息内容
    Pic      string `json:"url"` //图片相关
    Url      string //文件相关
    Desc     string //文件描述
    Amount   int    //其他数据大小
}

//MsgTableName 生成指定数据表名
func (m *Message) MsgTableName() string {
    return "message"
}
通信逻辑
在正式开发信息模块前,我们需要梳理一下通信的逻辑
用户登录后与服务器建立websocket连接:
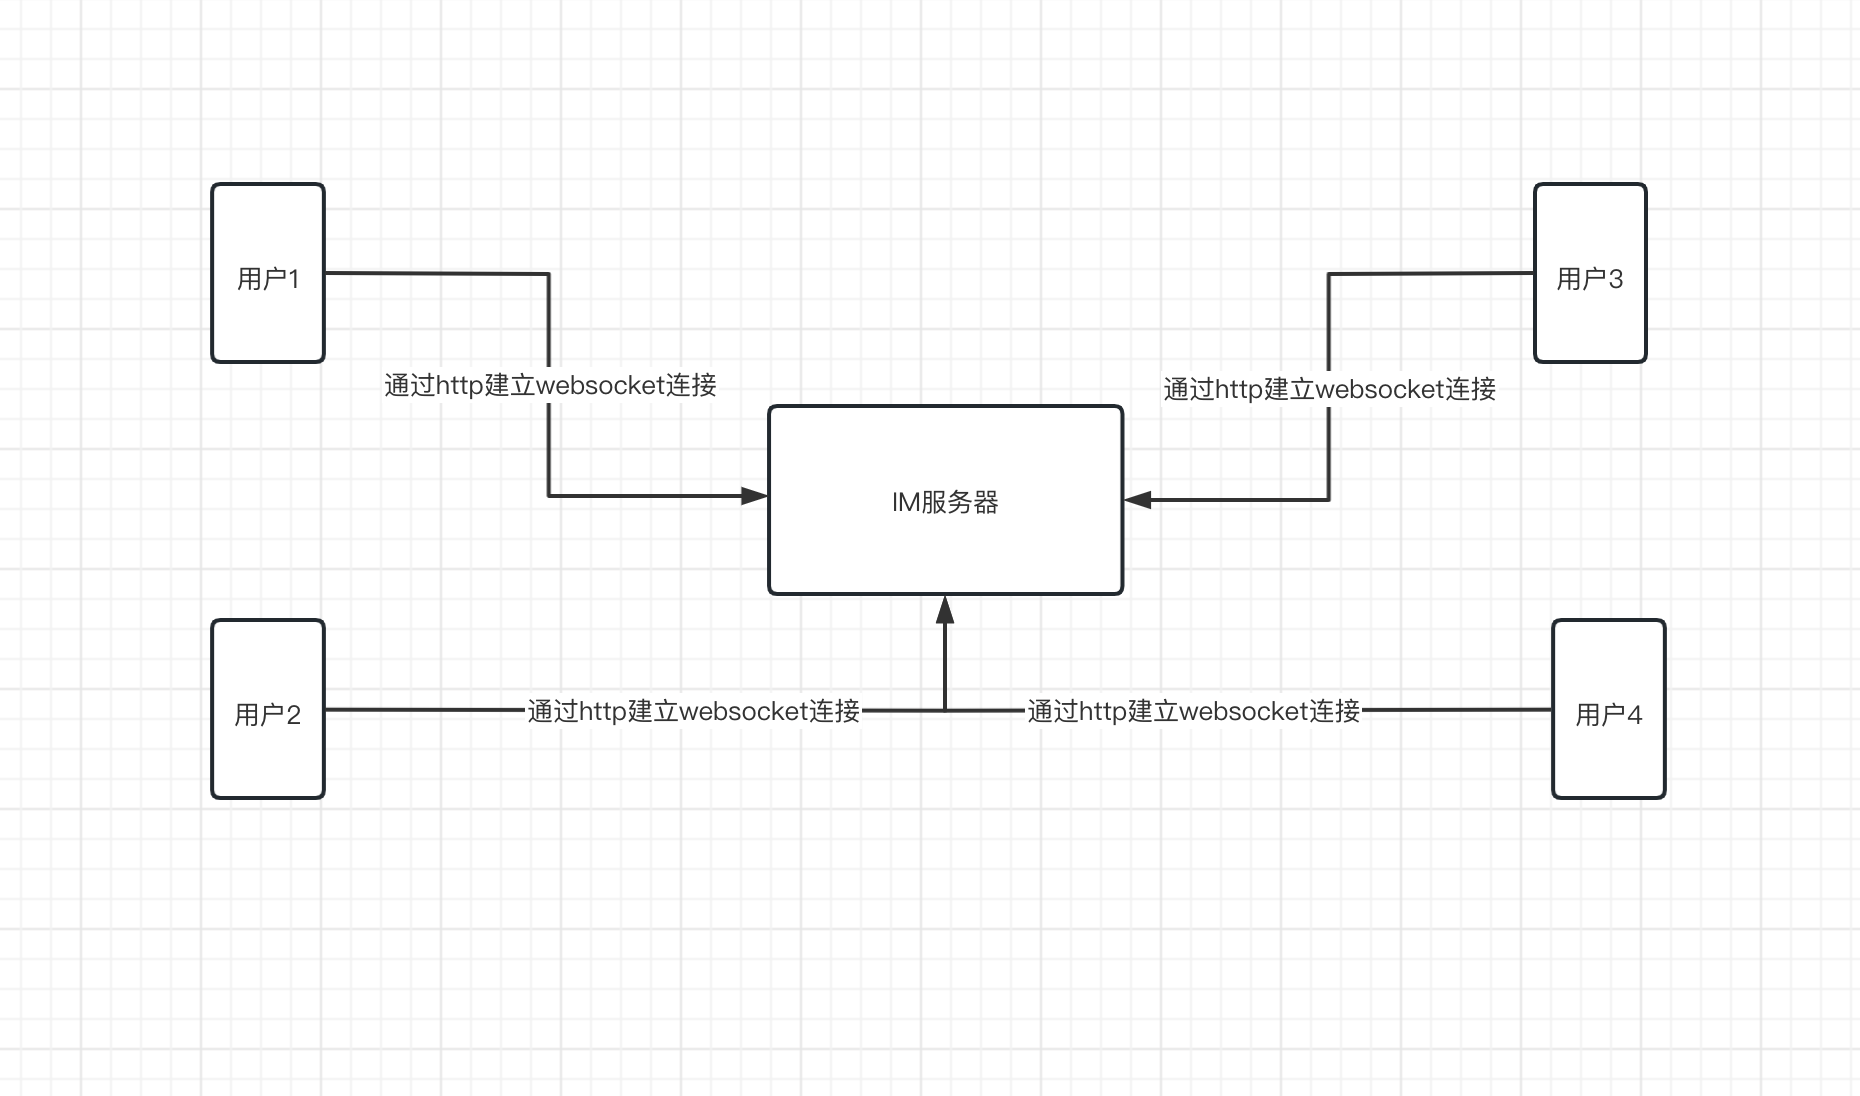
通信流程:
http升级为websocket
用户登录后,此时用户上线,通过发送http请求,将服务升级到websocket连接。
id与构造的node进行绑定
用户上线后,将其id和对应的websocket的构造体node绑定
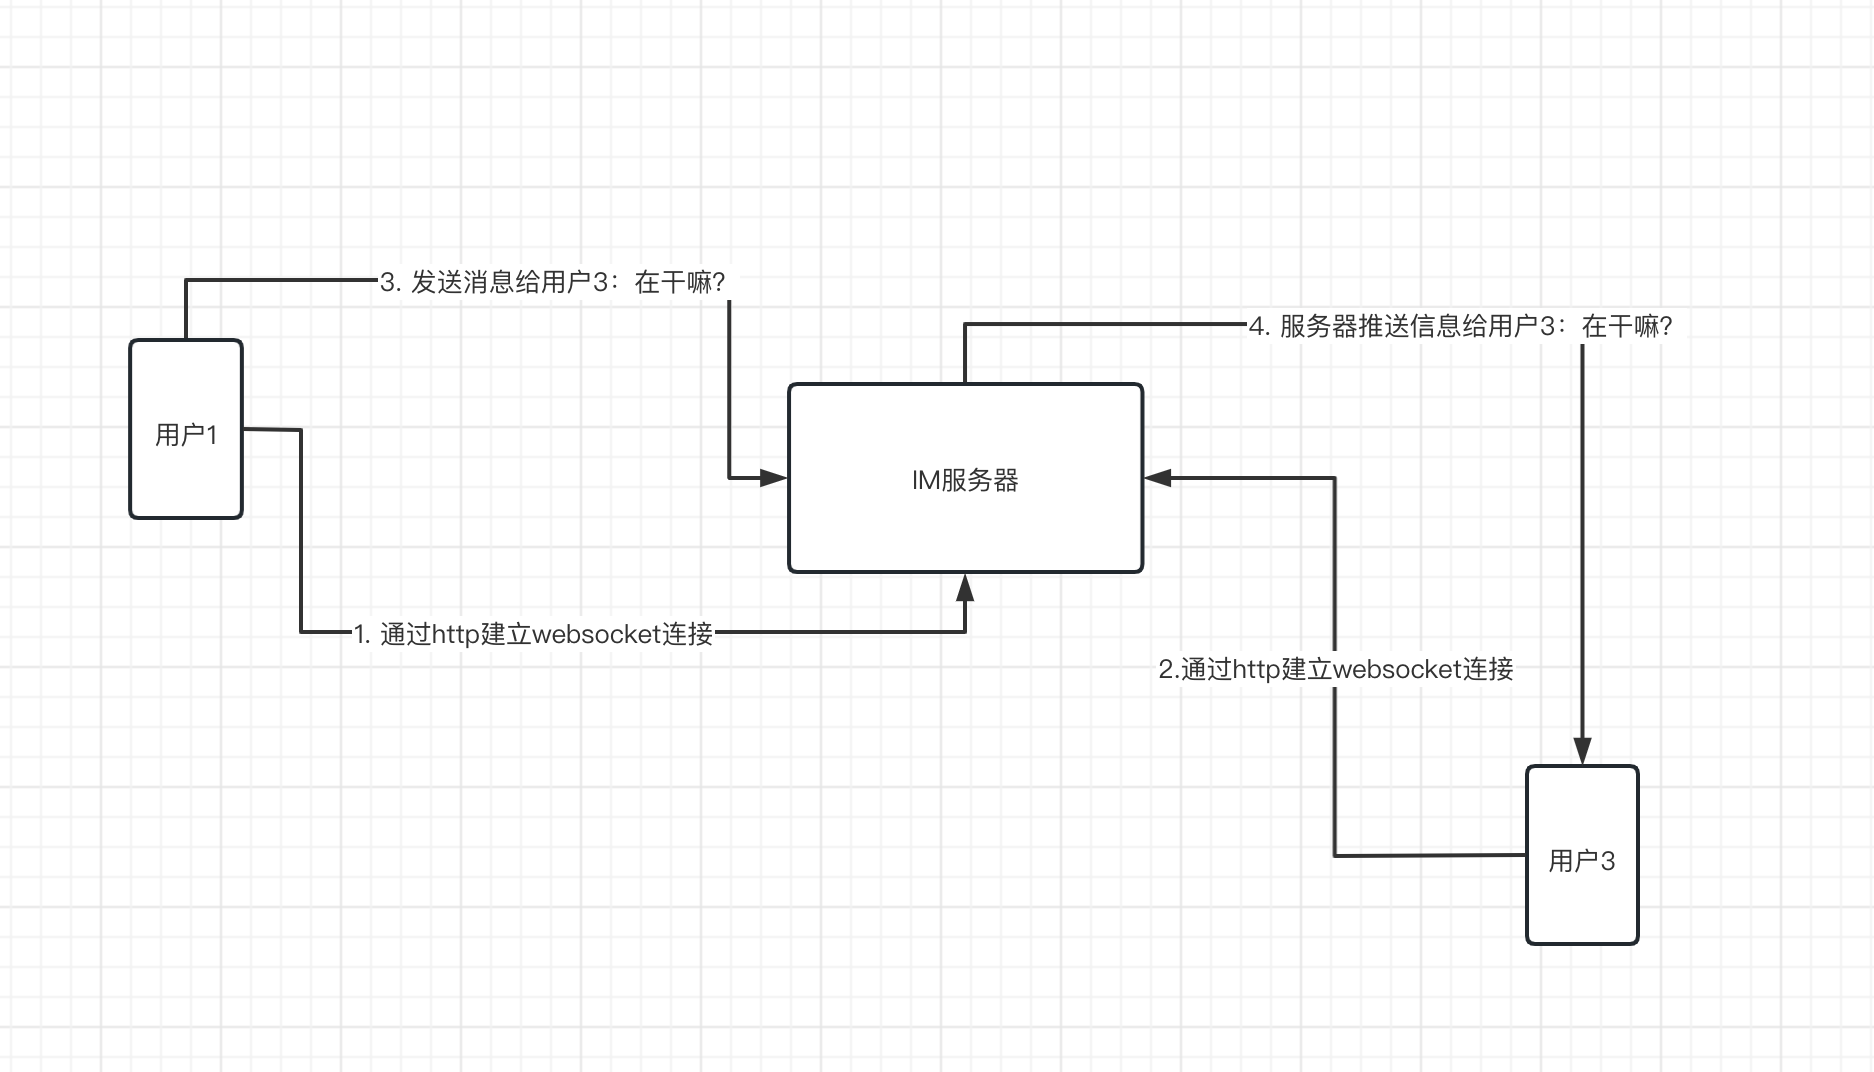
发送消息
用户发送消息给指定用户时,带上接收者id,发送至websocket,通过一系列逻辑处理,使用接收者id查找到对应的node,然后将消息放入node,此时websocket连接,会将消息推送给接收者。
接收消息
接收者在线后,同样会连接到websocket,然后id绑定node,去node中的websocket中读取对应的信息。
举例
例如:用户小明(userID=1)和小红(userID=2)都在线,他们都有对应发node并且都与服务器建立了websocket连接,当小明要发送一条信息(您好,在干嘛?)给小红,服务器获取到小明发送的消息体,然后通过消息体里接收者小红的id=2, 然后匹配map[2] = node, 然后将消息写入小红(userID=2)对应的node中的websocket连接中(也就是小红与服务器的websocket连接),小红就可以收到小明的信息了。
构造node
用户登录后,为每一个用户绑定一个node
//Node 构造连接
type Node struct {
    Conn      *websocket.Conn //socket连接
    Addr      string          //客户端地址
    DataQueue chan []byte     //消息内容
    GroupSets set.Interface   //好友 / 群
}
消息发送接收核心
信息发送和接收的核心逻辑仍然在message.go中编写
package models

import (
    "context"
    "encoding/json"
    "fmt"
    "net"
    "net/http"
    "strconv"
    "sync"

  "HiChat/global"

    "github.com/go-redis/redis/v8"
    "github.com/gorilla/websocket"
    "go.uber.org/zap"
    "gopkg.in/fatih/set.v0"
)

type Message struct {
    Model
    FormId   int64  `json:"userId"`   //信息发送者
    TargetId int64  `json:"targetId"` //信息接收者
    Type     int    //聊天类型:群聊 私聊 广播
    Media    int    //信息类型:文字 图片 音频
    Content  string //消息内容
    Pic      string `json:"url"` //图片相关
    Url      string //文件相关
    Desc     string //文件描述
    Amount   int    //其他数据大小
}

func (m *Message) MsgTableName() string {
    return "message"
}

//Node 构造连接
type Node struct {
    Conn      *websocket.Conn //连接
    Addr      string          //客户端地址
    DataQueue chan []byte     //消息
    GroupSets set.Interface   //好友 / 群
}

//映射关系
var clientMap map[int64]*Node = make(map[int64]*Node, 0)

//读写锁,绑定node时需要线程安全
var rwLocker sync.RWMutex
Chat初始化node进行信息收发调度
编写一个chat方法:核心作用就是升级连接, 初始化node, 用户id绑定node, 使用协程并发调用sendProc(node)和recProc(node)进行信息收发。
//Chat    需要 :发送者ID ,接受者ID ,消息类型,发送的内容,发送类型
func Chat(w http.ResponseWriter, r *http.Request) {
    //1.  获取参数信息发送者userId
    query := r.URL.Query()
    Id := query.Get("userId")
    userId, err := strconv.ParseInt(Id, 10, 64)
    if err != nil {
        zap.S().Info("类型转换失败", err)
        return
    }

    //升级为socket
    var isvalida = true
    conn, err := (&websocket.Upgrader{
        CheckOrigin: func(r *http.Request) bool {
            return isvalida
        },
    }).Upgrade(w, r, nil)
    if err != nil {
        fmt.Println(err)
        return
    }

    //获取socket连接,构造消息节点
    node := &Node{
        Conn:      conn,
        DataQueue: make(chan []byte, 50),
        GroupSets: set.New(set.ThreadSafe),
    }

    //将userId和Node绑定
    rwLocker.Lock()
    clientMap[userId] = node
    rwLocker.Unlock()

    //服务发送消息
    go sendProc(node)

    //服务接收消息
    go recProc(node)

    //sendMsg(userId, []byte("欢迎进入聊天系统"))
}
服务器发送信息
从node中获取信息并写入websocket中
//sendProc 从node中获取信息并写入websocket中
func sendProc(node *Node) {
    for {
        select {
        case data := <-node.DataQueue:
            err := node.Conn.WriteMessage(websocket.TextMessage, data)
            if err != nil {
                zap.S().Info("写入消息失败", err)
                return
            }
            fmt.Println("数据发送socket成功")
        }

    }
}
服务器接收消息
从websocket中将消息体拿出,然后进行解析,再进行聊天类型判断, 最后将消息发送至目的用户的node中
//recProc 从websocket中将消息体拿出,然后进行解析,再进行信息类型判断, 最后将消息发送至目的用户的node中
func recProc(node *Node) {
    for {
        //获取信息
        _, data, err := node.Conn.ReadMessage()
        if err != nil {
            zap.S().Info("读取消息失败", err)
            return
        }

        //这里是简单实现的一种方法
        msg := Message{}
        err = json.Unmarshal(data, &msg)
        if err != nil {
            zap.S().Info("json解析失败", err)
            return
        }

        if msg.Type == 1 {
            zap.S().Info("这是一条私信:", msg.Content)
            tarNode, ok := clientMap[msg.TargetId]
            if !ok {
                zap.S().Info("不存在对应的node", msg.TargetId)
                return
            }

            tarNode.DataQueue <- data
            fmt.Println("发送成功:", string(data))
        }

    }
}
整个单聊服务就完成了。
配置api
将逻辑编写完成后,在service目录下user.go中编写
//SendUserMsg 发送消息
func SendUserMsg(ctx *gin.Context) {
    models.Chat(ctx.Writer, ctx.Request)
}
然后在router中配置路由
//用户模块
    user := v1.Group("user")
    {
        ……
    ……
    ……
        user.GET("/SendUserMsg", middlewear.JWY(), service.SendUserMsg)
    }
测试
注意事项
在测试之前我已经将jwt中token验证,改成了get请求:
        //token := c.PostForm("token")
        token := c.Query("token")
        user := c.Query("userId")
当然最简单的测试方法是,直接在router中:
user.GET("/SendUserMsg", middlewear.JWY(), service.SendUserMsg)将middlewear.JWY()扔掉,最后参数只需要这样:ws://127.0.0.1:8000/v1/user/SendUserMsg?userId=13就可以直接参数了
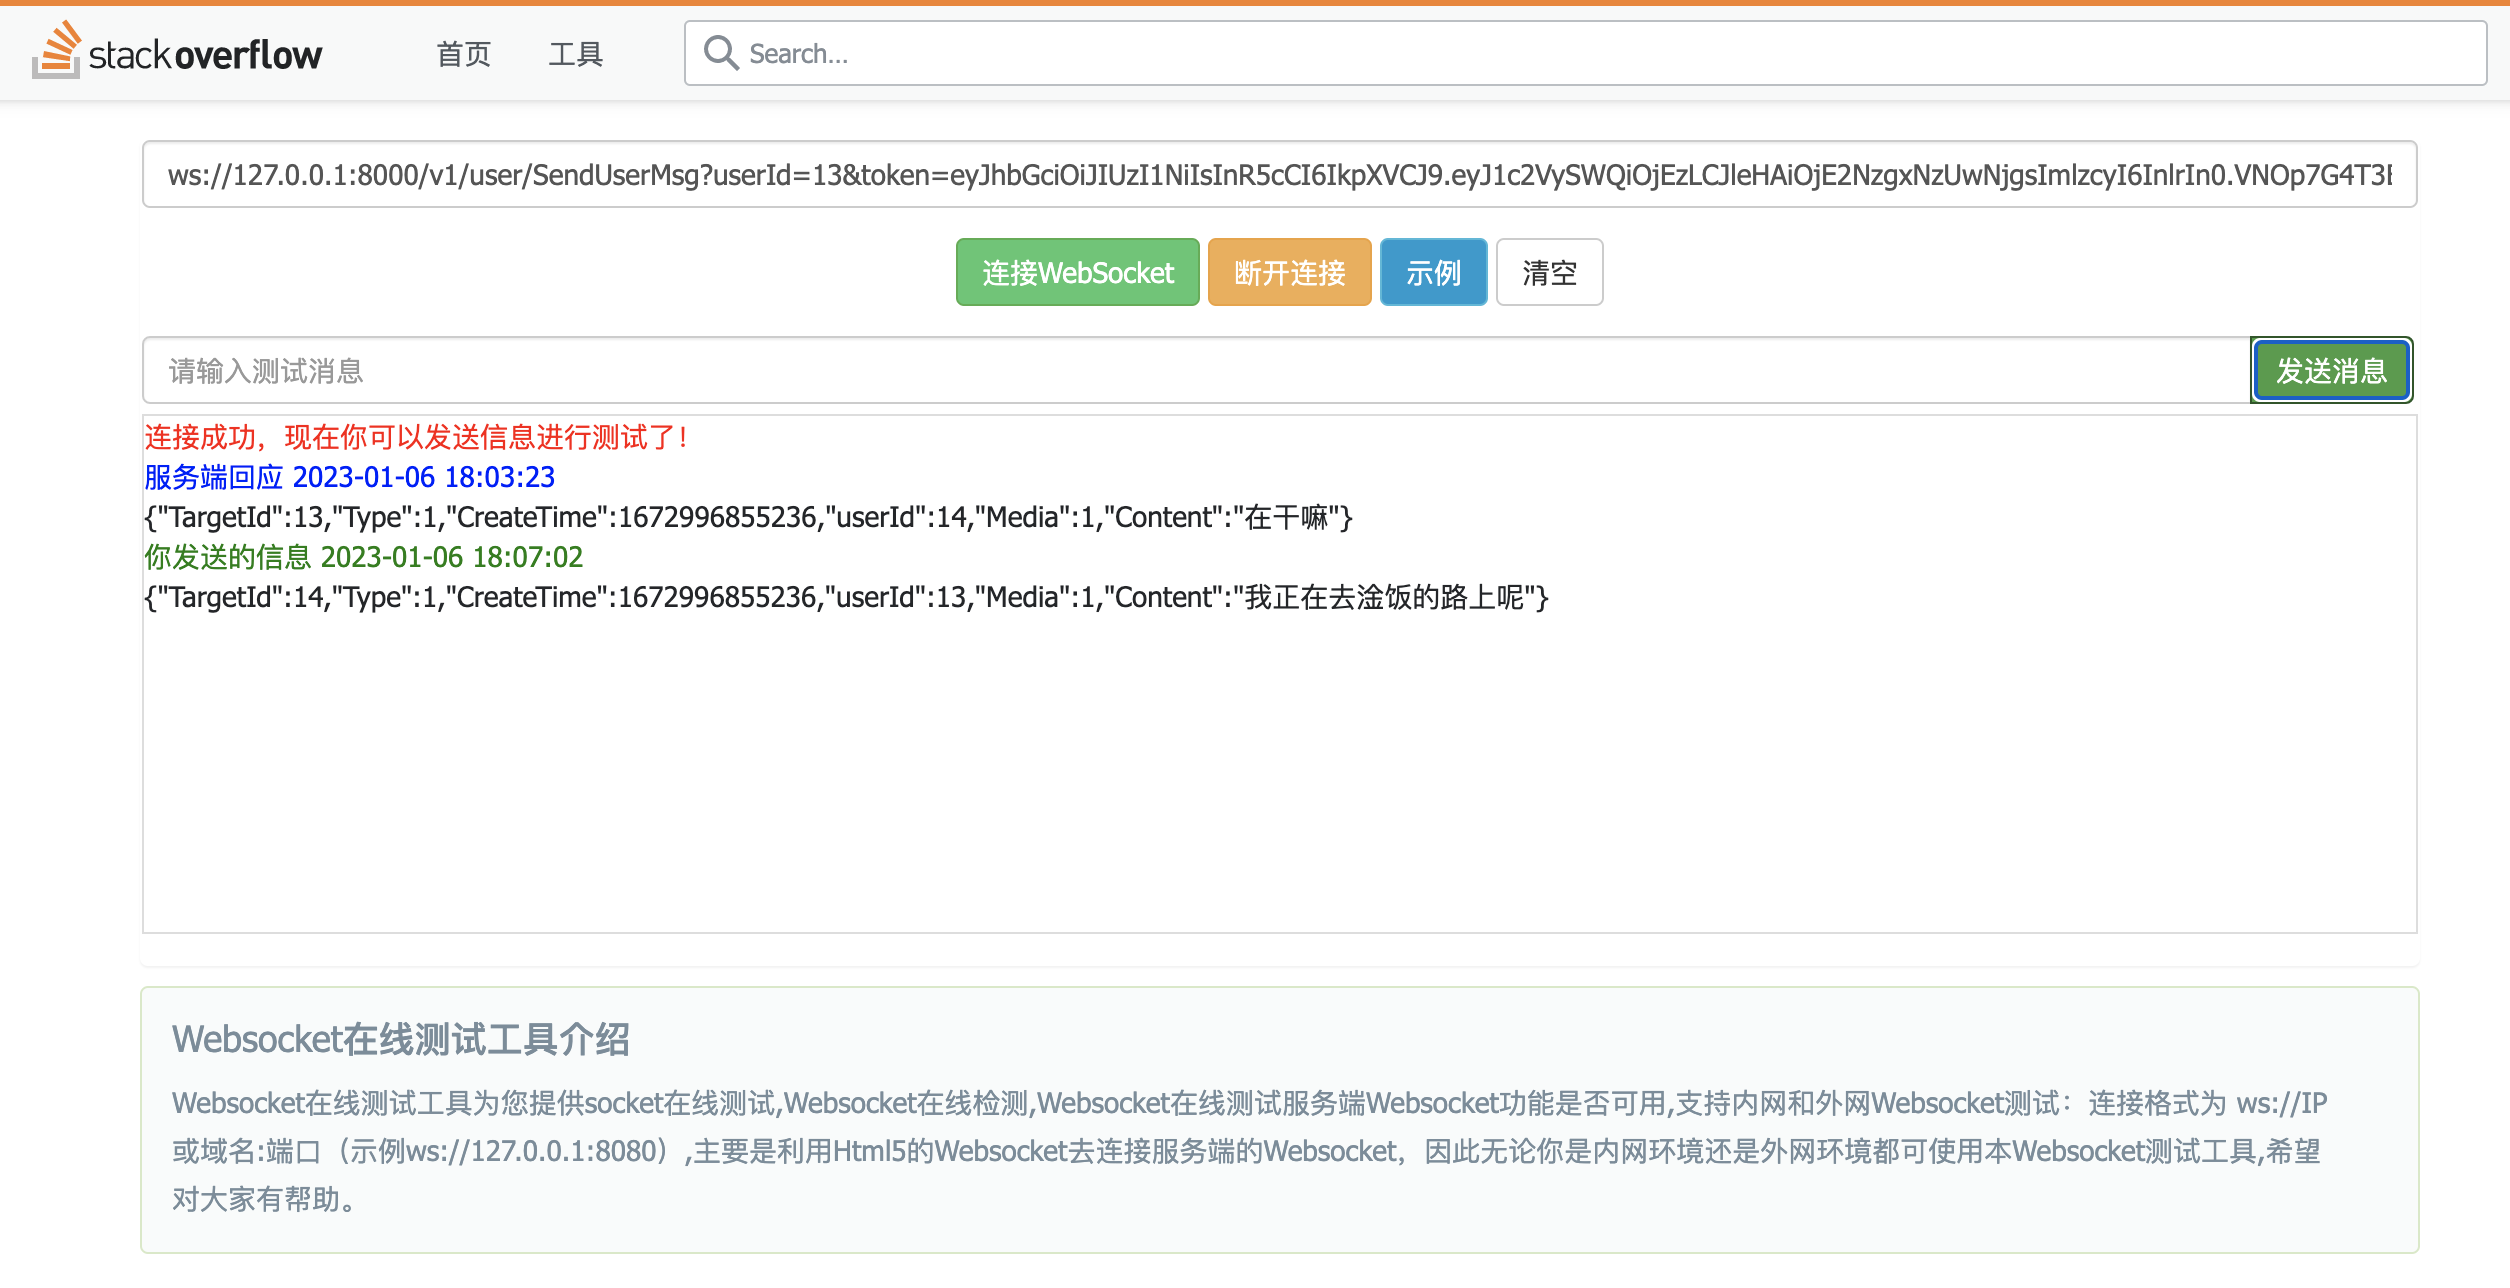
测试网站
stackoverflow.org.cn/websocket/
用户13:ws://127.0.0.1:8000/v1/user/SendUserMsg?userId=13&token=eyJhbGciOiJIUzI1NiIsInR5cCI6IkpXVCJ9.eyJ1c2VySWQiOjEzLCJleHAiOjE2NzgxNzUwNjgsImlzcyI6InlrIn0.VNOp7G4T3BGkCUNe_yyDcw7b8hZvjqTGDRWUe9mNims
用户14:ws://127.0.0.1:8000/v1/user/SendUserMsg?userId=14&token=eyJhbGciOiJIUzI1NiIsInR5cCI6IkpXVCJ9.eyJ1c2VySWQiOjE0LCJleHAiOjE2NzgxNzUwMDcsImlzcyI6InlrIn0.nkVjhbSNnZLVNfFstWQNOgzrNMIcmgyvDIlCn6oAsDU
这里你想要重新登录,然后获取到ws://127.0.0.1:8000/v1/user/SendUserMsg?后续参数userId和token
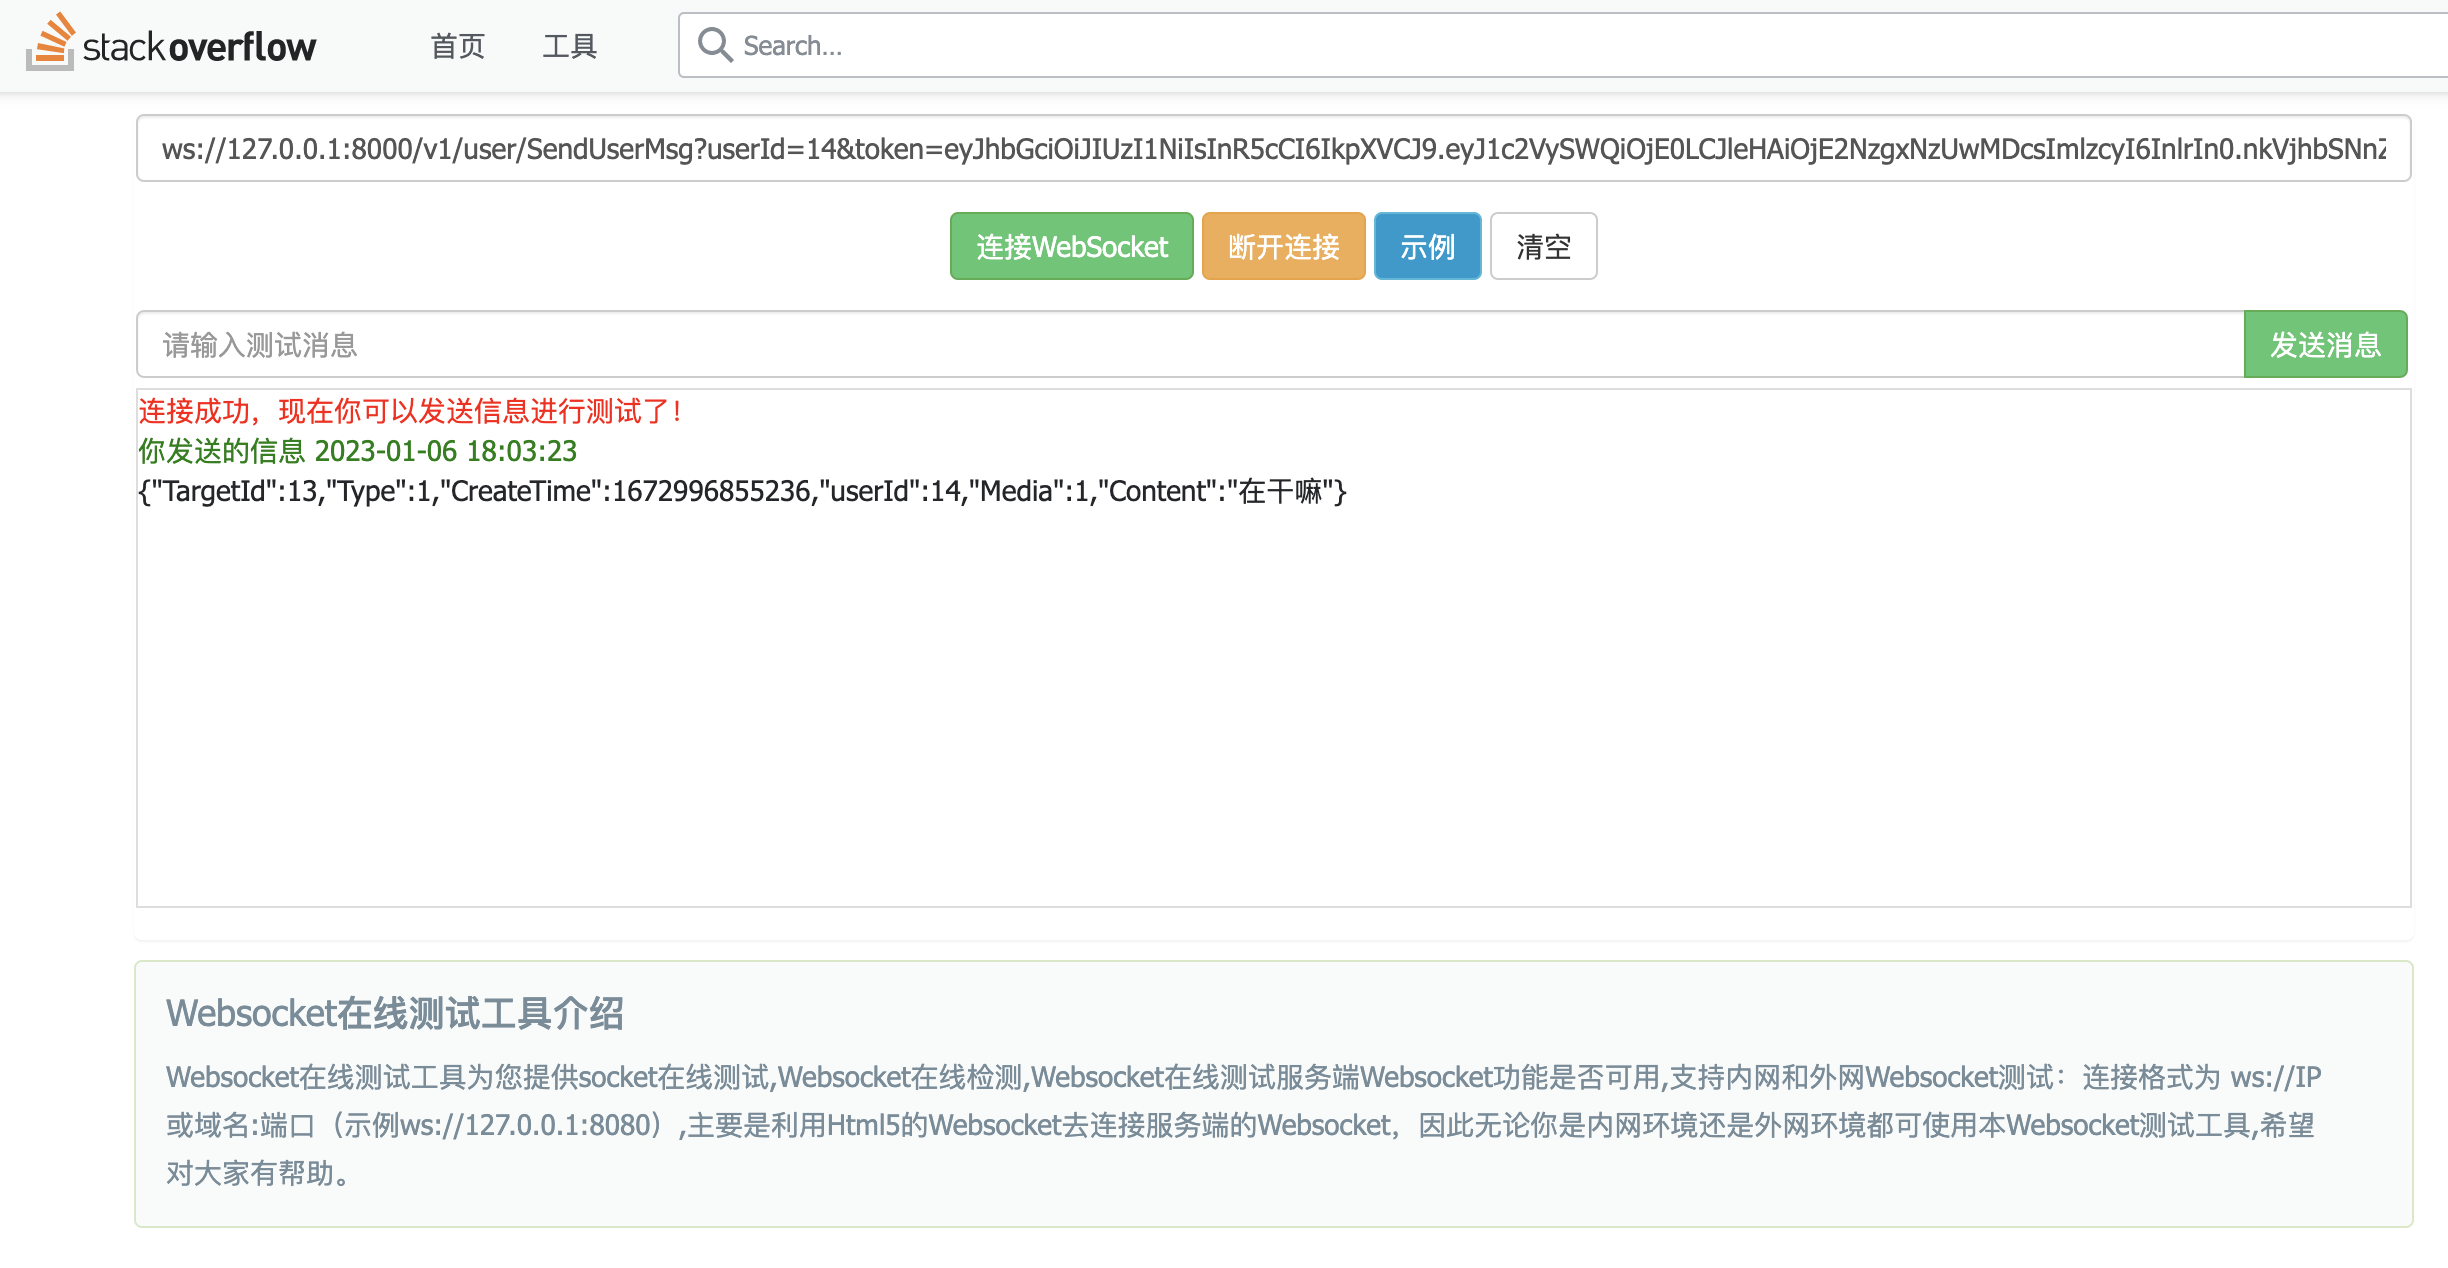
消息体:
{"TargetId":13,"Type":1,"CreateTime":1672996855236,"userId":14,"Media":1,"Content":"在干嘛"}测试如下:
13发送消息给14
14收到来自13的信息:
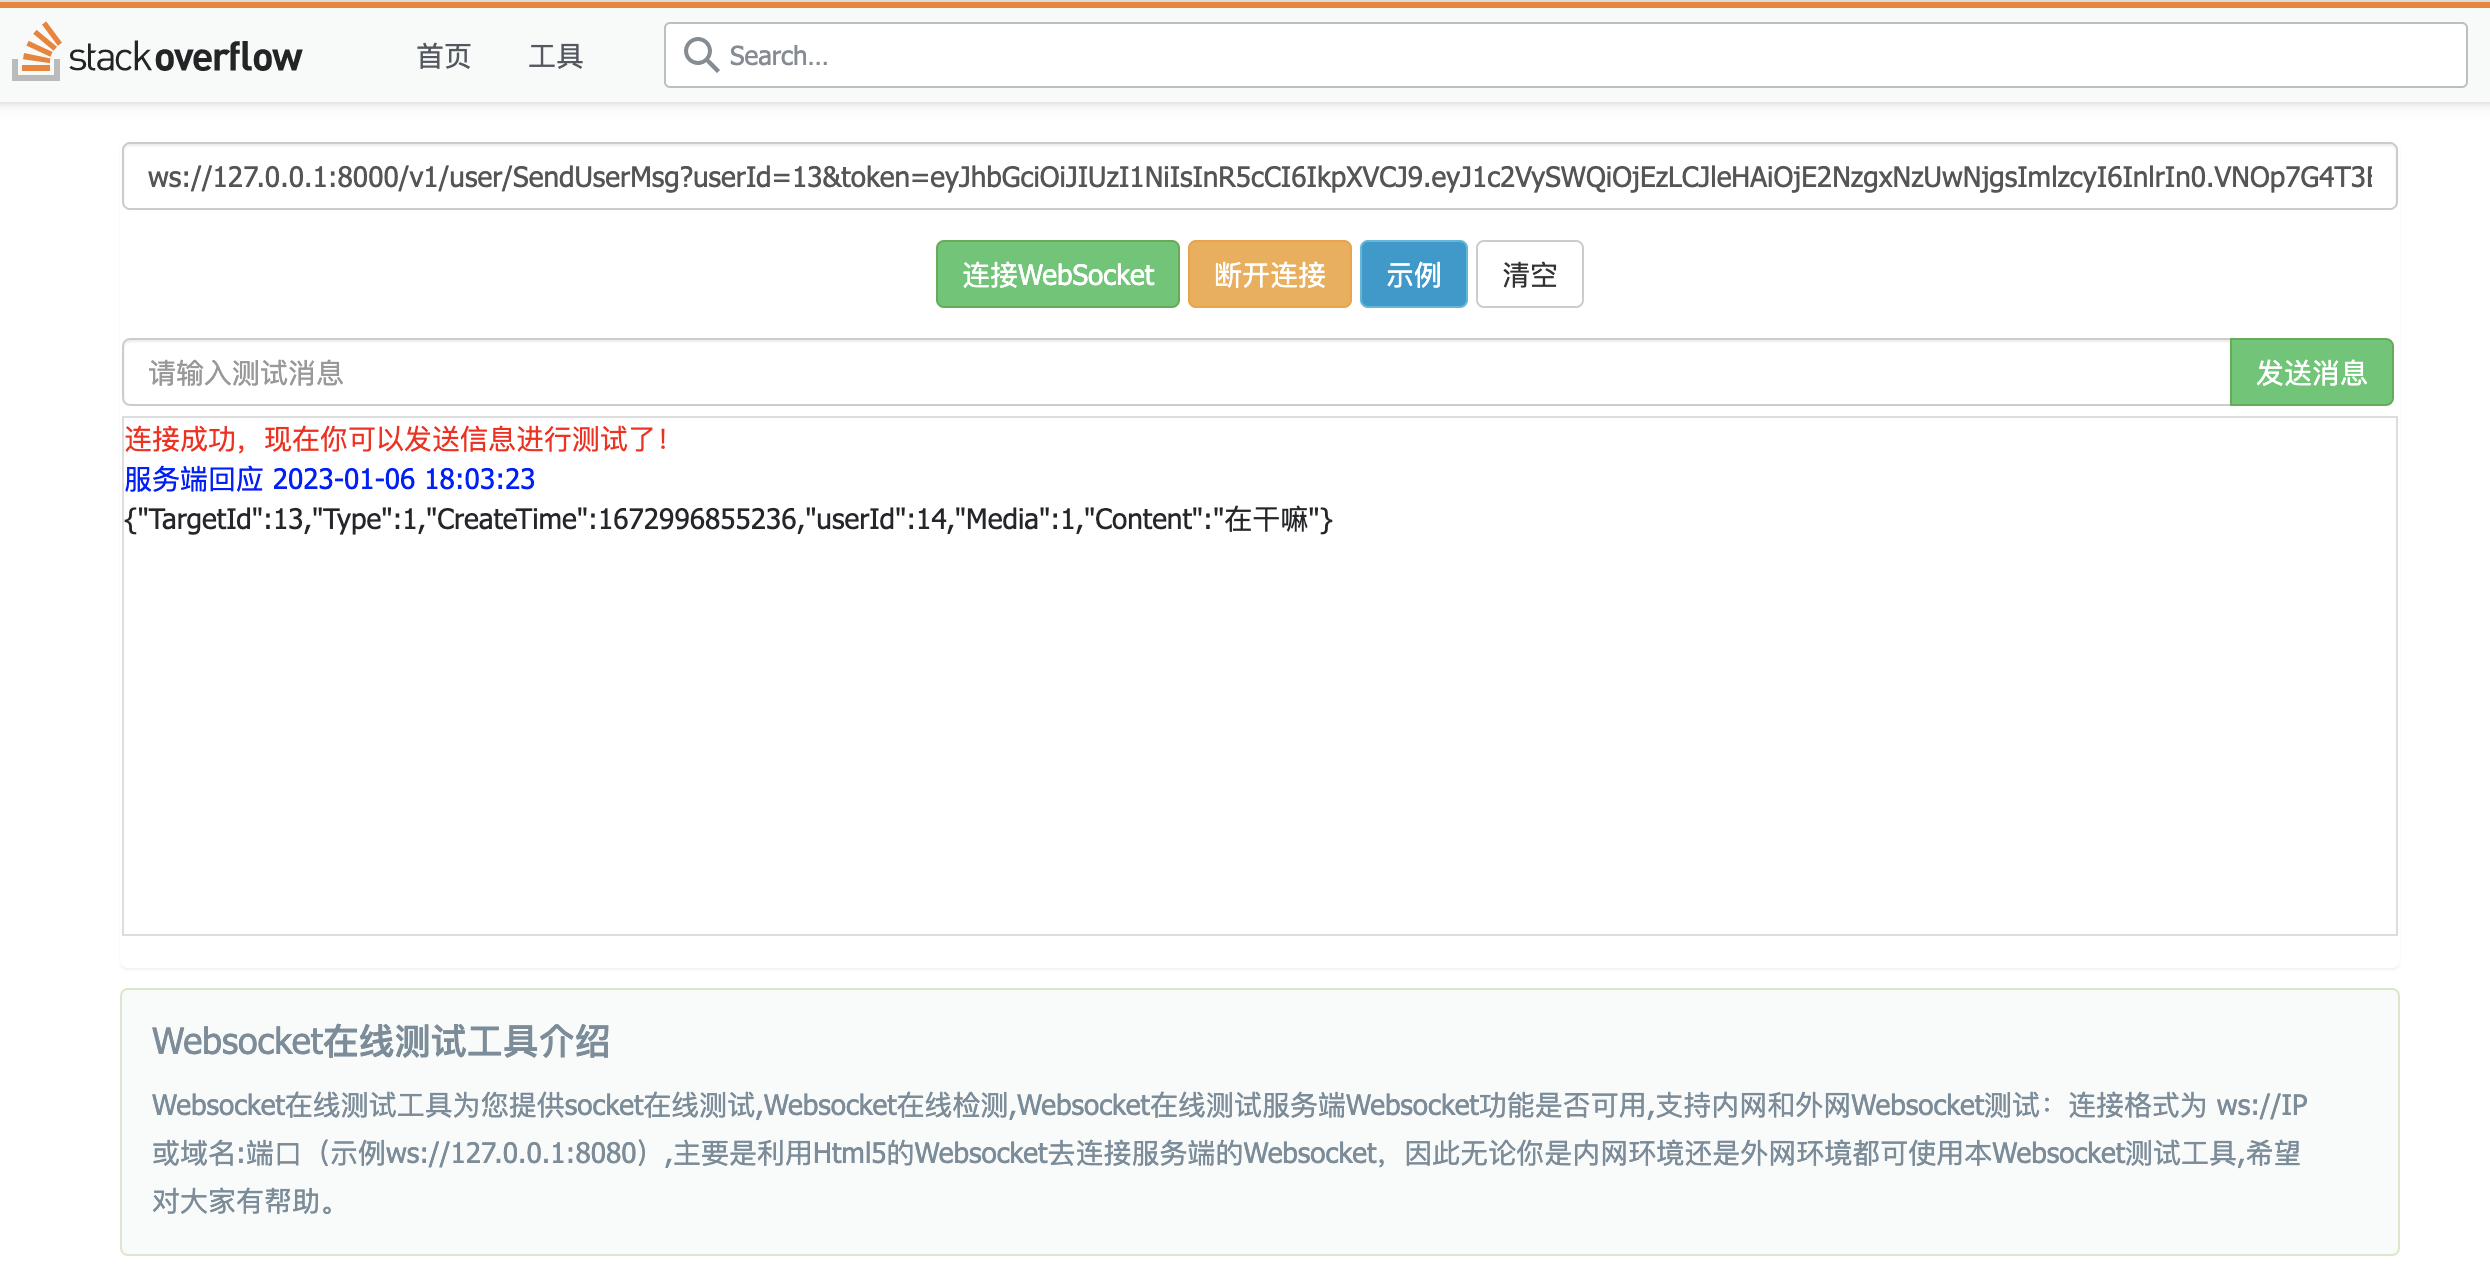
14回复13信息:
13收到14的回复:
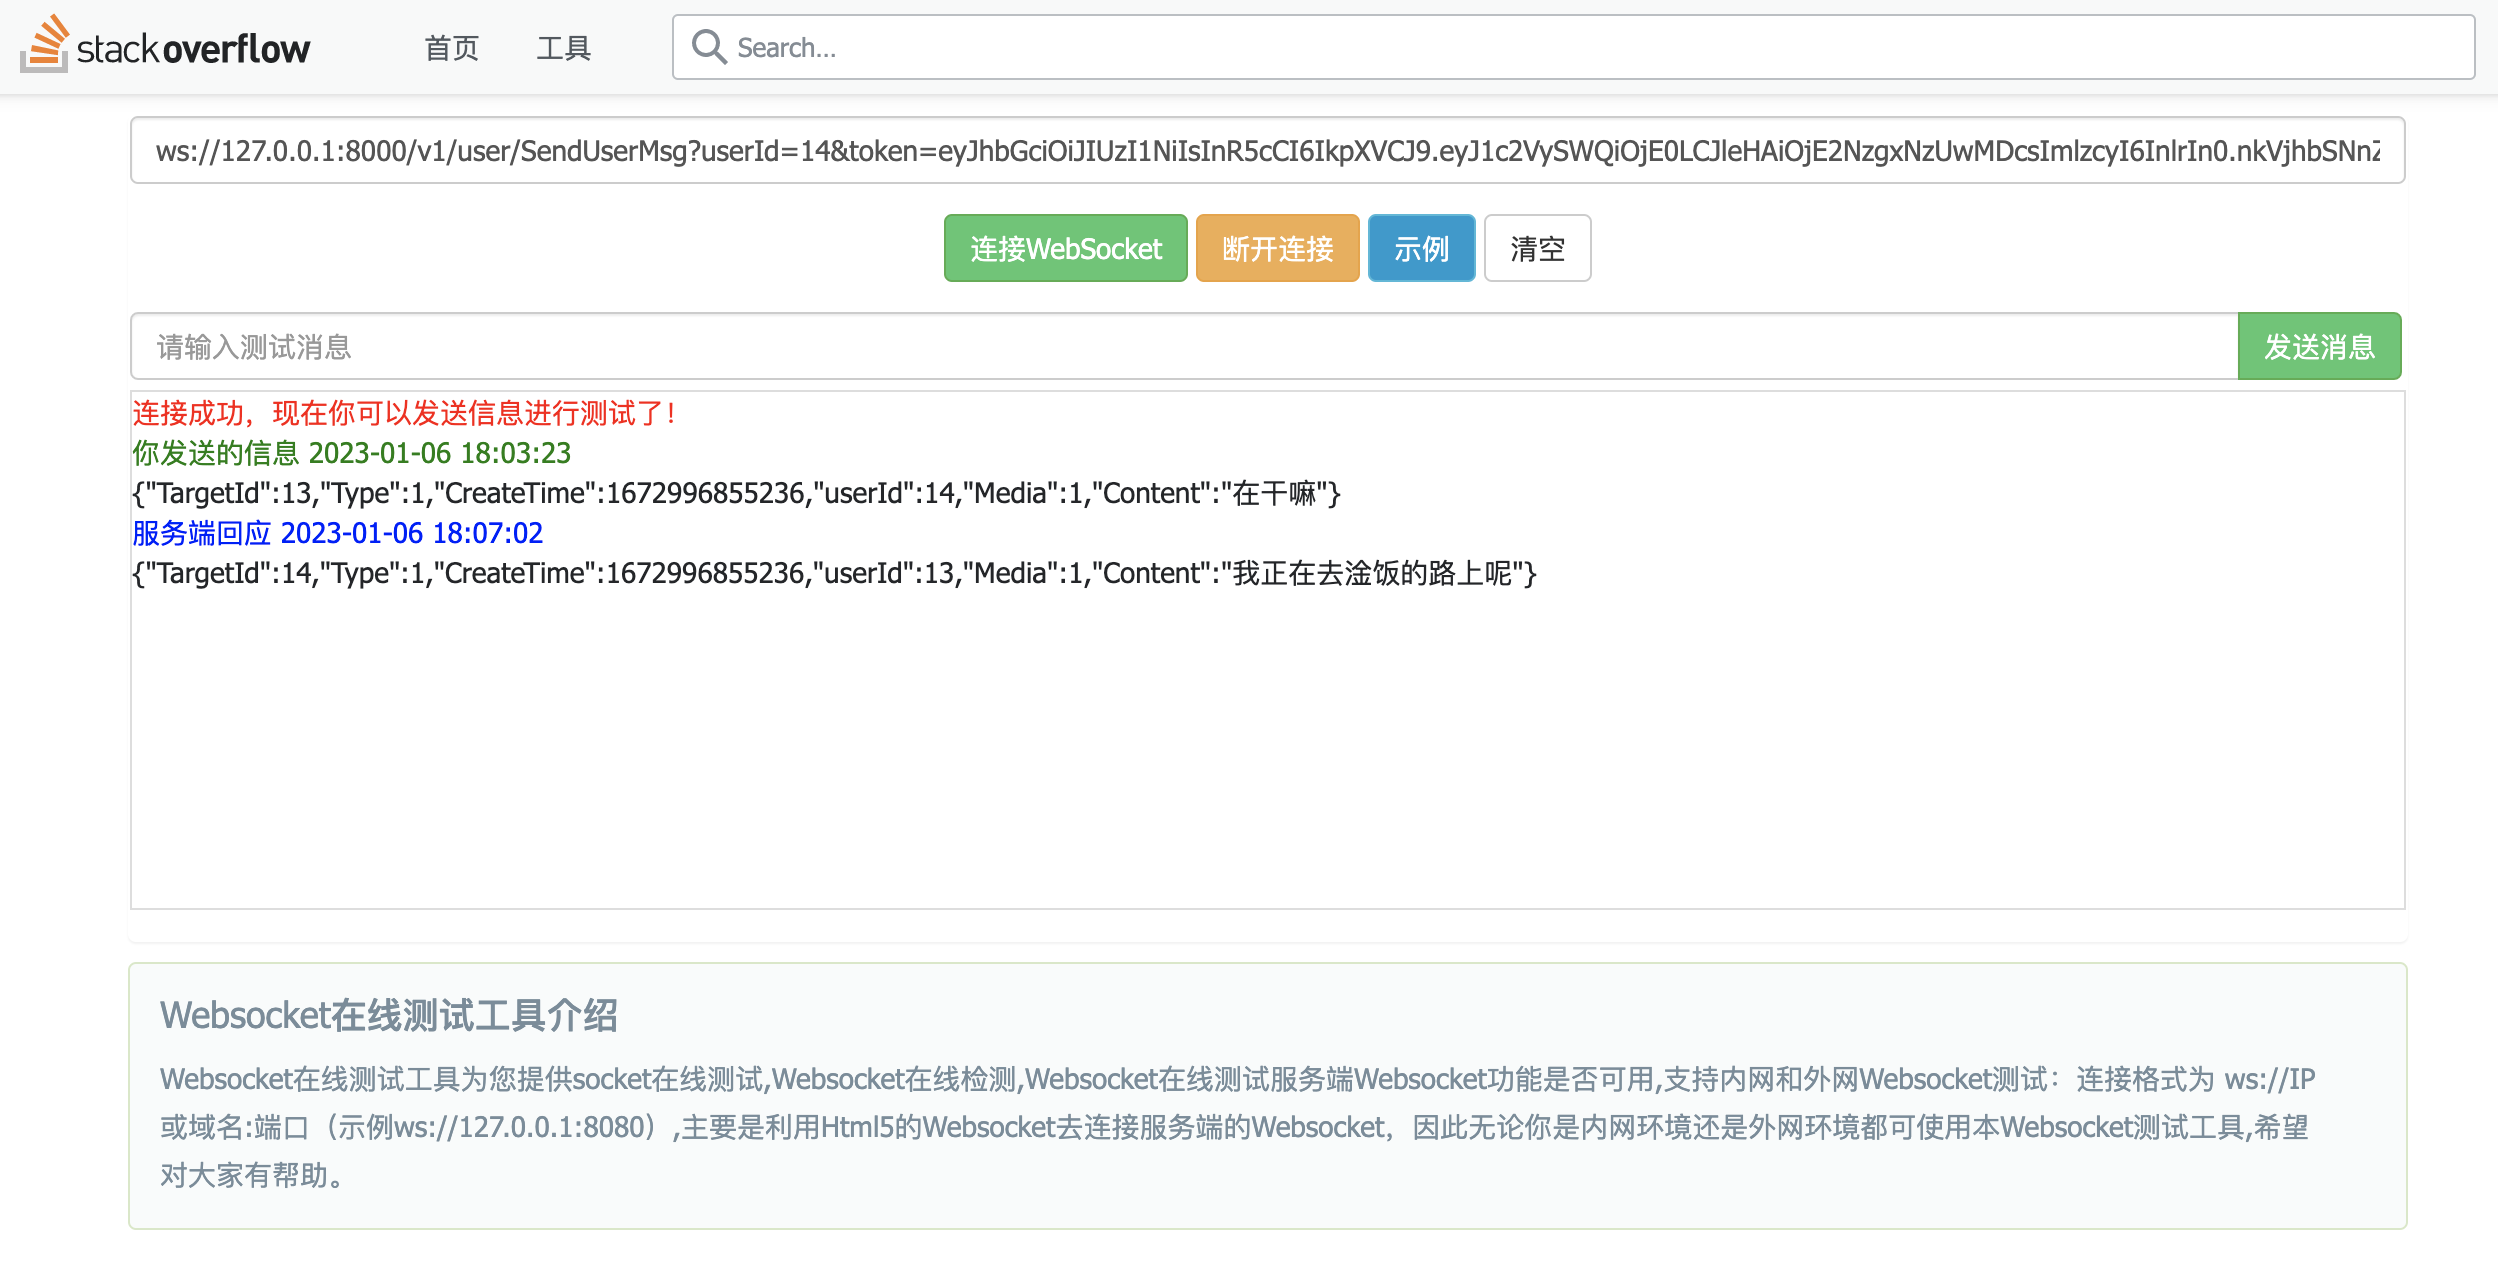
这样用户信息的发送和接收都完成了。
总结
这一部分的内容,主要就是对信息的发送和接收进行理解,当然这里的信息收发都只是使用websocket就行简单的使用,在下一篇文章中,我们将信息的收发核心加入udp连接。
本作品采用《CC 协议》,转载必须注明作者和本文链接


 关于 LearnKu


推荐文章: