
分享我的windows开发环境
8 / 9 / 创建于 4年前 /
 rufo 的个人博客
在使用过mac和window做开发,我个人感觉还是windows开发效率高。
比如有utool这些工具,还是powershell加docker,直接上天。
最终效果如图:
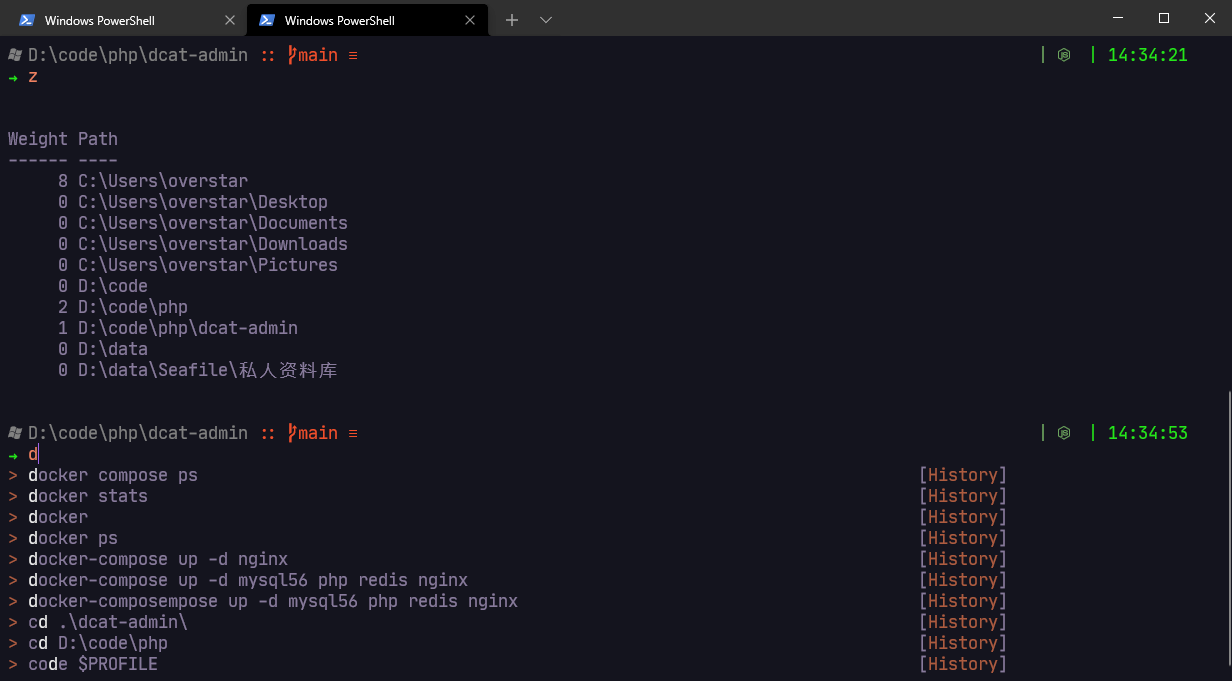
安装docker
直接去官网下载安装
安装php环境
推荐使用https://github.com/yeszao/dnmp,
我自己也用 docker-compose 搞了个,不过没别人的方便。
安装Scoop
使用scoop来管理软件,以管理员身份运行PowerShell,执行
Set-ExecutionPolicy RemoteSigned -scope CurrentUser然后执行安装命令
Invoke-Expression (New-Object System.Net.WebClient).DownloadString('https://get.scoop.sh')
# 或者
iwr -useb get.scoop.sh | iex
更换 scoop 源,依次执行
scoop config SCOOP_REPO https://gitee.com/squallliu/scoop
scoop update

scoop bucket add java https://hub.fastgit.org/ScoopInstaller/Java.git
scoop bucket add php https://hub.fastgit.org/ScoopInstaller/PHP.git
scoop bucket add versions https://hub.fastgit.org/ScoopInstaller/Versions.git
scoop bucket add nightlies https://hub.fastgit.org/ScoopInstaller/Nightlies.git
scoop bucket add extras https://hub.fastgit.org/lukesampson/scoop-extras.git
基本使用
scoop install [app]@[版本号] 使用conda虚拟环境(python可选)
conda install -n root -c pscondaenvs pscondaenvs安装oh-my-posh主题和powershell插件
以管理员权限打开powershell,将CurrentUser的ExecutionPolicy(执行权限)从原来的Undefined更改成RemoteSigned,同时信任来自PSGallery的所有模块:
Set-ExecutionPolicy RemoteSigned -Scope CurrentUser

Set-PSRepository -Name PSGallery -InstallationPolicy Trusted
安装插件
# ls颜色插件
Install-Module -AllowClobber Get-ChildItemColor -Scope CurrentUser
# Docker插件
Install-Module DockerCompletion -Scope CurrentUser
# oh-my-posh主题
Install-Module oh-my-posh -Scope CurrentUser
# PSReadLine插件
Install-Module -Name PowerShellGet -Force
Install-Module -Name PSReadLine -AllowPrerelease -Force
# 类似zsh的jump插件
Install-Module ZLocation -Scope CurrentUser
#安装颜色插件
Install-Module -AllowClobber Get-ChildItemColor -Scope CurrentUser
安装字体
建议使用JetBrainsMono字体,下载地址:www.nerdfonts.com/font-downloads
我的配置
需要更新配置文件$PROFILE,类似于Linux Bash的.bashrc,输入:
code $PROFILE在打开的文件中添加:
Import-Module posh-git
Import-Module DockerCompletion
Import-Module oh-my-posh
Import-Module PSReadLine
Import-Module Get-ChildItemColor

Set-PSReadLineKeyHandler -Key Tab -Function Complete
Set-PSReadLineKeyHandler -Key "Ctrl+d" -Function MenuComplete

#Set-PSReadLineKeyHandler -Key UpArrow -Function HistorySearchBackward
#Set-PSReadLineKeyHandler -Key DownArrow -Function HistorySearchForward

Set-PSReadLineOption -HistorySearchCursorMovesToEnd
Set-PSReadLineOption -PredictionSource History

Set-PSReadLineOption -PredictionViewStyle ListView

Set-PoshPrompt  negligible

# function prompt { "Lunar $pwd" }
function cd... { Set-Location ..\.. }
Set-Alias dc docker-compose -Option "AllScope"

function which
{
    $results =New-Object System.Collections.Generic.List[System.Object];
    foreach ($command in $args)
    {
        $path = (Get-Command $command).Source
        if ($path)
        {
            $results.Add($path);
        }
    }
    return $results;
}
Set-Alias cat Get-Content -Option "AllScope"

#设置别名
function dp([string]$msg) {
    if($msg -eq "a"){
        Write-Output "docker ps -a"
        docker ps -a
    }else{
        echo "docker ps "
        docker ps
    }
}

function dphp {
     docker exec -it php /bin/sh
}


function build([string]$msg) {
    Set-Location D:\Projects\docker_env
    docker-compose stop $msg
    docker-compose build $msg
    docker-compose up -d $msg
}

function sh([string]$msg) {
   docker exec -it $msg /bin/sh
}
function bash([string]$msg) {
   docker exec -it $msg /bin/bash
}
function dr([string]$msg) {
   docker restart $msg
}

# 3. 查看目录 ls & ll
function ListDirectory {
    (Get-ChildItem).Name
    Write-Host("")
}

# 设置ls和ll
$GetChildItemColorTable.File['Directory'] = "Red"
ForEach ($Exe in $GetChildItemColorExtensions.ExecutableList) {
    $GetChildItemColorTable.File[$Exe] = "Green"
}

Set-Alias -Name ll -Value Get-ChildItem
Set-Alias l Get-ChildItem -option AllScope
Set-Alias ls Get-ChildItemColorFormatWide -option AllScope

# 下面是conda的别名
function workon($name){
    activate $name
    # echo "切换到环境:"+[string]$name
}
function in($name){
    activate $name
    # echo "切换到环境:"+[string]$name
}
function out{
    deactivate
}
我使用的windows terminal主题:
{
            "background": "#1B1B23",
            "black": "#000000",
            "blue": "#564D9B",
            "brightBlack": "#5D3225",
            "brightBlue": "#867AED",
            "brightCyan": "#EAEAEA",
            "brightGreen": "#29E620",
            "brightPurple": "#A05EEE",
            "brightRed": "#FF6388",
            "brightWhite": "#BFA3FF",
            "brightYellow": "#F08161",
            "cursorColor": "#A063EB",
            "cyan": "#808080",
            "foreground": "#877A9B",
            "green": "#37A415",
            "name": "Urple",
            "purple": "#6C3CA1",
            "red": "#B0425B",
            "selectionBackground": "#A063EB",
            "white": "#87799C",
            "yellow": "#AD5C42"
        }
到此就配置差不多了
本作品采用《CC 协议》,转载必须注明作者和本文链接


 关于 LearnKu


推荐文章: