
 TDD 构建 Laravel 论坛笔记
38.Vue 分页
- 本系列文章为
laracasts.com的系列视频教程——Let's Build A Forum with Laravel and TDD 的学习笔记。若喜欢该系列视频,可去该网站订阅后下载该系列视频, 支持正版 ;- 视频源码地址:github.com/laracasts/Lets-Build-a-...;
- 本项目为一个 forum(论坛)项目,与本站的第二本实战教程 《Laravel 教程 - Web 开发实战进阶》 类似,可互相参照。
本节说明
- 对应视频教程第 38 小节:Laravel and Vue Pagination
本节内容
首先我们来看一个 Bug:
是的,我们未能在组件中删除选定的回复。修复的方法很简单,我们为每个回复绑定一个独特的id即可:
forum\resources\assets\js\components\Replies.vue
<template>
    <div>
        <div v-for="(reply ,index) in items" :key="reply.id">
            <reply :data="reply" @deleted="remove(index)"></reply>
        </div>

        <new-reply :endpoint="endpoint" @created="add"></new-reply>
    </div>
</template>
.
.
我们再来一次:
我们再来优化一下我们的日期显示。我们利用 Moment.js 插件来进行优化,首先进行安装:
$ npm install moment --save接着我们在Reply.vue 组件中应用:
<template>
    .
    .
    <h5 class="flex">
        <a :href="'/profiles/'+data.owner.name"
            v-text="data.owner.name">
        </a> said <span v-text="ago"></span>
    </h5>
    .
    .
</template>
<script>
    import Favorite from './Favorite.vue';
    import moment from 'moment';
    .
    .
    computed: {
        ago() {
          return moment(this.data.created_at).fromNow() + '...';
        },
    .
    .
</script>
现在再来看一下页面效果: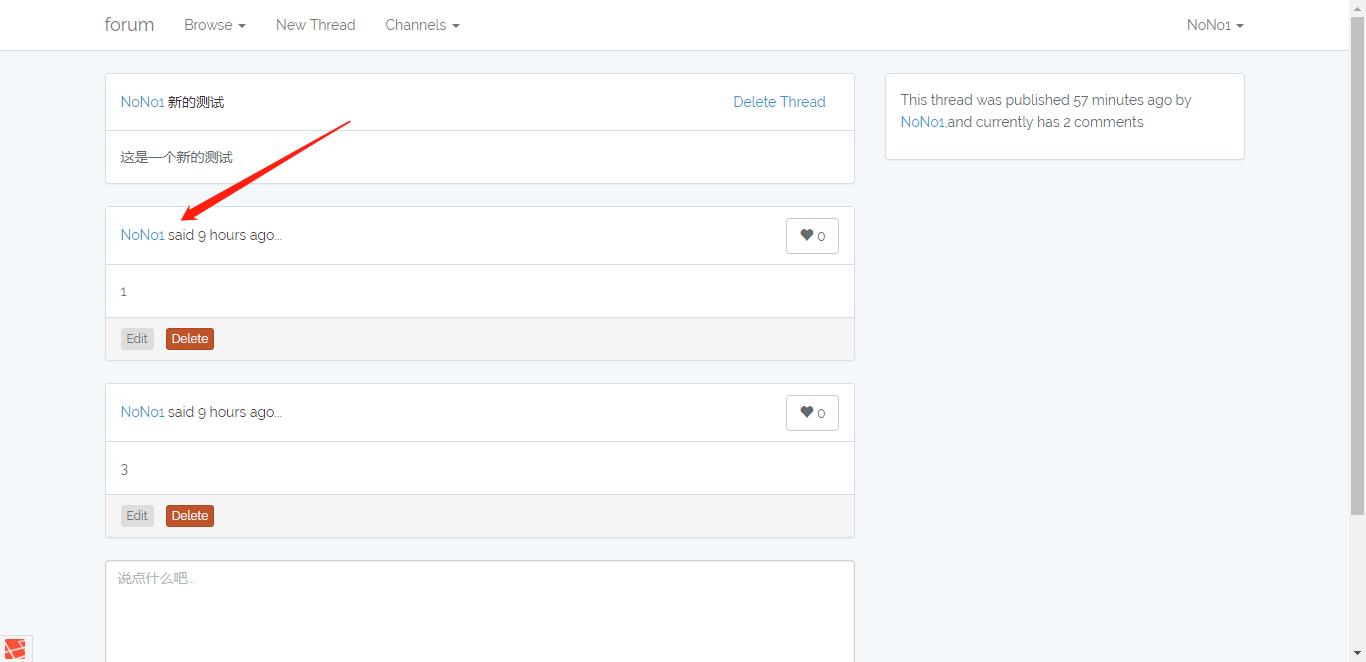
好了,现在我们正式开始本节的内容:实现 Vue 分页功能。首先修改视图:
forum\resources\views\threads\show.blade.php
.
.
    <replies @added="repliesCount++" @removed="repliesCount--"></replies>
</div>
.
.
接着修改组件:
forum\resources\assets\js\components\Replies.vue
.
.
<script>
    import Reply from './Reply';
    import NewReply from './NewReply';

    export default {
        components: { Reply,NewReply },

        data() {
            return {
                items:[],
                endpoint: location.pathname+'/replies'
            }
        },

        created() {
          this.fetch();
        },

        methods: {
            fetch() {
              axios.get(this.url)
                  .then(this.refresh);
            },

            refresh(response) {
                // To Do
            },

            add(reply){
                this.items.push(reply);

                this.$emit('added');
            },

            remove(index) {
                this.items.splice(index,1);

                this.$emit('removed');

                flash('Reply has been deleted!');
            }
        }
    }
</script>我们重新定义了视图和组件,目的是为了实现利用Ajax的方式给回复进行分页。我们在组件中发送了请求,但是我们现在还没有相应的路由。让我们来添加路由:
forum\routes\web.php
.
.
Route::get('threads/{channel}','ThreadsController@index');
Route::get('/threads/{channel}/{thread}/replies','RepliesController@index');
Route::post('/threads/{channel}/{thread}/replies','RepliesController@store');
.
.我们利用了index()方法来获取当前页话题的数据,但是目前我们的方法还没有定义。在开始编写我们的功能代码之前,让我们按照开发模式,先建立测试:
forum\tests\Feature\ReadThreadsTest.php
    .
    .
    /** @test */
    public function a_user_can_request_all_replies_for_a_given_thread()
    {
        $thread = create('App\Thread');
        create('App\Reply',['thread_id' => $thread->id],2);

        $response = $this->getJson($thread->path() . '/replies')->json();

        dd($response);
    }
}
运行测试: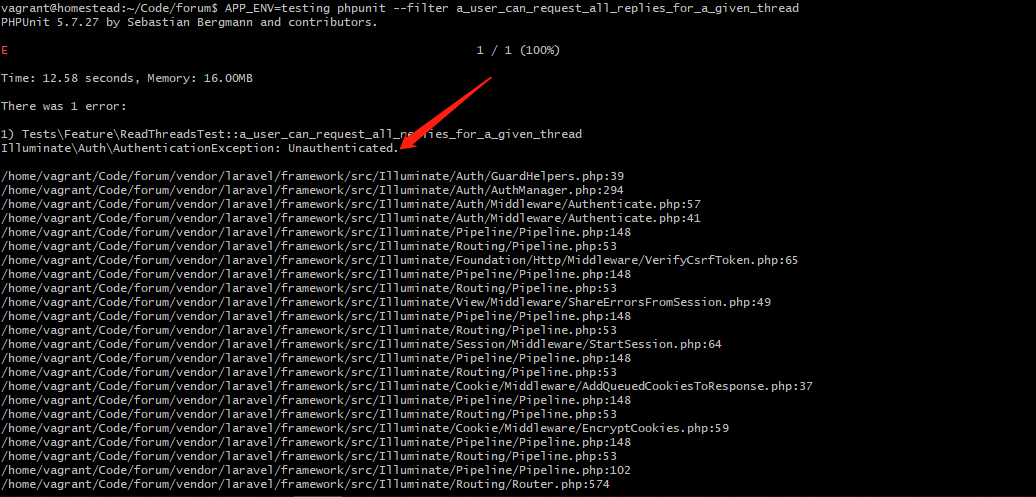
显示报错,原因是我们利用Auth中间件进行了权限控制:
forum\app\Http\Controllers\RepliesController.php
.
.
class RepliesController extends Controller
{
    public function __construct()
    {
        $this->middleware('auth');
    }
    .
.我们的index()不要要登录就能访问,所以我们修改一下:
.
.
class RepliesController extends Controller
{
    public function __construct()
    {
        $this->middleware('auth',['except' => 'index']);
    }
    .
    .
再次测试: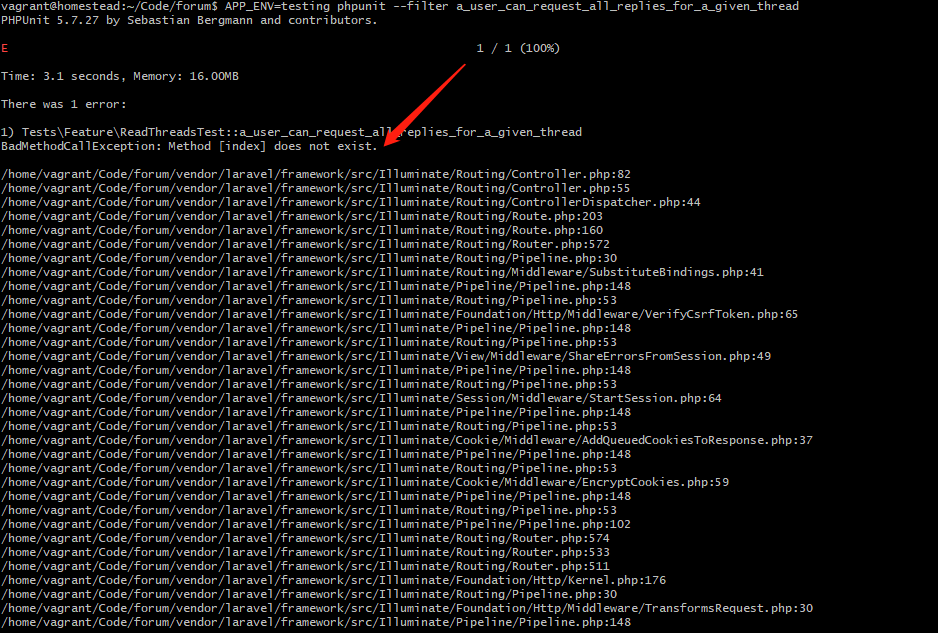
ok,接下来的工作:建立index()方法。
forum\app\Http\Controllers\RepliesController.php
.
.
class RepliesController extends Controller
{
    public function __construct()
    {
        $this->middleware('auth',['except' => 'index']);
    }

    public function index($channelId,Thread $thread)
    {
        return $thread->replies()->paginate(1);
    }
    .
    .
再次运行测试: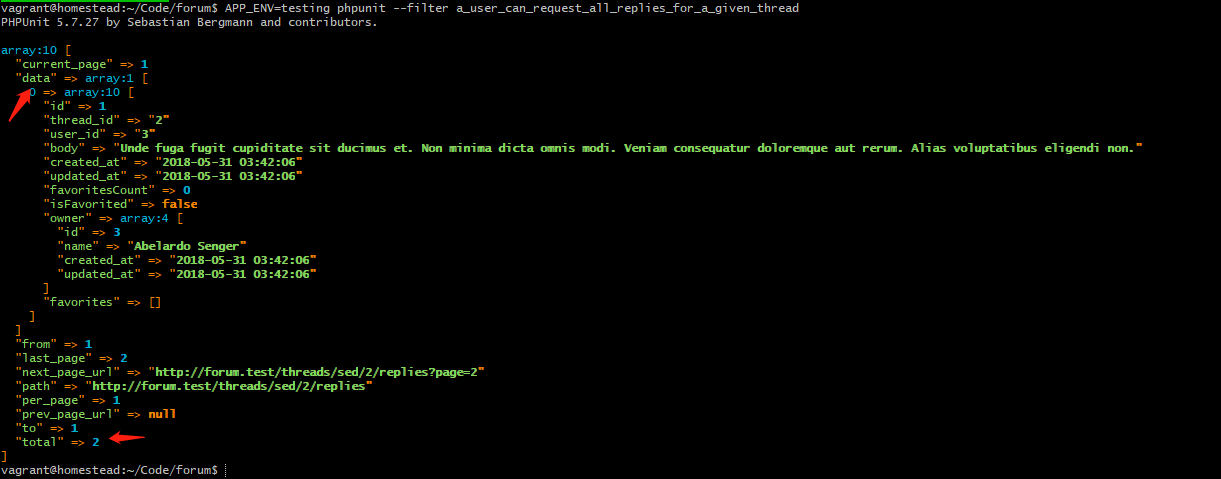
既然已经可以看到返回的全部信息,那么我们就可以逐步完善测试:
    .
    .
    /** @test */
    public function a_user_can_request_all_replies_for_a_given_thread()
    {
        $thread = create('App\Thread');
        create('App\Reply',['thread_id' => $thread->id],2);

        $response = $this->getJson($thread->path() . '/replies')->json();

        $this->assertCount(1,$response['data']);
        $this->assertEquals(2,$response['total']);
    }
    .
    .
再次运行测试:
注:为了功能的推进,我们对
index()方法只是暂时定义,后面还需要进行修改。
现在我们继续修改Replies.vue组件:
forum\resources\assets\js\components\Replies.vue
        .
        .
        methods: {
            fetch() {
              axios.get(this.url())
                  .then(this.refresh);
            },

            url() {
              return `${location.pathname}/replies`;
            },

            refresh(response) {
                console.log(response);
            },
            .
.我们先来看一下response的内容: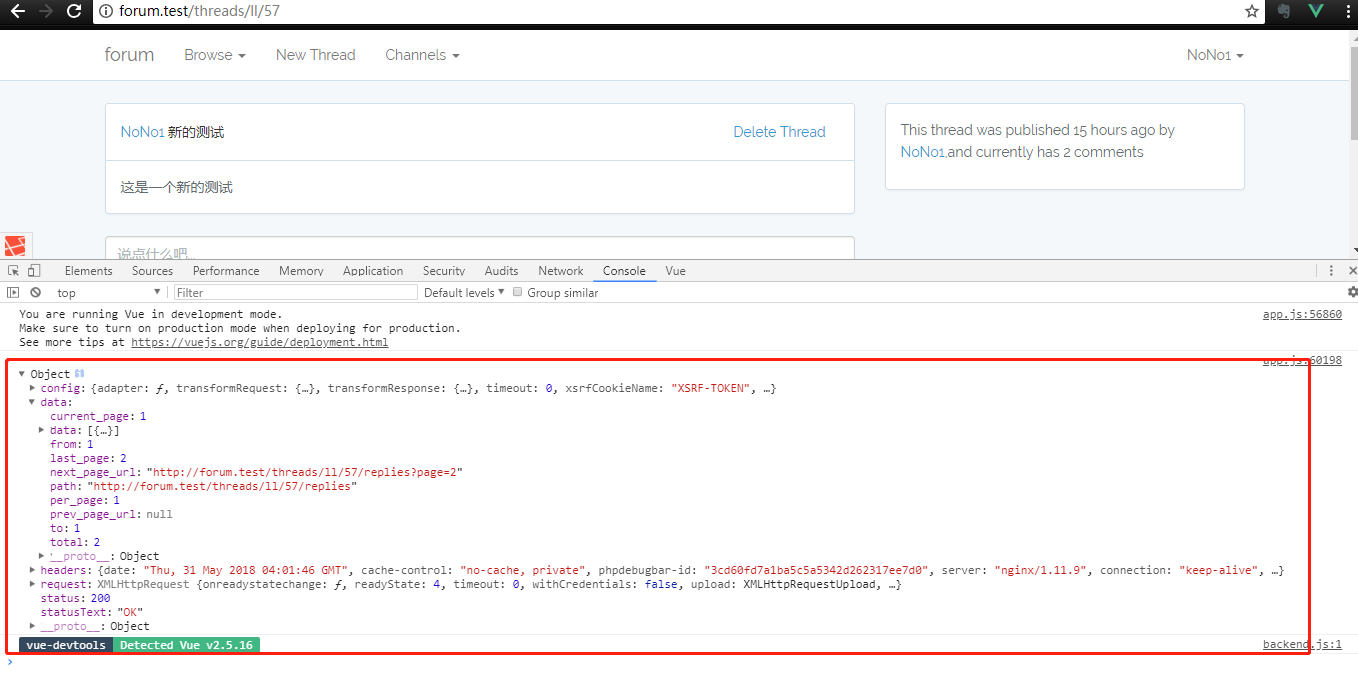
接着继续完善组件:
forum\resources\assets\js\components\Replies.vue
.
.
<script>
    import Reply from './Reply';
    import NewReply from './NewReply';

    export default {
        components: { Reply,NewReply },

        data() {
            return {
                dataSet:false,
                items:[],
                endpoint: location.pathname+'/replies'
            }
        },

        created() {
          this.fetch();
        },

        methods: {
            fetch() {
              axios.get(this.url())
                  .then(this.refresh);
            },

            url() {
              return `${location.pathname}/replies`;
            },

            refresh({data}) {
                this.dataSet = data;
                this.items = data.data;
            },
            .
            .
        }
    }
</script>
再次刷新页面: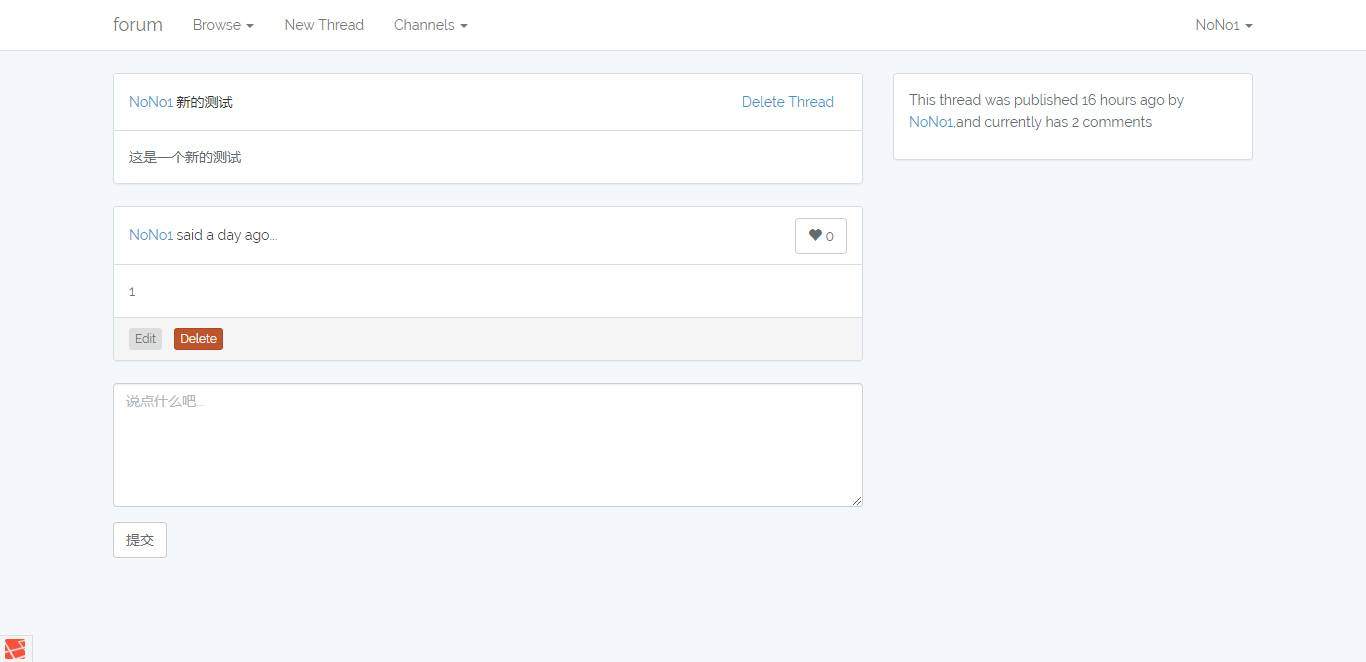
现在我们已经可以看到回复区域,现在我们可以修改ThreadsController.php:
forum\app\Http\Controllers\ThreadsController.php
    .
    .
    public function show($channel,Thread $thread)
    {
        return view('threads.show',compact('thread'));
    }
    .
.按照正常逻辑,下一步我们应该加上分页链接。但是在此之前,我们先来做一些重构:我们将组件的add和remove方法抽取出去。类似于 Trait,我们将add和remove方法放在Collection.js文件中:
forum\resources\assets\js\mixins\Collection.js
export default {
    data() {
        return {
            items: []
        };
    },

    methods: {
        add(item){
            this.items.push(item);

            this.$emit('added');
        },

        remove(index) {
            this.items.splice(index,1);

            this.$emit('removed');

            flash('Reply has been deleted!');
        }
    }
}
然后我们在组件中引入:
forum\resources\assets\js\components\Replies.vue
<template>
    <div>
        <div v-for="(reply ,index) in items" :key="reply.id">
            <reply :data="reply" @deleted="remove(index)"></reply>
        </div>

        <new-reply :endpoint="endpoint" @created="add"></new-reply>
    </div>
</template>

<script>
    import Reply from './Reply';
    import NewReply from './NewReply';
    import collection from '../mixins/Collection';

    export default {
        components: { Reply,NewReply },

        mixins: [collection],

        data() {
            return {
                dataSet:false,
                endpoint: location.pathname+'/replies'
            }
        },

        created() {
          this.fetch();
        },

        methods: {
            fetch() {
              axios.get(this.url())
                  .then(this.refresh);
            },

            url() {
              return `${location.pathname}/replies`;
            },

            refresh({data}) {
                this.dataSet = data;
                this.items = data.data;
            }
        }
    }
</script>
我们来测试一下之前的功能:
让我们继续完成分页功能。我们把分页部分定义成一个可复用的组件,因为在话题显示页面我们也会用到这个组件:
forum\resources\assets\js\components\Paginator.vue
<template>
    <ul class="pagination" v-if="shouldPaginate">
        <li v-show="prevUrl">
            <a href="#" aria-label="Previous" rel="prev" @click.prevent="page--">
                <span aria-hidden="true">« Previous</span>
            </a>
        </li>

        <li v-show="nextUrl">
            <a href="#" aria-label="Next" rel="next" @click.prevent="page++">
                <span aria-hidden="true">Next »</span>
            </a>
        </li>
    </ul>
</template>

<script>
    export default {
        props: ['dataSet'],

        data() {
            return {
                page:1,
                prevUrl:'',
                nextUrl:''
            }
        },

        watch: {
          dataSet() {
              this.page = this.dataSet.current_page;
              this.prevUrl = this.dataSet.prev_page_url;
              this.nextUrl = this.dataSet.next_page_url;
          },

          page() {
              this.broadcast().updateUrl();
          }
        },

        computed: {
            shouldPaginate() {
                return !! this.prevUrl || !! this.nextUrl;
            }
        },

        methods: {
            broadcast() {
                return this.$emit('changed',this.page);
            },

            updateUrl() {
                history.pushState(null,null,'?page=' + this.page);
            }
        }
    }
</script>在我们的组件中,当shouldPaginate为true时才会显示分页区域。我们给 Previous 按钮赋值为prevUrl,同时绑定了click事件,当该事件触发时,page变量的值减 1;给 Next 按钮赋值nextUrl,同时绑定了click事件,当该事件触发时,page变量的值加 1。
我们利用 侦听器(watch) 来监控dataSet属性,一旦属性值发生变化,我们会给page、prevUrl和nextUrl重新赋值,然后会触发page函数。在该函数中,我们依次执行broadcast和updateUrl:在broadcast中,我们绑定changed事件,以便让父组件监听到,然后进行翻页相关的动作;在updateUrl中,我们将page参数发送给父组件。
接着我们注册该组件:
forum\resources\assets\js\app.js
.
.
Vue.component('flash', require('./components/Flash.vue'));
Vue.component('paginator', require('./components/Paginator.vue'));

Vue.component('thread-view', require('./pages/Thread.vue'));
.
.接下来我们需要修改父组件,即Replies.vue组件:
forum\resources\assets\js\components\Replies.vue
<template>
    <div>
        <div v-for="(reply ,index) in items" :key="reply.id">
            <reply :data="reply" @deleted="remove(index)"></reply>
        </div>

        <paginator :dataSet="dataSet" @changed="fetch"></paginator>

        <new-reply @created="add"></new-reply>
    </div>
</template>

<script>
    import Reply from './Reply';
    import NewReply from './NewReply';
    import collection from '../mixins/Collection';

    export default {
        components: { Reply,NewReply },

        mixins: [collection],

        data() {
            return { dataSet:false }
        },

        created() {
          this.fetch();
        },

        methods: {
            fetch(page) {
              axios.get(this.url(page)).then(this.refresh);
            },

            url(page) {
                if (! page) {
                    let query = location.search.match(/page=(\d+)/);

                    page = query ? query[1] : 1;
                }

                return `${location.pathname}/replies?page=${page}`;
            },

            refresh({data}) {
                this.dataSet = data;
                this.items = data.data;
            }
        }
    }
</script>我们取消了为NewReply.vue绑定endpoint属性,所以我们要进行相应修改:\resources\assets\js\components\NewReply.vue
.
.
<script>
    export default {
        data() {
            return {
                body:'',
            };
        },

        computed: {
            signIn() {
                return window.App.signIn;
            }
        },

        methods: {
            addReply() {
                axios.post(location.pathname + '/replies',{ body:this.body })
                    .then(({data}) => {
                        this.body = '';

                        flash('回复已提交!');

                        this.$emit('created',data);
                    });
            }
        }
    }
</script>在Replies.vue组件中,我们为Paginator.vue组件绑定了dataSet属性,并且监听changed事件:
<paginator :dataSet="dataSet" @changed="fetch"></paginator>一旦监听到changed事件,就会触发fetch方法。在fetch方法中,我们根据page参数来获取需要的内容并刷新回复区域。
注意:我们没有给
fetch方法传入page参数,所以page会通过以下代码获取:if (! page) { let query = location.search.match(/page=(\d+)/); page = query ? query[1] : 1; }而我们在
Paginator.vue组件中的updateUrl方法已经更新了正确的page值,所以我们通过以上代码获取到的page值就是我们想要的值。所以url方法会返回正确的url。
目前我们的代码编写告一段落,接下来让我们测试一下成果:
分页功能已经实现,现在可以把回复数设置为 20:
forum\app\Http\Controllers\RepliesController.php
.
.
class RepliesController extends Controller
{
    public function __construct()
    {
        $this->middleware('auth',['except' => 'index']);
    }

    public function index($channelId,Thread $thread)
    {
        return $thread->replies()->paginate(20);
    }
    .
    .
最后,运行一下全部测试: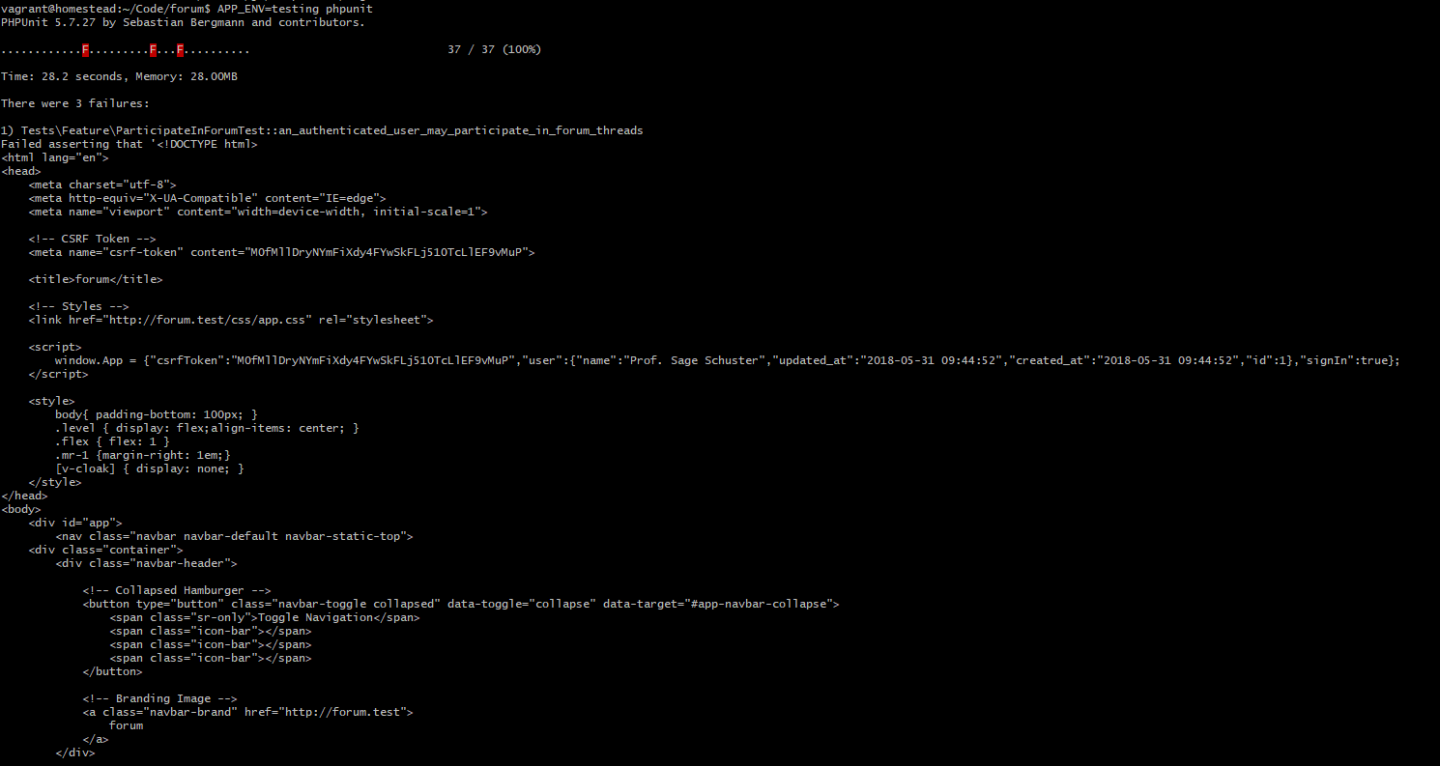
可以看到我们有几个测试失败了,这是因为我们改变了获取回复的方式,我们将在以后的章节中进行修复。


 关于 LearnKu


推荐文章: